Quick Answer
A complete crawl space inspection covers ten areas: exterior grading, moisture and standing water, mold, structural integrity, vapor barrier, ventilation, insulation, pests, mechanical systems, and air quality — a visual walk-through most homeowners can finish in 1 to 2 hours with basic PPE. Moisture is the root cause of nearly every problem; wood readings above 19% signal active decay risk.
Key takeaways
- A complete crawl space inspection covers ten areas: exterior grading, moisture, mold, structural integrity, vapor barrier, ventilation, insulation, pests, mechanical systems, and air quality. Most homeowners can finish a visual walk-through in 1 to 2 hours with basic PPE.
- Moisture is the root cause of nearly every crawl space problem — mold, rot, structural failure, and pest infestation all trace back to water. Moisture-meter readings above 19% in wood framing indicate active decay risk; above 28% means decay is likely already underway.
- Research shows up to 50% of the air you breathe on the first floor originates in the crawl space via the stack effect. A crawl space at 75% relative humidity is an indoor air quality problem, not just a structural one.
- In Florida, North Carolina, and South Carolina, inspect every six months — not just annually — and always after a hurricane, flood, or major rain event. Vented crawl spaces in the humid Southeast routinely exceed 80% relative humidity through spring and summer.
- Some findings require immediate professional response: standing water, visible mold, termite mud tubes, rotten structural wood, sewage odors, or electrical damage. Disturbing mold without proper containment actively spreads spores and makes the problem worse.
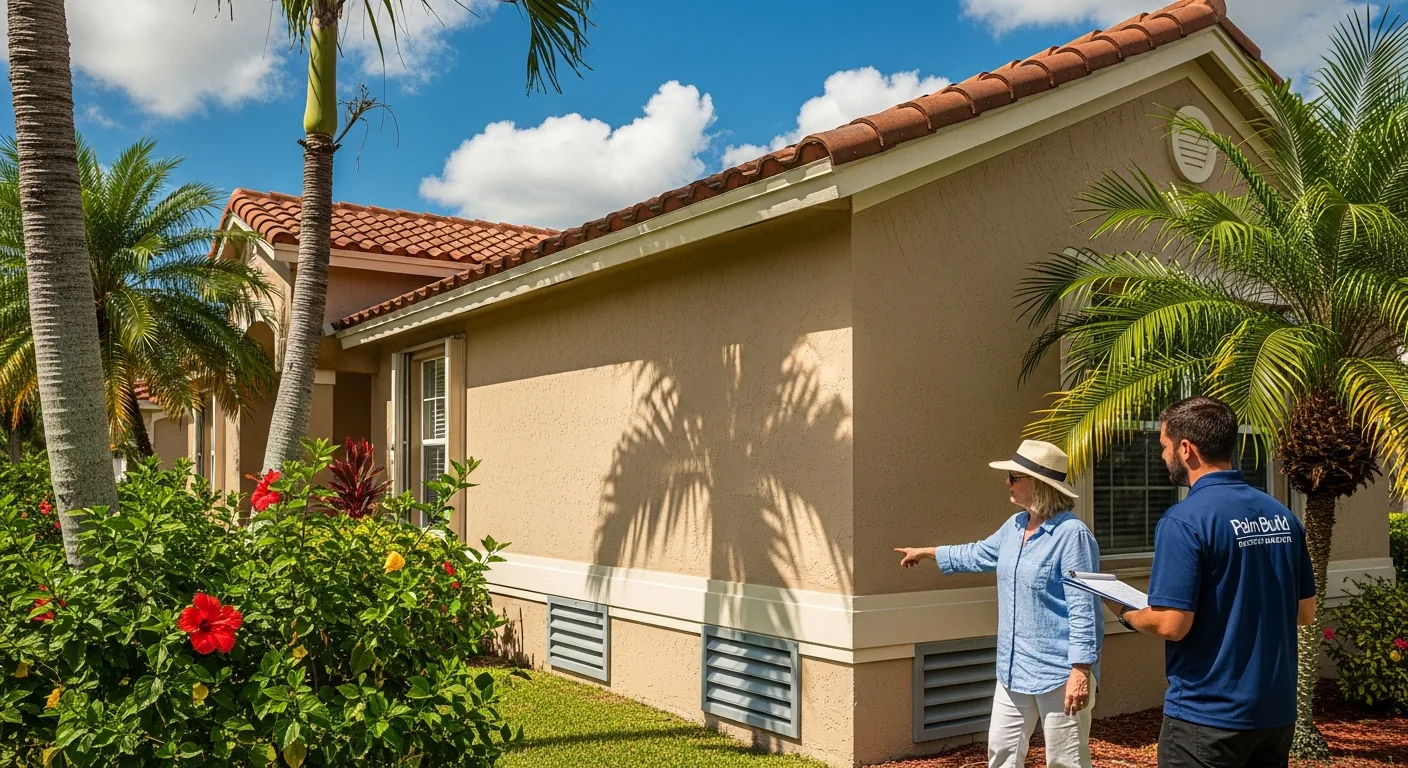
Your crawl space inspection checklist should cover ten areas: moisture and standing water, mold or fungal growth, structural integrity (joists, beams, foundation walls), vapor barrier condition, ventilation, insulation, pest activity, plumbing leaks, electrical and HVAC systems, and exterior grading. Most homeowners can complete a visual inspection in one to two hours using basic PPE and a flashlight. What you find determines whether you handle it yourself, schedule a maintenance fix, or call a restoration professional immediately. If any finding in this guide stops you cold, our crawl space cleanup and encapsulation services cover assessment, moisture control, mold remediation, and structural repair across Florida, North Carolina, and South Carolina.
First-floor air from crawl space
Up to 50%
Stack effect pulls moisture, spores, and odors upward
National avg. repair cost
$6,000
Early detection keeps most homeowners below this
Vented SE crawl space RH
80%+
Routine through spring and summer in FL/NC/SC
Inspection time (DIY)
1–2 hrs
With PPE, flashlight, moisture meter, and checklist
Why Your Crawl Space Matters More Than You Think
Out of sight rarely means out of danger. Building-science research consistently shows that up to 50% of the air you breathe on the first floor of your home can originate directly from the crawl space, a process engineers call the **stack effect**. As warm air rises and escapes through upper floors, it pulls replacement air upward from the lowest part of the structure — your crawl space — carrying with it whatever moisture, mold spores, pest debris, or soil gases are present below.
The practical implication is significant. A crawl space that smells musty, harbors mold, or retains moisture is not just a foundation problem — it is an indoor air quality problem affecting every room above it. Crawl spaces are also structurally critical. The joists, beams, sill plates, and foundation walls accessible through this space carry the full weight of your living area, and their condition is rarely visible from upstairs until the damage is advanced.
Routine inspections catch problems early, when repairs are still minor. The national average crawl space repair runs roughly $6,000, but that number assumes a moderate-scope job. Catching wood rot before it spreads, finding a plumbing drip before it feeds a mold colony, or spotting termite mud tubes in their early stage routinely saves homeowners thousands. The point of this checklist is simple: make the walk-through a calendar habit, not a crisis response.
Before You Enter: Safety Gear and Tools
Crawl spaces present real physical hazards: mold spores, pest droppings, sharp fasteners, live electrical wiring, confined-space risks, and in Southeast states, heat stress and high humidity. Never enter without proper personal protective equipment.
Required PPE
- NIOSH-approved N95 respirator at minimum — a P100 half-face respirator if mold is suspected
- Disposable Tyvek coverall suit with elastic cuffs (buy two, plan to discard after use)
- Heavy-duty nitrile or rubber gloves extending to mid-forearm
- Sealed safety goggles (not open-vent — spores can still enter)
- Knee pads
- Hard hat or bump cap
- Work boots with ankle support
- LED headlamp — both hands free for the inspection
Inspection tools
- Pin-type wood moisture meter (the single most important diagnostic tool)
- Flashlight or work light (supplemental, beyond the headlamp)
- Smartphone or camera for documentation
- Stainless steel probe or awl to test wood hardness
- Notepad or digital form for findings
- Radon test kit (available at hardware stores for $15–$30)
- Tape measure
The Complete Crawl Space Inspection Checklist
Step 1 — Start outside: exterior inspection
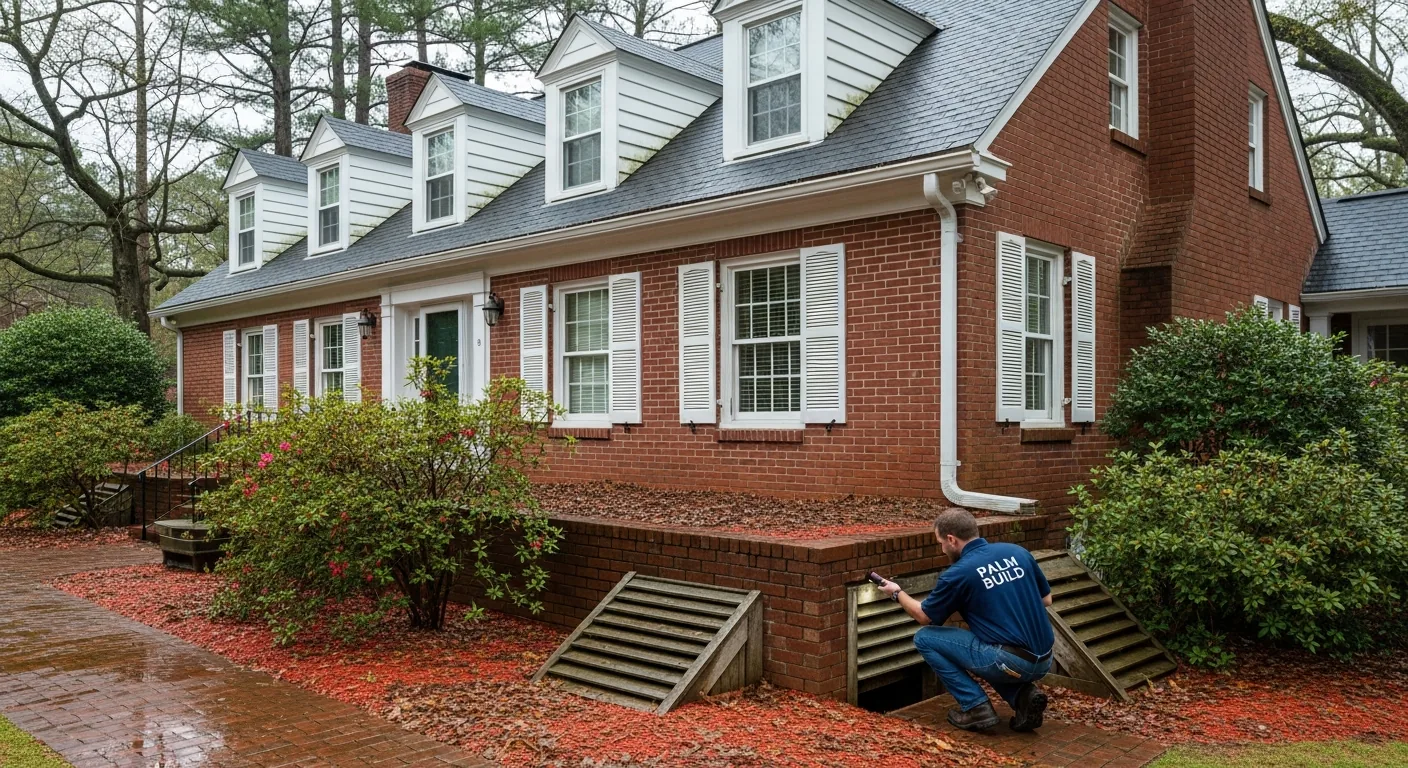
Before descending into the crawl space, walk the perimeter of your home. Many interior problems originate from exterior conditions — negative grading, blocked vents, or a downspout dumping water inches from the foundation. Catching these from the outside is easier than tracing the moisture backward once it has already entered.
- Ground slopes **away** from the foundation — negative grading allows water pooling at the structure
- Gutters and downspouts are clear and discharge at least 6 feet from the foundation
- No vegetation or mulch piled against the foundation walls (both retain moisture)
- No cracks, gaps, or holes visible in foundation walls from outside
- Foundation vents visible and screened — not blocked by soil, mulch, or debris
- *(FL flood zone homes only)* FEMA-compliant flood vents present on at least two different exterior walls
- No pooling water near the foundation after recent rain
Step 2 — Moisture and water intrusion
Moisture is the root cause of nearly every significant crawl space problem. Mold, rot, structural failure, and pest infestation all trace back to water. This is your most important inspection category, and it is where your moisture meter earns its keep.
- No standing or pooling water anywhere in the crawl space
- No water stains or tide marks on foundation walls or soil
- No condensation on pipes, ducts, insulation, or framing
- No efflorescence — the white, chalky mineral deposit that proves repeated wetting and drying on concrete or block walls
- Soil feels dry underfoot, not damp or muddy
- No dark staining on wood framing from past water events
Moisture meter readings — the single most important diagnostic
Use your pin-type moisture meter on the sill plate, rim joists, and at least three floor joists across the span. A reading of 15% or below is normal. Above 19%, wood is entering the zone where mold and decay organisms establish. Above 28%, active decay is almost certainly already occurring — you are reading the wood as it rots.
| Reading | Status | What it means |
|---|---|---|
| ≤ 15% | Normal | Dry, stable wood. No action required. |
| 16–18% | Elevated | Monitor. Common after recent rain; should drop within a week. |
| 19–27% | At risk | Mold and decay organisms can establish. Investigate source. |
| ≥ 28% | Active decay likely | Wood is rotting. Call a professional for structural assessment. |
Wood moisture content — what the readings mean
Step 3 — Mold and fungal growth
No amount of mold is acceptable in a crawl space. Even small colonies release spores that are drawn upward through the stack effect into living areas, degrading air quality and triggering respiratory issues in sensitive occupants. Mold is not a cosmetic problem; it is a biological contaminant in continuous aerosol contact with the rooms where you sleep.
- No discoloration on framing — black, green, gray, white, or brown spots
- No fuzzy or slimy surface growth on joists, subfloor, or insulation
- No musty or earthy odor detectable even through your respirator
- No dark streaking on wood, particularly at the rim joist and sill plate
- No visible mold on paper-backed insulation (a classic colonization site)
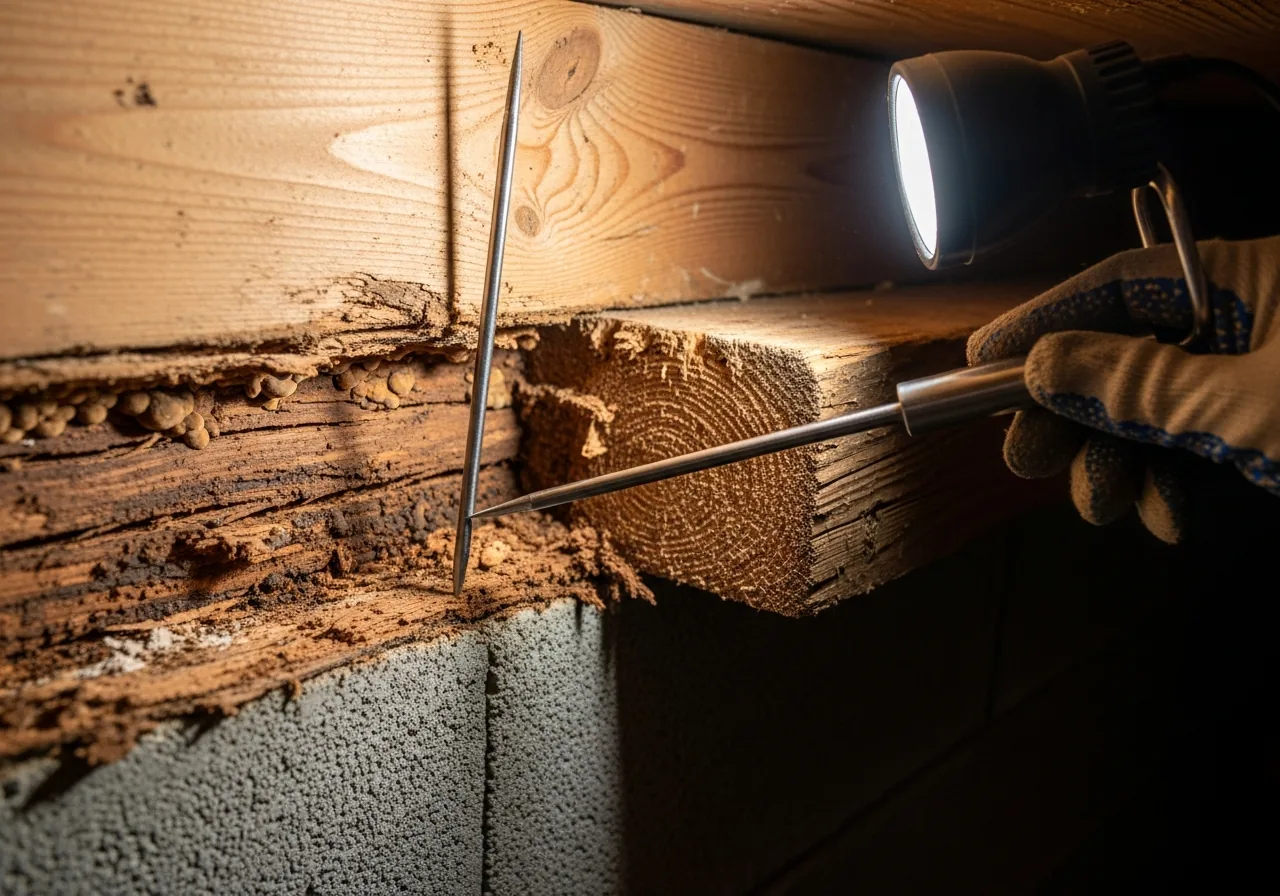
Step 4 — Structural integrity
The crawl space provides direct access to load-bearing elements that support your entire first floor. Problems here compound quickly — a joist end that is 30% rotten is not 30% as strong, it is closer to 0%. Probe with your awl at every bearing point.
- Foundation walls: no horizontal cracks (most serious), no stair-step cracks in block, no diagonal cracks from corners
- No bowing, buckling, or inward movement of foundation walls
- Floor joists: no sagging, warping, or soft spots — solid wood resists the awl, rot does not
- Beams and girders: no sagging at midspan or at bearing points
- Support posts and piers: no leaning, cracking, or settling
- Sill plate: not soft, spongy, crumbling, or visibly rotten
- Metal hardware (joist hangers, anchor bolts, strapping): no significant rust or corrosion
- Subfloor above: no bounce, sag, or soft areas visible from below
- No gaps between sill plate and foundation wall (settlement sign)
Above-grade clues that point to crawl space structural problems
- Floors that feel springy or uneven underfoot
- Doors or windows that stick, won't latch, or have visible gaps at frames
- Cracks in interior drywall, especially above doorframes
- Gaps developing between baseboards and the floor
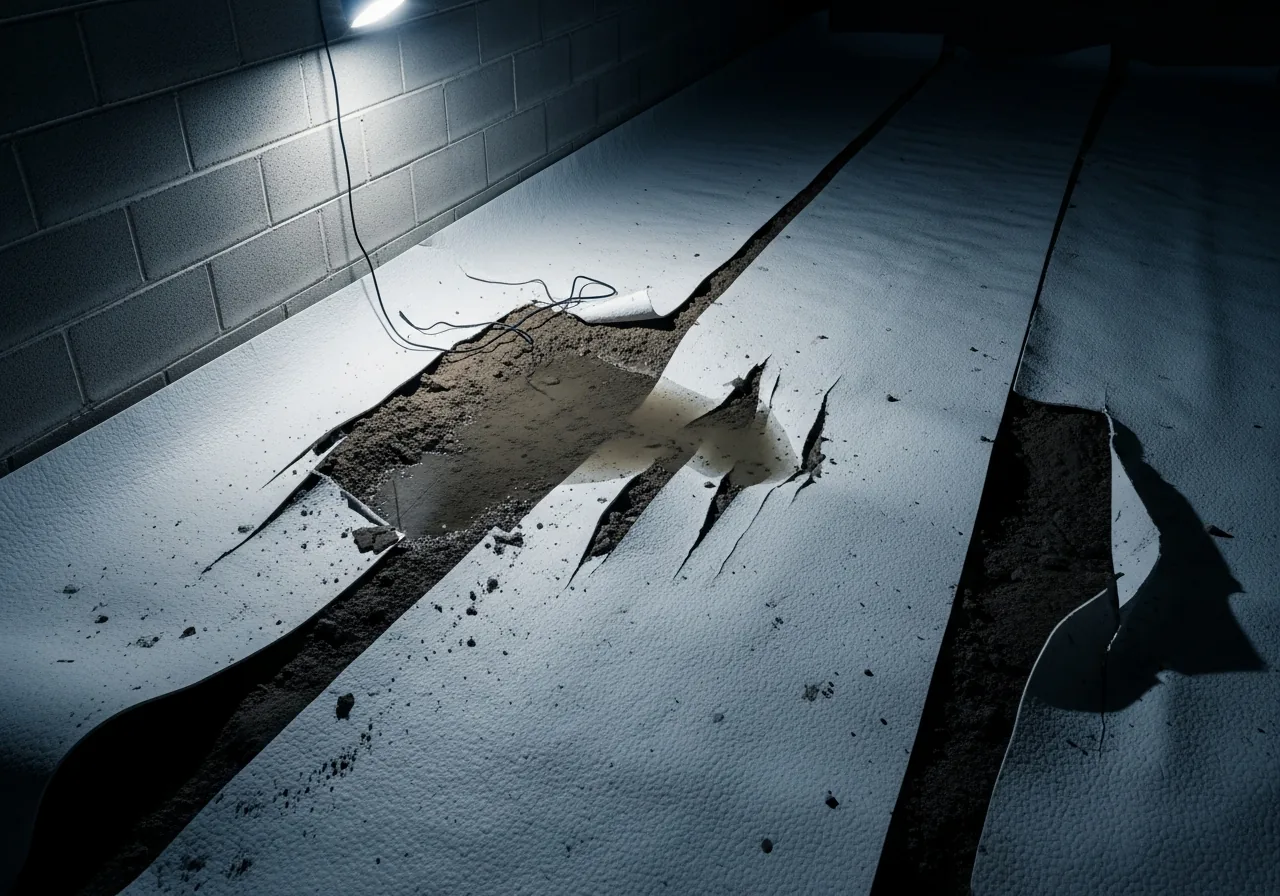
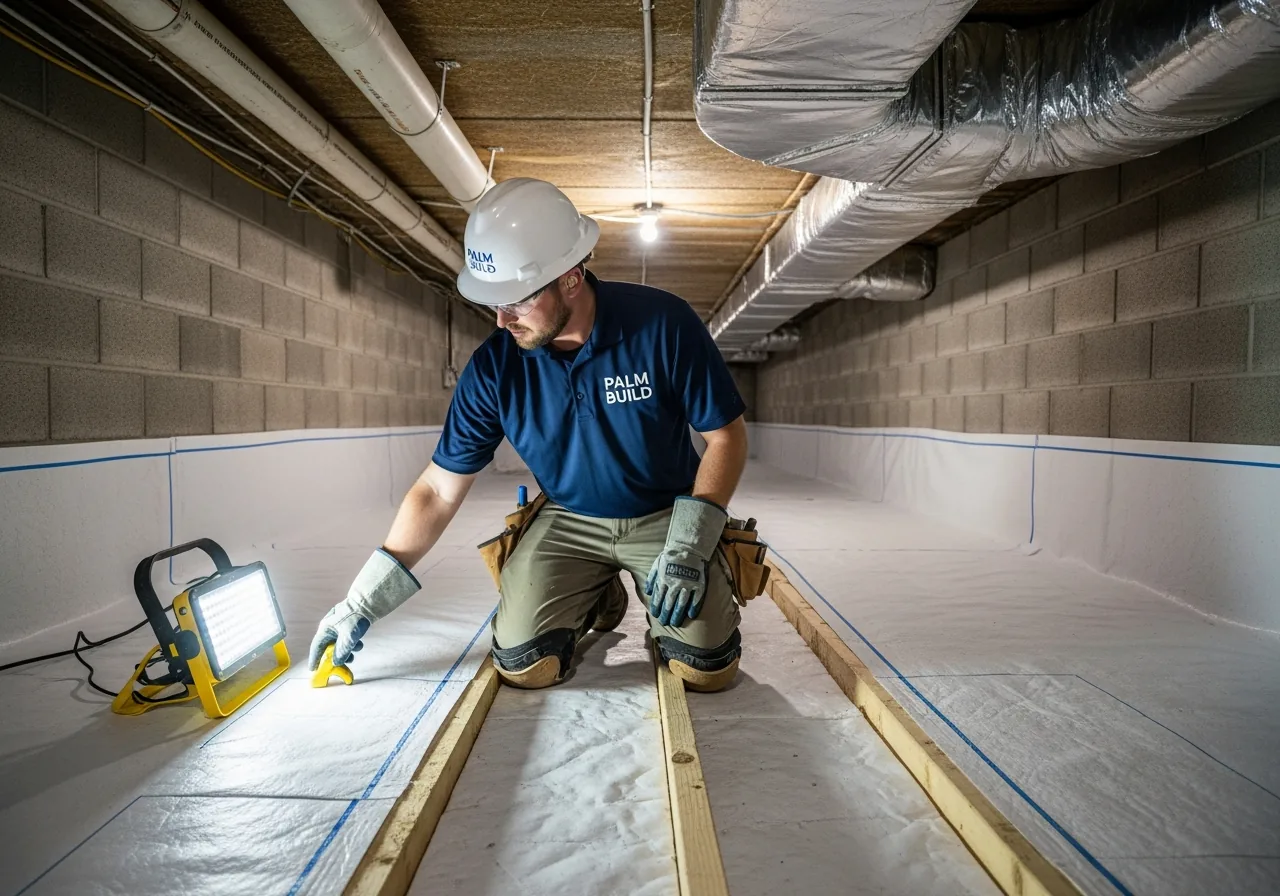
Step 5 — Vapor barrier condition
A vapor barrier (also called a ground cover or liner) is installed over the soil floor to block ground moisture from evaporating upward into the crawl space. Its condition is a strong indicator of overall moisture-control quality in the space, and a cheap fix compared to what happens when it fails.
- Vapor barrier present — bare soil is a significant risk, especially in FL, NC, and SC
- No visible tears, punctures, or holes
- Seams overlap at least 6 inches and are sealed or taped
- Barrier extends at least 6 inches up foundation walls and is mechanically attached
- No water pooling or condensation visible underneath or on top of the barrier
- No mold growing on or under the barrier
- Barrier covers 100% of soil — no exposed earth anywhere
Vapor barrier — passing inspection
- Covers 100% of the soil floor with no gaps
- 6 mil or thicker reinforced polyethylene (FL, NC, SC code minimums)
- Seams overlapped 6" and sealed with vapor-barrier tape
- Extended up foundation walls 6" and mechanically attached
- No tears, punctures, or water pooling on or under
Vapor barrier — call a pro
- Bare soil exposed anywhere in the space
- Thin poly sheet, torn or unsealed seams
- Pulling away from foundation walls
- Water pooled on top or visibly pooled under it
- Mold colonies on or under the barrier surface
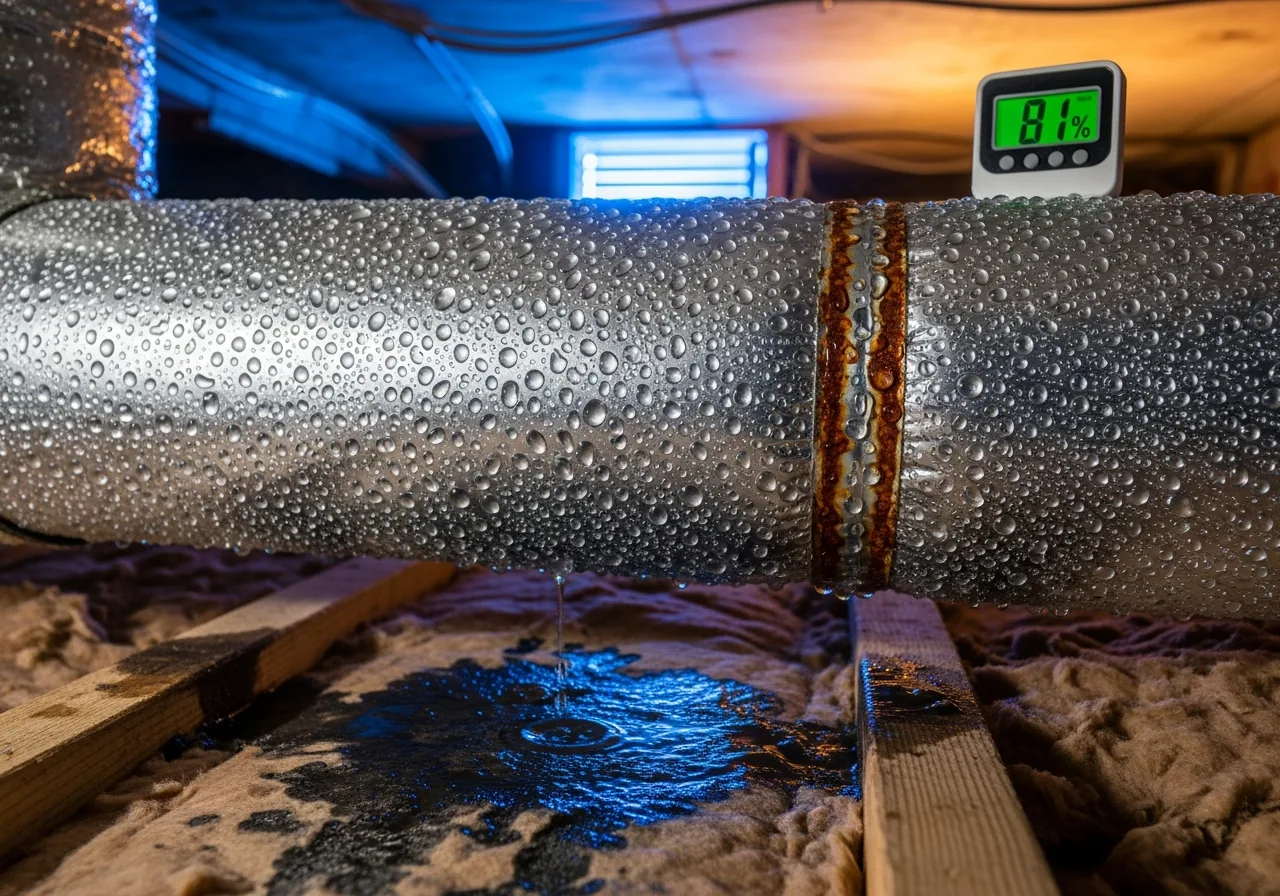
Step 6 — Ventilation and air quality
Ventilation strategy is one of the most misunderstood aspects of crawl space management. The vented approach works in dry climates and actively causes harm in Florida, North Carolina, and South Carolina. Outdoor air entering vents in the humid Southeast is almost always warmer and more humid than the crawl space air — so bringing it in accelerates condensation rather than preventing it.
- Vents are present, screened, and not blocked by debris, insulation, or pest nests
- Proper vent count — IRC Section R408 requires 1 sq ft of net-free vent area per 150 sq ft of crawl space area
- No condensation on cool surfaces (ductwork, pipes) — condensation indicates humidity above dewpoint
- Air is moving — no dead zones with stagnant, heavy air
- *(Encapsulated spaces)* Dehumidifier is present, plugged in, operational, and draining properly
- *(FL flood zone properties)* Flood vents on at least 2 walls; 1 sq inch of opening per sq ft of enclosed area
Step 7 — Insulation condition
Crawl space insulation serves two purposes: regulating floor temperature and contributing to the thermal boundary of the home. Moisture destroys it. Sagging, wet, or missing insulation is not just an energy problem — it is a direct indicator that the moisture control in the space has already failed.
- Insulation batts are present and properly installed (friction-fit between joists, vapor face toward conditioned space)
- No sagging, falling, or missing sections
- No wet, compressed, or discolored batts — dark staining or compression indicates moisture absorption
- Paper facing on batts is intact (mold commonly colonizes damaged paper backing)
- No nesting material — rodents shred and relocate insulation for nests
- Duct insulation (where applicable) is intact with no tears or gaps
Step 8 — Pest activity
Subterranean termites alone cause more than $5 billion in property damage annually in the U.S., affecting roughly 600,000 homes per year. Crawl spaces are their primary entry point into the structure. In Florida, North Carolina, and South Carolina, subterranean termite pressure is among the highest in the country — Formosan subterranean termites are established across the Southeast and destroy wood faster than native species.
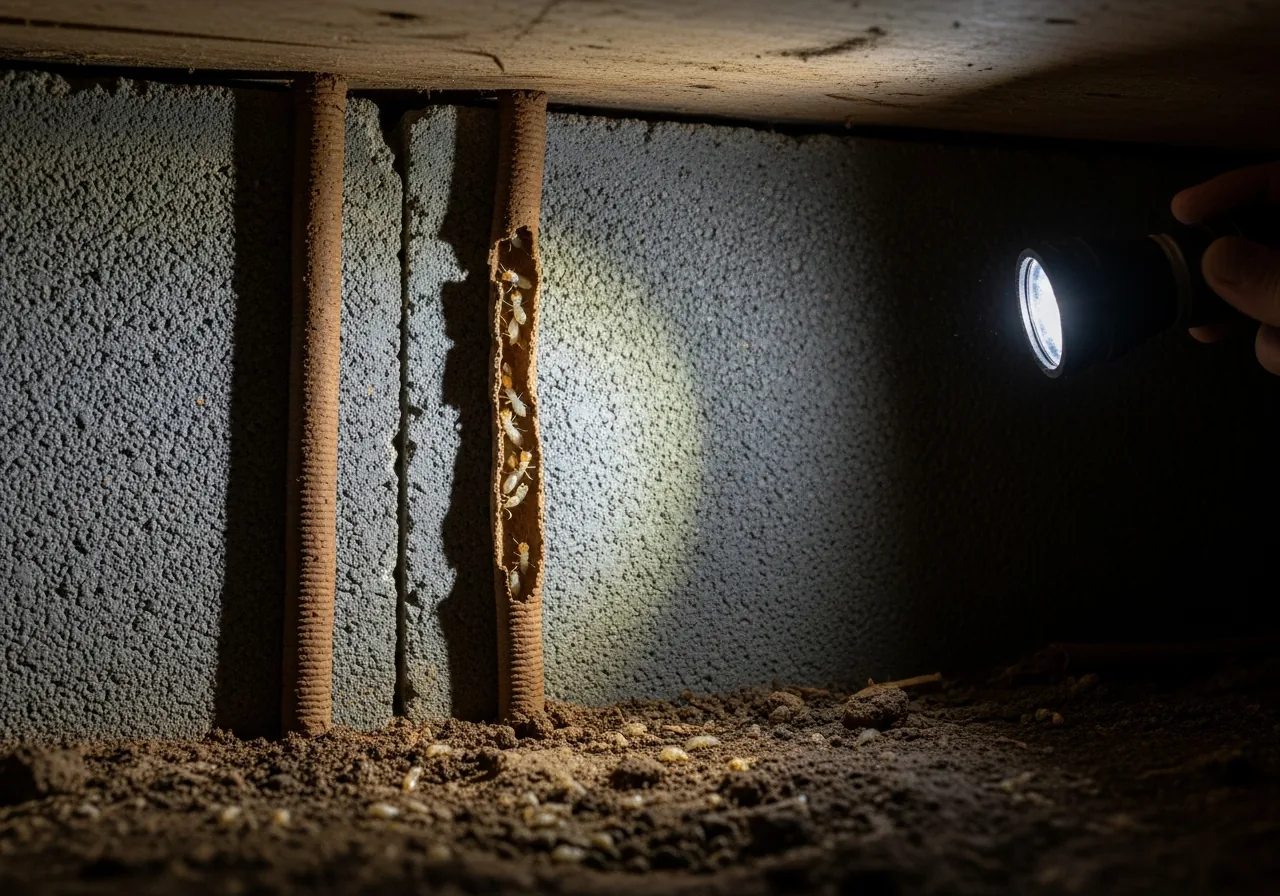
- No **termite mud tubes** — thin pencil-diameter brown earthen tubes running vertically up foundation walls, piers, or framing
- No hollow-sounding wood when tapped — termite galleries hollow wood from inside while leaving the surface intact
- No small piles of discarded termite wings near entry points
- No rodent droppings (dark, cylindrical pellets near walls or under pipes)
- No rodent nests made of shredded insulation or paper
- No gnaw marks on wood, pipe insulation, or electrical wiring
- No concentration of spiders and spider webs (indicator of insect prey activity)
- No gaps or holes in the foundation that could allow entry
- Access door or hatch seals properly — gaps turn it into a pest highway
Step 9 — Plumbing, electrical, and HVAC
The crawl space often houses a home's most failure-prone systems. Plumbing leaks in particular are a primary source of the moisture problems documented in earlier steps — a slow drip of a few gallons per week can feed a mold colony indefinitely without ever triggering a visible water bill spike.
Plumbing
- No active drips or wet spots below pipes
- No corrosion, greenish buildup, or pitting on copper pipes
- Pipe insulation intact — prevents condensation and freeze damage
- Drain lines properly supported with no sagging sections that allow standing water
Electrical
- No exposed or frayed wiring
- All junction boxes covered and accessible
- Wiring properly supported and not resting on insulation or pipes
- No DIY splicing, taped connections, or suitcase cords
HVAC and ductwork
- No disconnected duct sections — conditioned air escaping into the crawl space wastes energy and raises humidity
- Duct insulation intact and not wet or sagging
- No condensation on supply ducts (particularly in FL and SC summers)
- Air handler or furnace (if located in crawl space): no rust, standing water nearby, or evidence of leaks
Crawl Space Repair Cost Guide
Use the table below to estimate costs for issues commonly discovered during inspection. All figures reflect 2025–2026 national averages; FL, NC, and SC markets may vary by 10–20% depending on access, travel, and labor market conditions.
| Issue found during inspection | Typical repair cost | Notes |
|---|---|---|
| Professional inspection | $150 – $500 | Often free from reputable restoration contractors |
| Vapor barrier installation | $500 – $1,500 | Code-required in FL, NC, SC |
| Full crawl space encapsulation | $3,500 – $15,000 | ~$5,500 average for 1,200 sq ft |
| Dehumidifier installation | $1,500 – $3,000 | Required in sealed NC crawl spaces by code |
| Mold remediation | $500 – $4,000 | Must precede encapsulation |
| Insulation removal and replacement | $1,000 – $4,000 | Common after moisture damage |
| Floor joist / beam repair | $1,500 – $5,000 | Range depends on extent |
| Sill beam replacement (rot) | $7,000 – $30,000 | Expands quickly if rot has spread |
| Sump pump installation | $1,200 – $2,500 | For drainage management |
| Termite treatment + structural repair | $1,000 – $10,000+ | Treatment plus wood replacement |
| Foundation crack repair | $200 – $5,000+ | Varies significantly by crack type |
| Full crawl space repair (average scope) | $4,500 – $8,000 | National average near $6,000 |
Typical repair costs for issues found during a DIY crawl space inspection
State-Specific Guidance: FL, NC, and SC
Florida — the most aggressive moisture environment in the continental U.S.
Florida's subtropical climate creates the most persistent crawl space moisture pressure in the continental United States. The state ranks second only to Louisiana in mold-in-homes likelihood, and an estimated 264,000 mold-related insurance claims were filed in Florida in 2022 alone — more than 20% of all home insurance claims that year. Average relative humidity runs 74–76% year-round, consistently exceeding the 60% threshold at which mold begins to establish colonies.
- Mold species most common in FL crawl spaces include *Aspergillus*, *Penicillium*, *Stachybotrys* (black mold), and *Chaetomium* — all thrive in conditions your unprotected crawl space provides year-round
- If your home is in a FEMA Special Flood Hazard Area, verify flood vents are installed on at least two walls, with 1 sq inch of net-free area per sq ft of enclosed crawl space
- Standard vented crawl space designs are especially poorly suited to Florida — outdoor air entering vents is almost always warmer and more humid than crawl space air, accelerating condensation
- Vapor barrier material must meet Florida's 1.0 perm maximum code requirement; premium applications should use 0.1 perm barriers
North Carolina — Piedmont clay and code-driven moisture control
North Carolina crawl spaces face a compounding challenge: humid subtropical climate with outdoor dew points regularly exceeding 65°F from April through October, combined with Piedmont clay soils that drain slowly and remain saturated for days or weeks after rainfall. The result is that vented crawl spaces in NC typically exceed 80% relative humidity for most of spring and summer — well above the mold-growth threshold.
- Advanced Energy research found that sealed crawl spaces maintained relative humidity below 65%, while vented spaces in the same study routinely exceeded 80% — if your NC crawl space is vented, encapsulation should be a priority after any moisture finding
- NC building code requires active moisture control (dehumidifier, conditioned supply air, or exhaust fan) in sealed crawl spaces
- Minimum 6 mil vapor barrier by NC code
- Charlotte is designated EPA Radon Zone 3 (predicted average below 2.0 pCi/L) — include a radon test with your inspection
- Clay soil at or near the foundation is a persistent moisture source independent of weather events — probe your sill plate carefully even after a dry period
South Carolina — year-round humidity pressure
South Carolina's crawl spaces face humidity challenges that span all four seasons. Spring brings heavy rainfall that raises groundwater levels beneath unprotected crawl spaces; summer delivers peak humidity with condensation forming on every cool surface; fall offers brief relief; and even mild SC winters can produce moisture events from indoor–outdoor temperature differentials.
- Up to 50% of the air in a South Carolina home can originate from the crawl space — what lives below moves upward
- Coastal SC properties (Charleston, Myrtle Beach, Hilton Head) may be in FEMA flood zones requiring flood vent compliance
- Condensation on ductwork is a hallmark SC summer problem — inspect duct insulation carefully in warm-weather inspections
- As with FL and NC, vented crawl space designs are largely counterproductive in SC's climate; findings of moisture or mold are frequently an encapsulation indication
- Coastal salt air accelerates corrosion of standard metal components — duct straps, joist hangers, and anchor bolts need closer inspection in coastal zip codes
When to Stop DIYing and Call a Professional
A homeowner visual inspection is valuable for catching early-stage issues and establishing a documentation baseline. But several findings require immediate professional response — not because the DIY step is difficult, but because improper handling makes outcomes worse.
Call immediately if you find
- Standing water or flood damage — requires professional extraction and drying to IICRC S500 standards
- Any visible mold — requires professional remediation per IICRC S520 protocols; disturbing mold without containment spreads spores
- Termite mud tubes — requires licensed pest exterminator and structural assessment
- Sagging, soft, or clearly rotten structural beams — load-bearing damage is not a DIY repair
- Sewage odors or visible waste — biohazard requiring professional cleanup
- Suspected radon — requires certified mitigation contractor
- Electrical wiring damage — licensed electrician
Call soon (within 1–2 weeks) if you find
- Moisture meter readings consistently above 19% in wood
- Vapor barrier torn or absent
- Insulation wet, sagging, or missing sections
- Pest activity evidence without active infestation signs
- Condensation forming on ducts or pipes
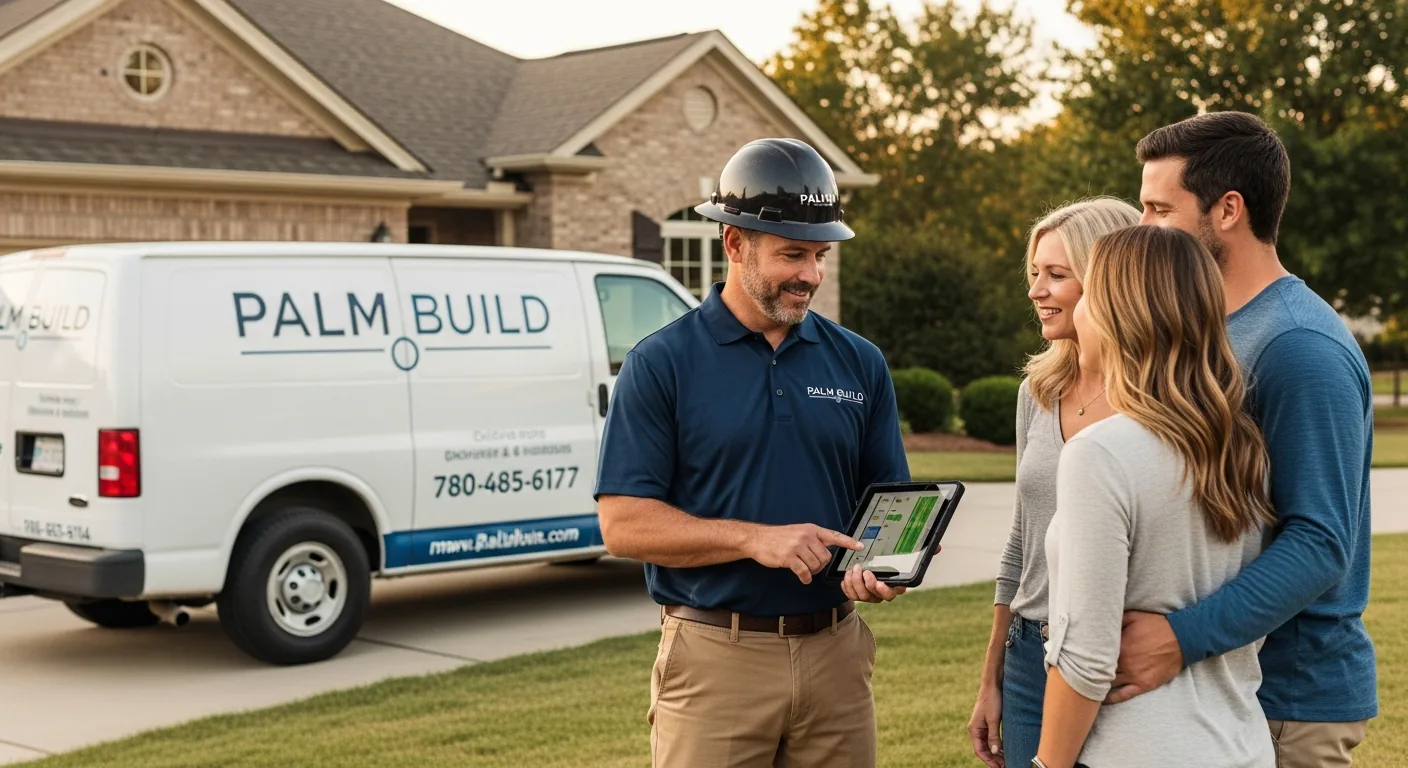
Palm Build's IICRC-certified teams serve homeowners and property managers across Florida, North Carolina, and South Carolina. We provide free crawl space assessments, work directly with insurance carriers on covered losses, and handle the full scope from moisture mitigation through structural repair and encapsulation — one team, no handoffs.
Crawl Space Cleanup & Moisture Control
Full-scope crawl space assessment, vapor barriers, encapsulation, dehumidifier installation, and mold remediation across FL, NC, and SC.
Signs of Crawl Space Problems
Eight visible warning signs that indicate moisture, mold, or structural issues worth a professional inspection.
Crawl Space Mold Removal
Causes, costs, and the IICRC remediation sequence for mold discovered during a DIY inspection.
Standing Water in Your Crawl Space
Emergency response, extraction, and documentation when the inspection finds pooled water.
Vapor Barrier vs. Crawl Space Encapsulation
Side-by-side comparison with decision rules, humidity thresholds, and state code specifications.
North Carolina Crawl Space Problems
NC-specific patterns, code requirements, seasonal humidity data, and the radon consideration unique to 77 of 100 NC counties.
Professional Mold Remediation
IICRC-certified mold inspection, containment, removal, and post-remediation verification.
Water Damage Restoration
24/7 emergency response for standing water, floods, and plumbing failures discovered during inspection.
Frequently Asked Questions
How do I inspect my own crawl space? +
What are the signs of a bad crawl space? +
How often should a crawl space be inspected? +
How much does a crawl space inspection cost? +
What is the most common problem found in crawl spaces? +
What does a professional look for in a crawl space inspection? +
When should I call a professional for crawl space issues? +
Does homeowners insurance cover crawl space damage? +
What is the stack effect and why does it matter for my crawl space? +
Found something concerning during your inspection?
Palm Build's IICRC-certified technicians provide free crawl space assessments, work directly with insurance carriers on covered losses, and handle the full scope from water extraction through mold remediation, encapsulation, and structural repair. We serve Florida, North Carolina, and South Carolina with 24/7 emergency response.
Found this helpful? Send it to someone who needs it.