Key takeaways
- Wind damage concentrates at roof corners, edges, ridges, and rakes — not the field. Start every inspection there with binoculars, not a ladder.
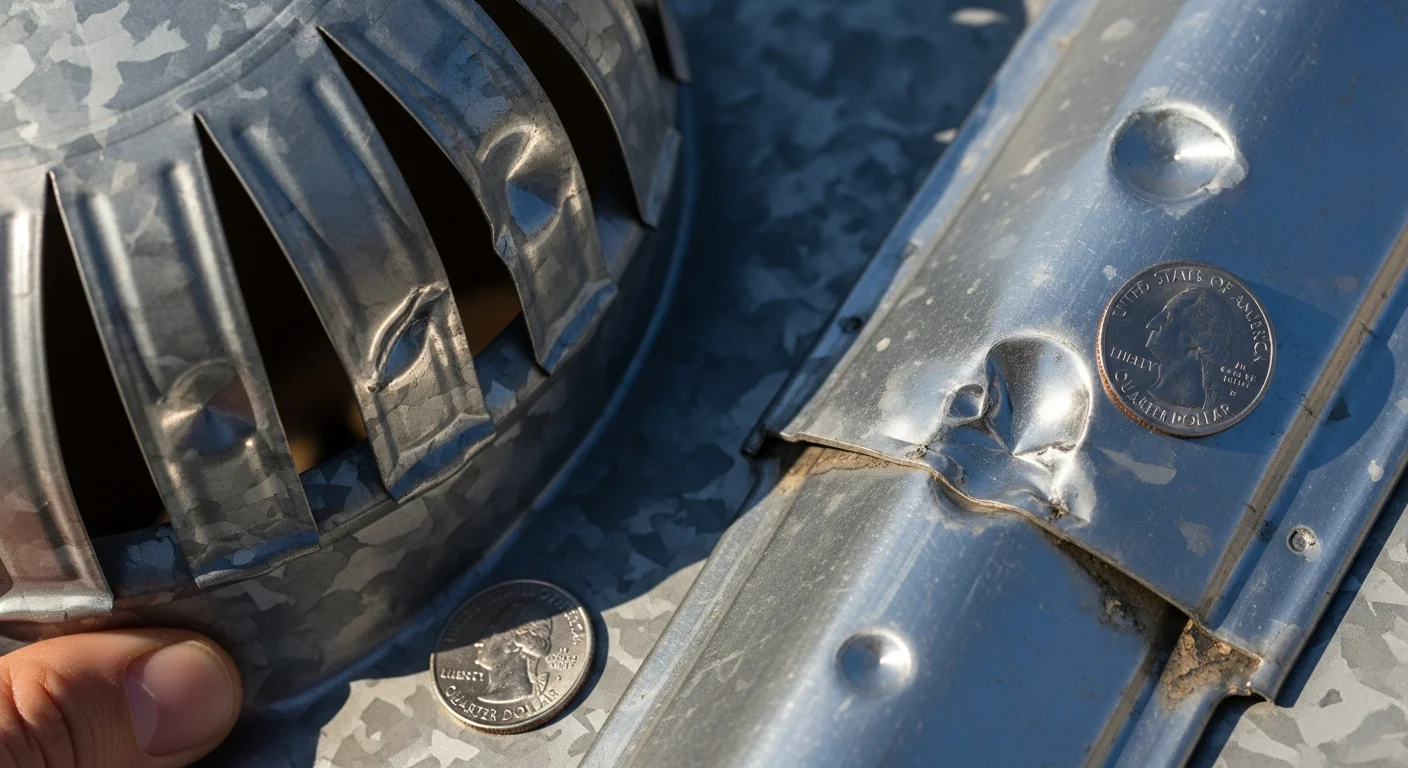
- Hail damage is scattered and often confused with normal aging. The pro tell is collateral dents on soft metals (vents, flashing, gutters) — those confirm storm severity even when shingle damage is subtle.
- NOAA's Storm Prediction Center logged 5,373 severe hail events in 2024, and the Southeast climate region has absorbed 220 billion-dollar weather disasters since 1980 — storm damage isn't an edge case, it's the regional baseline.
- Mold can begin growing on damp materials within 24 to 48 hours per EPA, CDC, and FEMA — daylight in the attic, exposed underlayment, or active drips are emergency thresholds, not next-week problems.
- Florida law gives you 1 year to file (Fla. Stat. § 627.70132). NC consumer guidance flags storm-chaser scams. SC requires insurers to furnish proof-of-loss forms within 20 days — three different rulebooks, one documentation discipline that satisfies all of them.
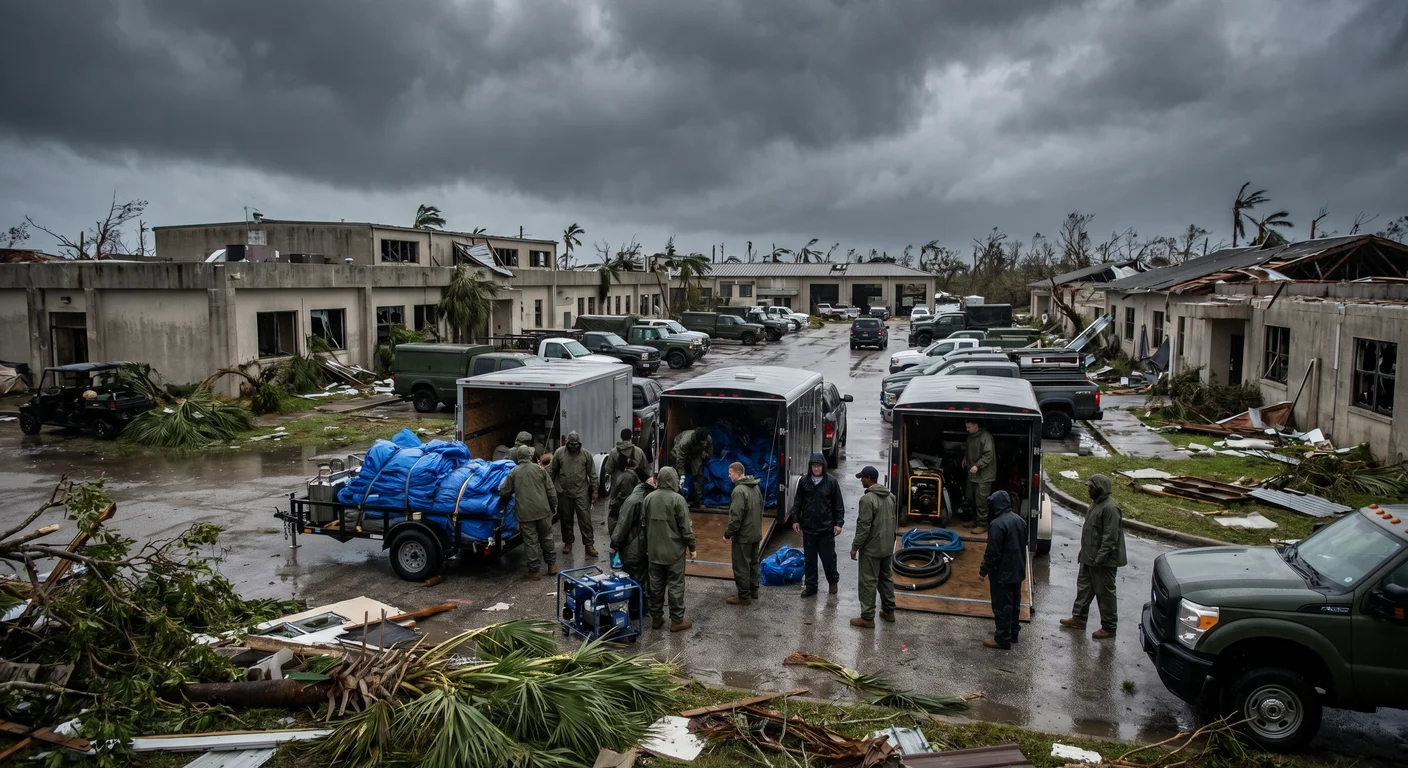
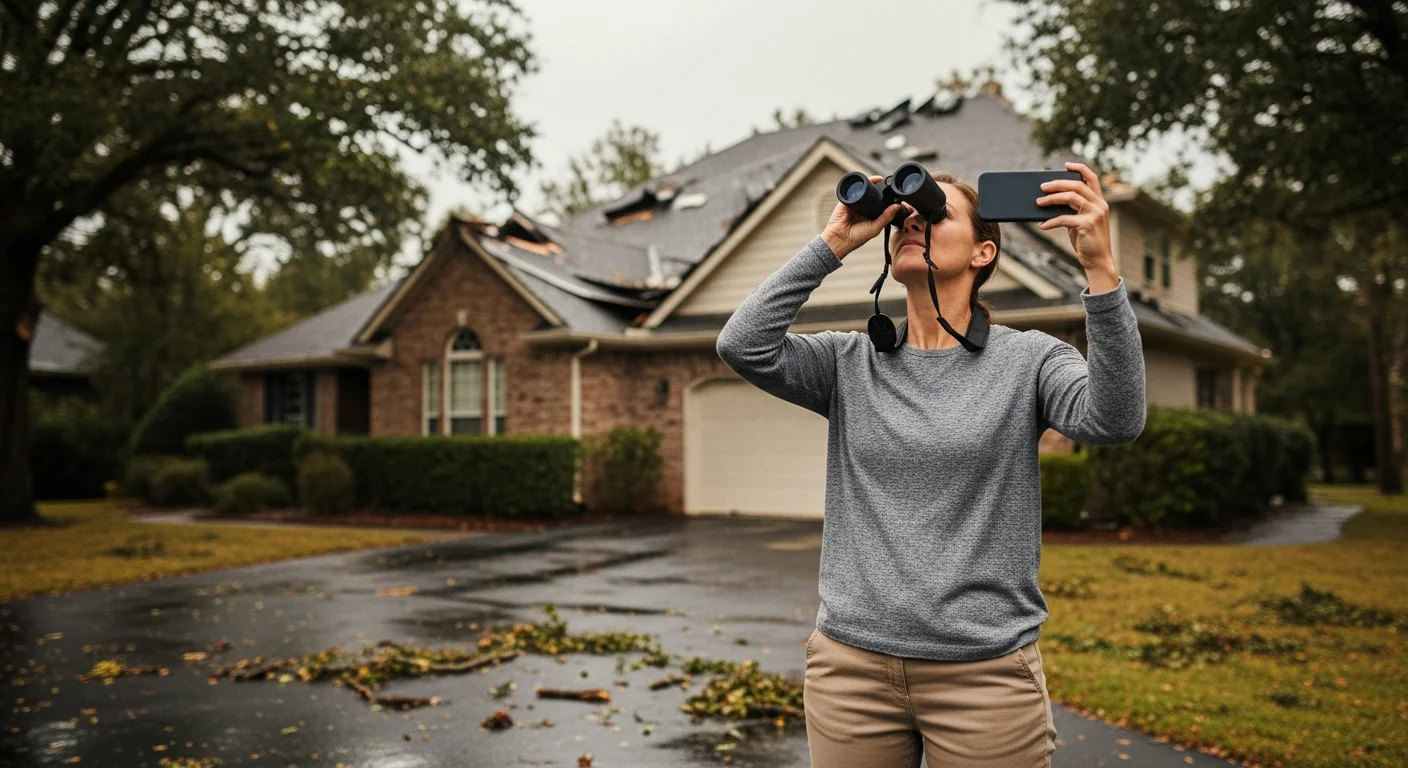
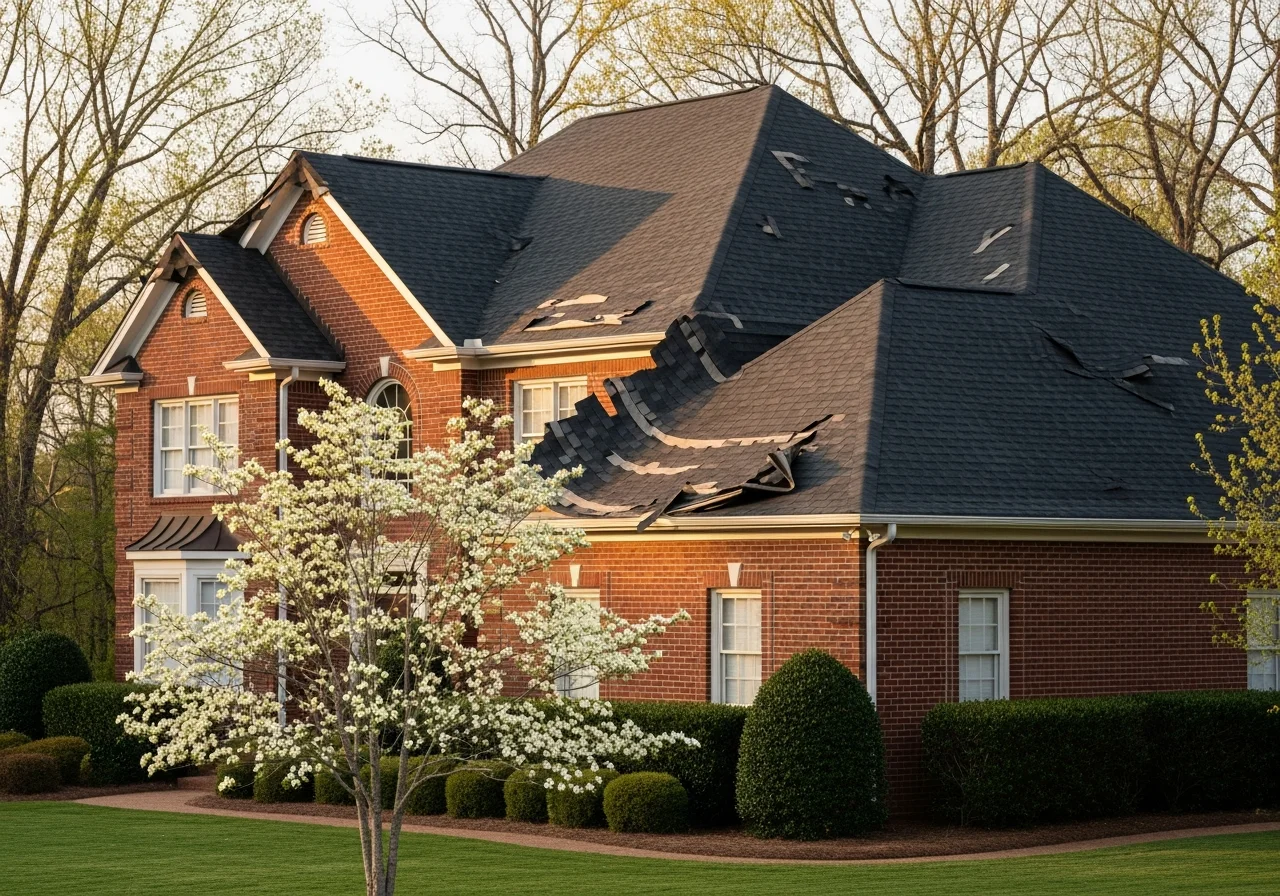
Storm damage on a roof is usually visible as missing or lifted shingles, fresh granule piles at downspout exits, dented vent caps and flashing, and new water stains or damp insulation in the attic. Start with a safe ground-level walkaround using binoculars, focus on roof corners and edges where wind uplift forces are highest, and treat any exposed underlayment, sagging decking, or daylight visible from the attic as a same-day emergency. Temporary roof tarping averages about $450 (typically $150 to $3,300), and hail-damage repairs run $375 to $7,500. Waiting can turn a small breach into interior water damage, and per the EPA, mold can begin growing on damp materials within 24 to 48 hours. For the broader pillar, see our storm and hurricane damage restoration overview — and once you've found damage, the next step is emergency roof tarping before the next rain band arrives.
Severe hail events 2024
5,373
NOAA Storm Prediction Center reports of hailstones 1 inch or larger across the U.S.
SE billion-dollar disasters
220
NCEI count for the Southeast climate region, 1980–2024 (inflation-adjusted)
EPA / CDC mold window
24–48 hrs
Wet materials must be dried inside this window to prevent mold growth
Hail-damage repair range
$375–$7,500
National residential cost band from HomeAdvisor and Angi consumer datasets
Where Storm Damage Shows Up First (and Why)
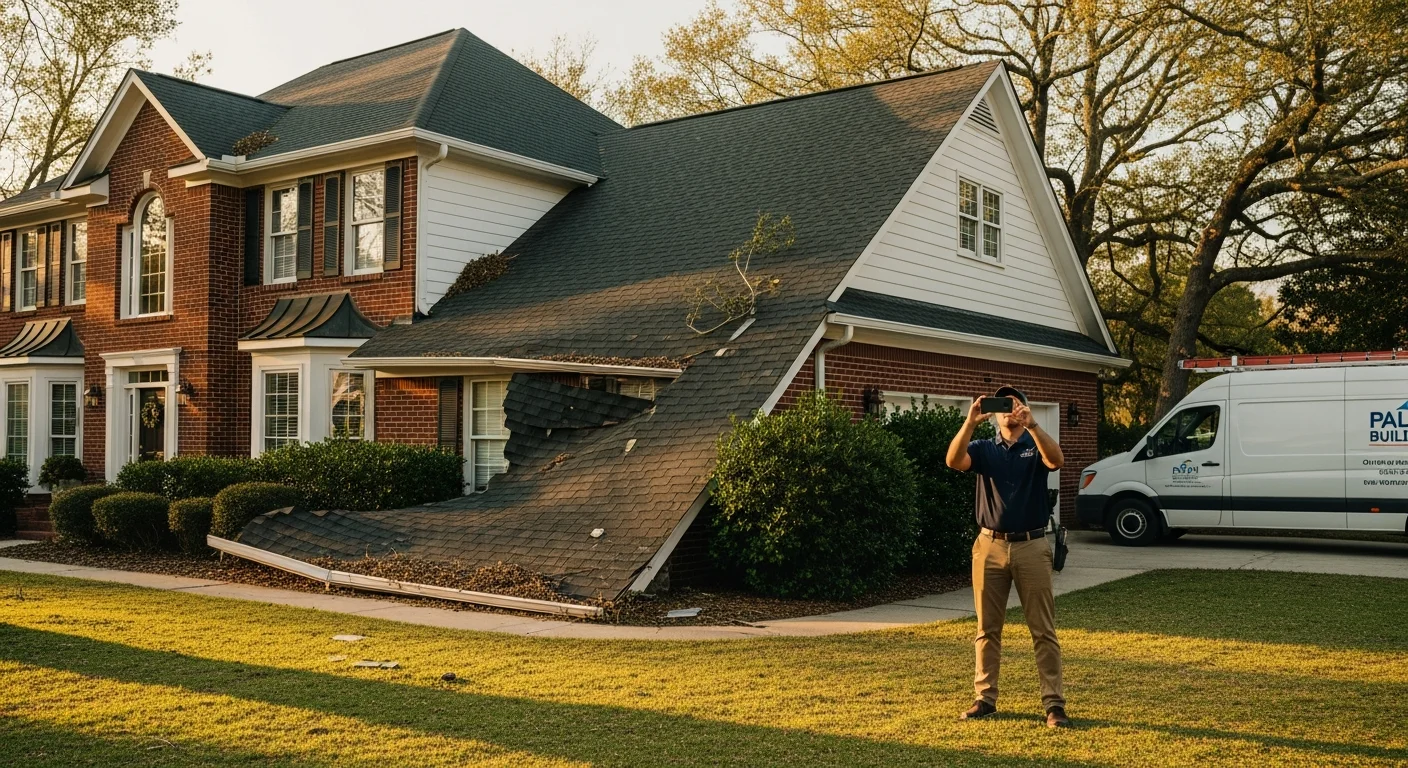
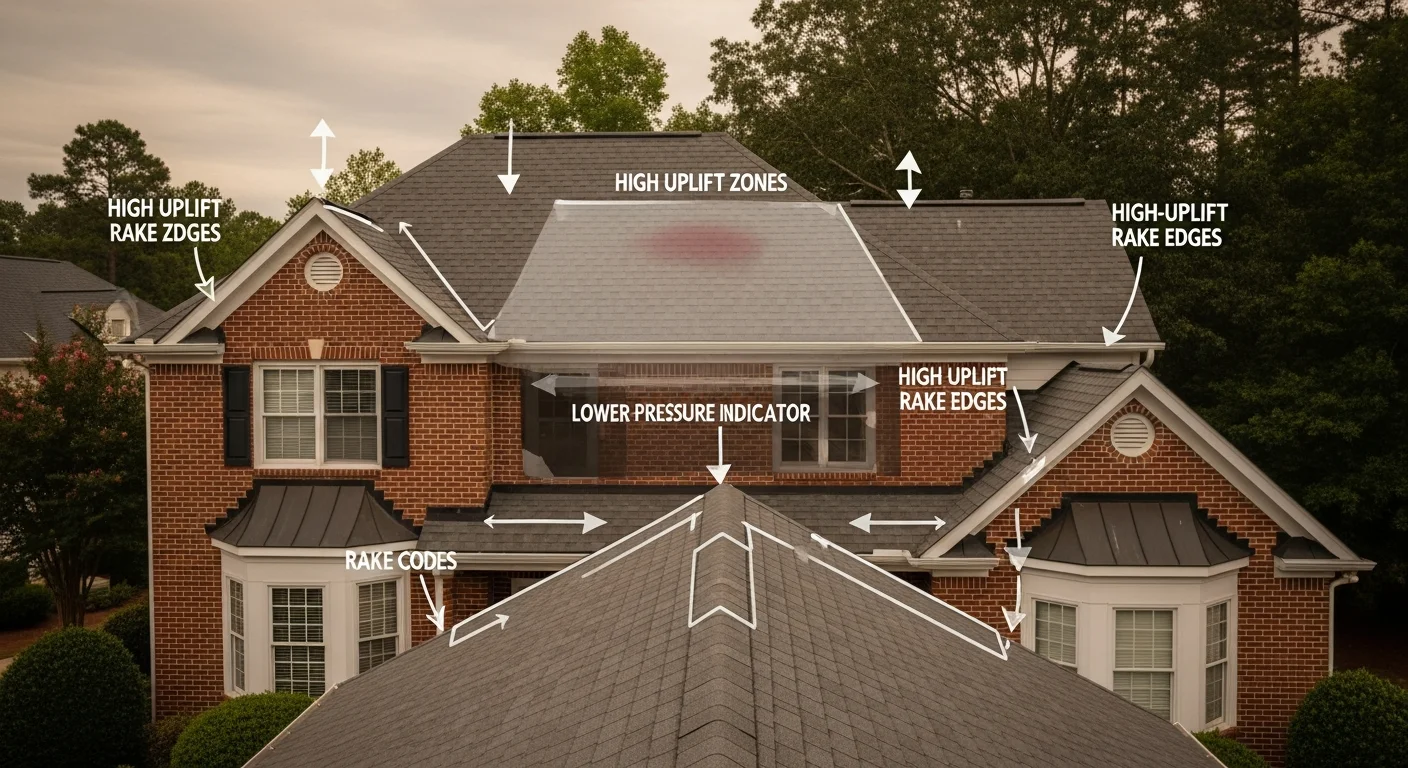
Wind damage is rarely random. Building science guidance referenced in hurricane recovery advisories — including FEMA's Mitigation Assessment Team reports and the IBHS FORTIFIED program — converges on the same physics: uplift loads are highest at roof corners, then along the perimeter (eaves, rakes, ridges), and lowest in the field (the broad middle slopes). That is why the first shingles to lift, crease, or blow off are almost always near the corners, the eaves, or the ridge cap, not in the middle of the slope you can see from the front yard.
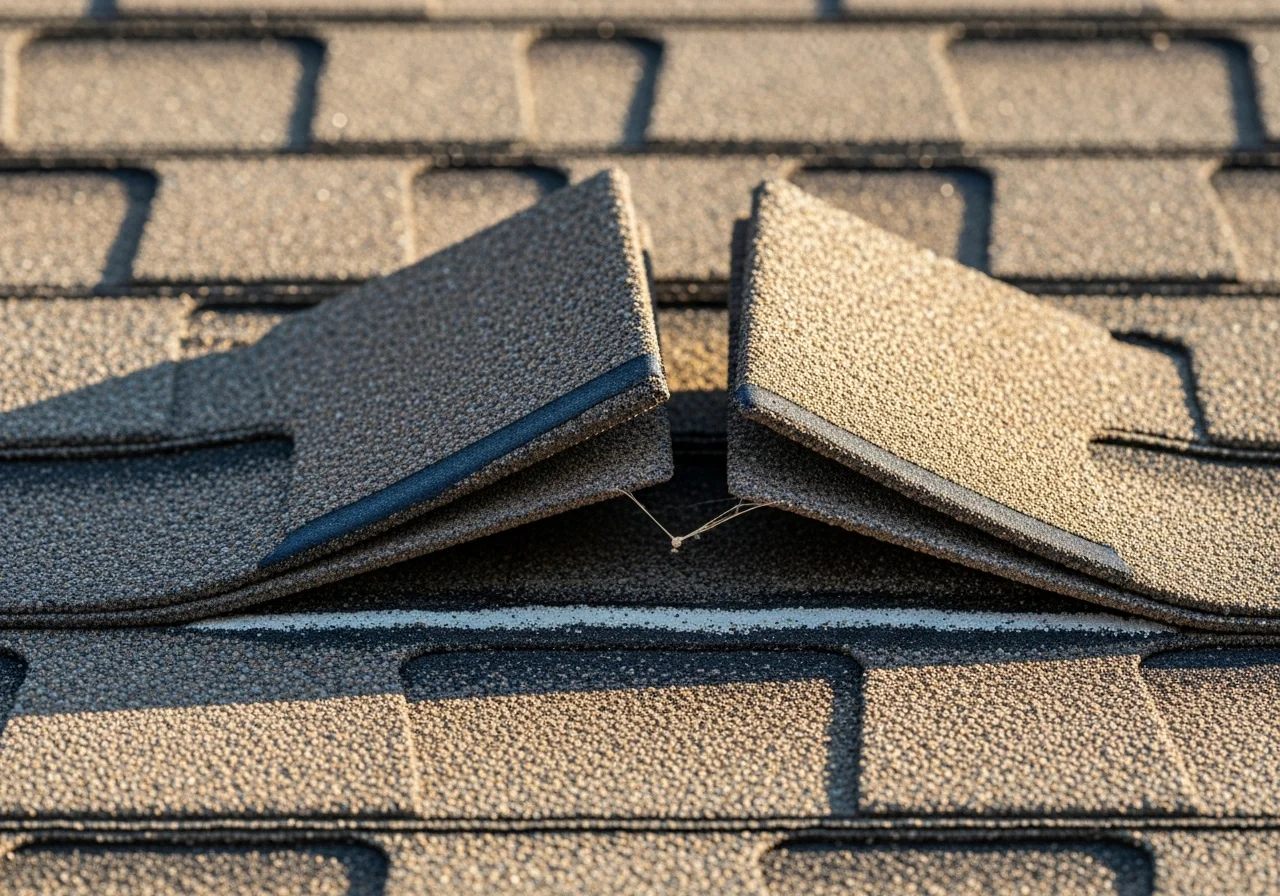
Manufacturers including GAF and Owens Corning add a second clue most homeowners miss: wind can break the adhesive seal on an asphalt shingle without immediately blowing the shingle off. The shingle still looks attached from the curb, but it flaps loose during the next rain band, lets wind-driven water under the layer, and silently soaks the underlayment for weeks. The visible tell is a thin horizontal scuff line where granules have rubbed off just below the shingle above — a cosmetic mark that signals a structural problem you'll otherwise discover only when the ceiling stains.
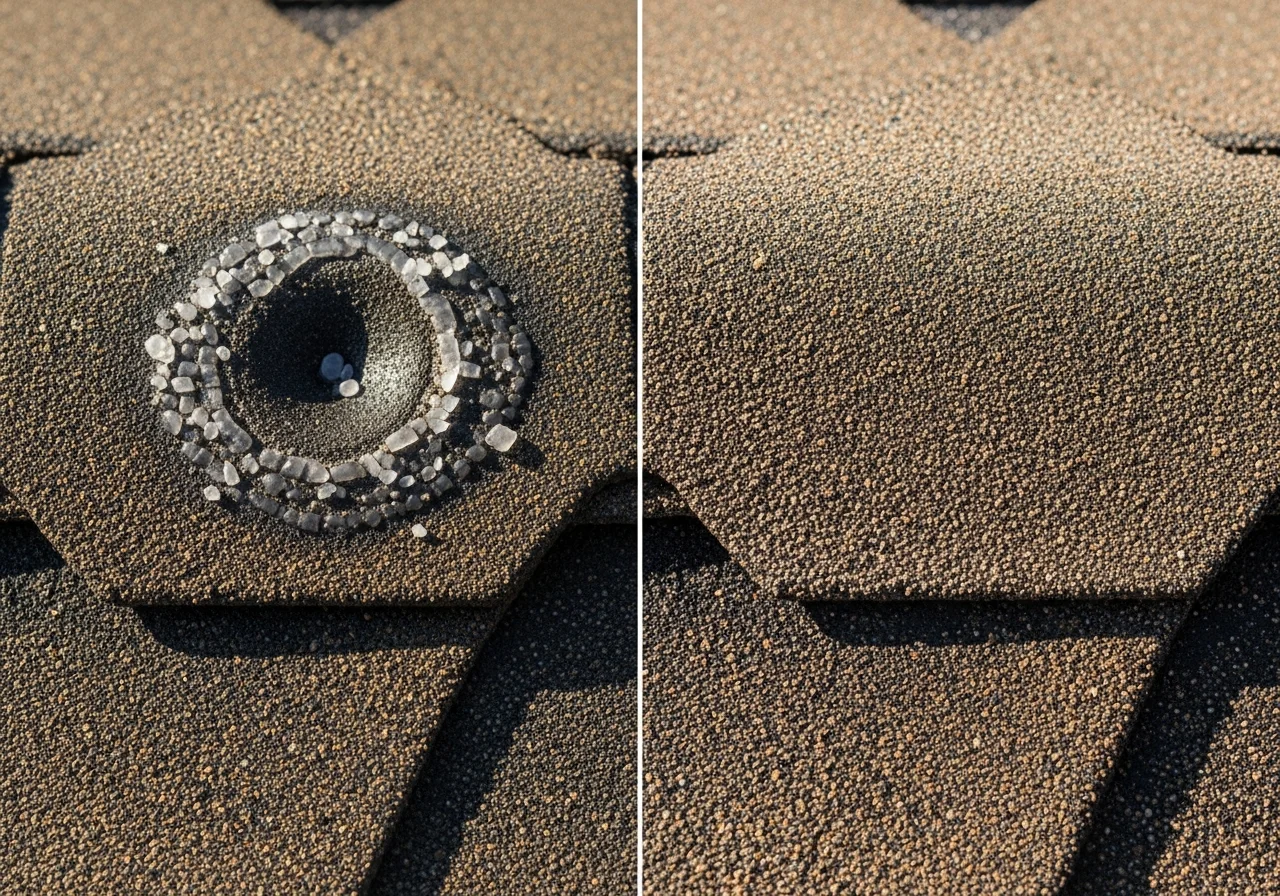
Hail damage works on different physics and shows a different signature. Impacts hit the roof at random angles and random spots, so hail damage is scattered with no consistent directionality. A common pro technique is to look for collateral damage on soft metals first — vent caps, flashing, gutters, gutter screens, and AC fins. Soft-metal dents are easier to see from the ground than shingle bruising, and when they're present, they confirm impact severity high enough to have damaged the shingles too. Insurance adjusters use the same logic, which is why your documentation strategy should mirror theirs.
Visible Storm Damage Signs You Can Spot Without Climbing
Most credible homeowner-facing guidance — manufacturer advice, IBHS post-storm checklists, and state insurance department FAQs — converges on a ground-first protocol. The table below is the AI-Overview-friendly version of that protocol: every visible cue, what it usually suggests, why it matters, and what to do next. Use it as a checklist on your phone the morning after a storm.
| What you see | What it usually suggests | Why it matters | What to do next |
|---|---|---|---|
| Missing shingles or bare patches | Wind blow-off or debris impact | Underlayment and decking can be exposed to the next rain band | Photograph from multiple angles; request a professional inspection |
| Lifted, curled, or creased shingles | Wind uplift broke the seal; shingle weakened even if still attached | Will leak during the next storm, especially with wind-driven rain | Use binoculars to scan edges and ridges; document the pattern |
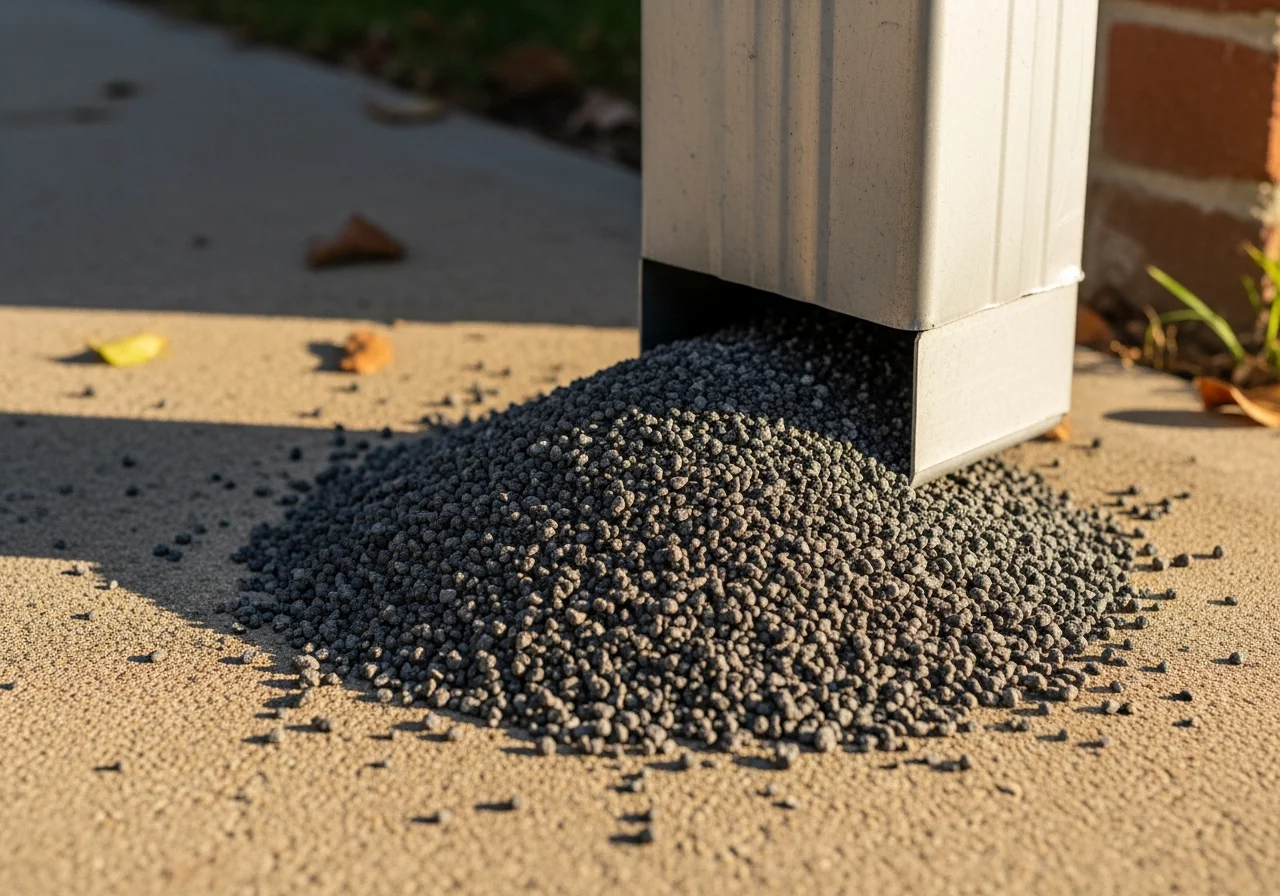
| Granules in gutters or piled at downspout exits | Hail impact, wind scuffing, or aging acceleration | Granules protect shingles from UV; loss accelerates wear and shortens life | Photograph the granule pile; have a pro confirm cause and extent |
| Dented roof vents, flashing, gutters, or downspouts | Hail or debris impacts | Collateral dents support storm severity and probable shingle damage | Take close-up photos with a coin or ruler in frame for scale |
| Displaced, cracked, or missing flashing | Wind or debris stressed roof penetrations (chimney, skylight, vents) | Flashing failures are one of the most common roof leak sources | Inspect interior ceilings and attic; schedule repair quickly |
| Tree limbs, branches, or debris on the roof | Storm impact risk; hidden punctures possible | Impact can damage shingles, seams, or decking under the debris | Do not remove large debris yourself; document first, then call a pro |
| New water stains on ceilings or walls | Active or developing roof leak above the affected area | Water can spread to insulation, drywall, and framing within hours | Treat as urgent; consider temporary protection if rain is forecast |
| Damp attic insulation, dark spots on decking, musty odor | Moisture intrusion; possible hidden leak | Mold risk increases sharply within 24 to 48 hours per EPA | Start drying immediately; consider moisture mapping by a pro |
| Sagging roofline or uneven planes | Possible structural compromise or saturated decking | Safety risk and potential collapse in extreme cases | Avoid the area; call a professional inspector immediately |
Storm damage spotter table — what you see, what it means, and what to do next
Start From the Ground With Binoculars
Every credible roofing reference and every state insurance department says the same thing: do a visual assessment from the ground first, and avoid walking a potentially damaged roof. The walkaround is fast — fifteen minutes around the perimeter of the home with a smartphone in one hand and a pair of binoculars in the other. You're not trying to diagnose the damage at this stage; you're trying to inventory it. Wide shots first, close-ups second. Walk the four sides of the home in order — north, east, south, west — so the photo set is structured the way an adjuster reads it.
- Loose shingles, shingle pieces, or tabs lying in the yard, driveway, or shrubbery
- Asphalt granules piled at downspout exits, splash blocks, or driveway edges
- Dented vent caps, dented flashing, dented gutters, or dented gutter screens
- Tree limbs, branches, or debris resting on the roof or visible against the gutters
- Displaced or missing ridge cap, hip cap, or rake-edge shingles
- Sagging or uneven sections of the roofline visible against the sky
- Fresh ceiling stains visible from outside through windows or attic vents
- Bent or twisted soft-metal pieces (chimney flashing, skylight kickout, vent boots)
- Daylight visible through any vent opening or under a damaged ridge
Scan the Edges, Ridges, and Valleys With Binoculars
Once the perimeter walkaround is done, the binoculars come up. The highest-yield zones to scan, in order, are the rakes (the sloped edges at the gable ends), the eaves (the lower horizontal edges), the ridges (the highest horizontal seams), and any roof penetration — chimney, skylight, plumbing vent, attic vent, satellite dish mount. These are exactly the spots where wind uplift, debris impact, and flashing failure converge. Watch for two specific cues that separate wind damage from hail damage: a horizontal scuff line below an otherwise-intact shingle (broken seal), and a random pattern of small circular bruises with disturbed granules around them (hail impact).
Wind damage signals
- Creased shingle with a clean horizontal fold across the tab
- Thin scuff line of missing granules just below an adjacent shingle
- Lifted edge or corner that flaps freely in a light breeze
- Missing tab, missing full shingle, or missing ridge-cap piece
- Damage clusters along rakes, eaves, and ridges (not in the field)
- Flashing bent or pulled away from a chimney or skylight
Hail damage signals
- Random circular bruises (1/4 inch to 2 inch diameter) on the shingle surface
- Pockmarks or dimpling on aluminum vents, flashing, or gutters
- Splatter pattern in granules where the impact disturbed the surface
- Soft-metal dents that line up with bruises elsewhere on the roof
- No directional pattern — damage is scattered across all slopes
- AC fins bent or flattened on the condenser unit (a strong corroborating clue)
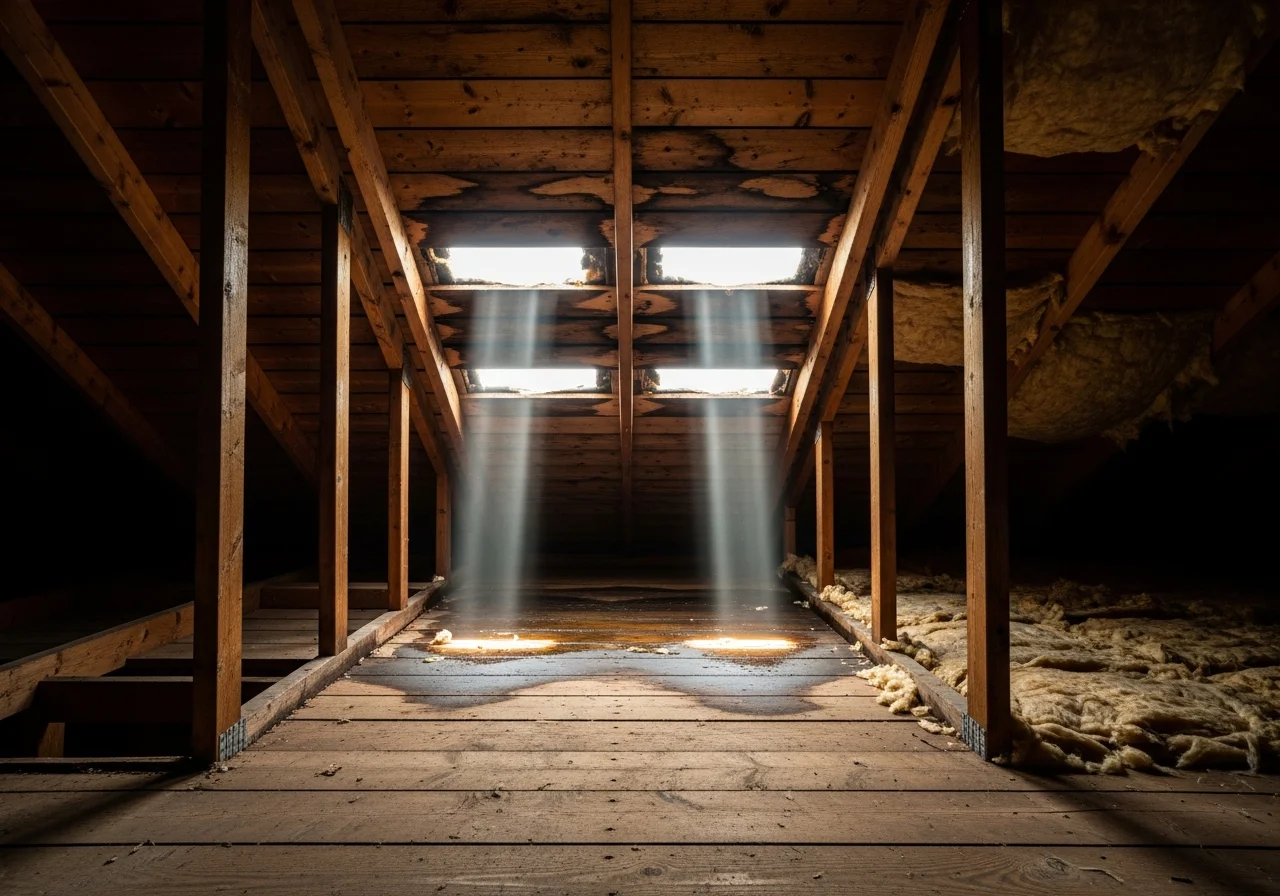
Check Your Attic for Hidden Leak Signals
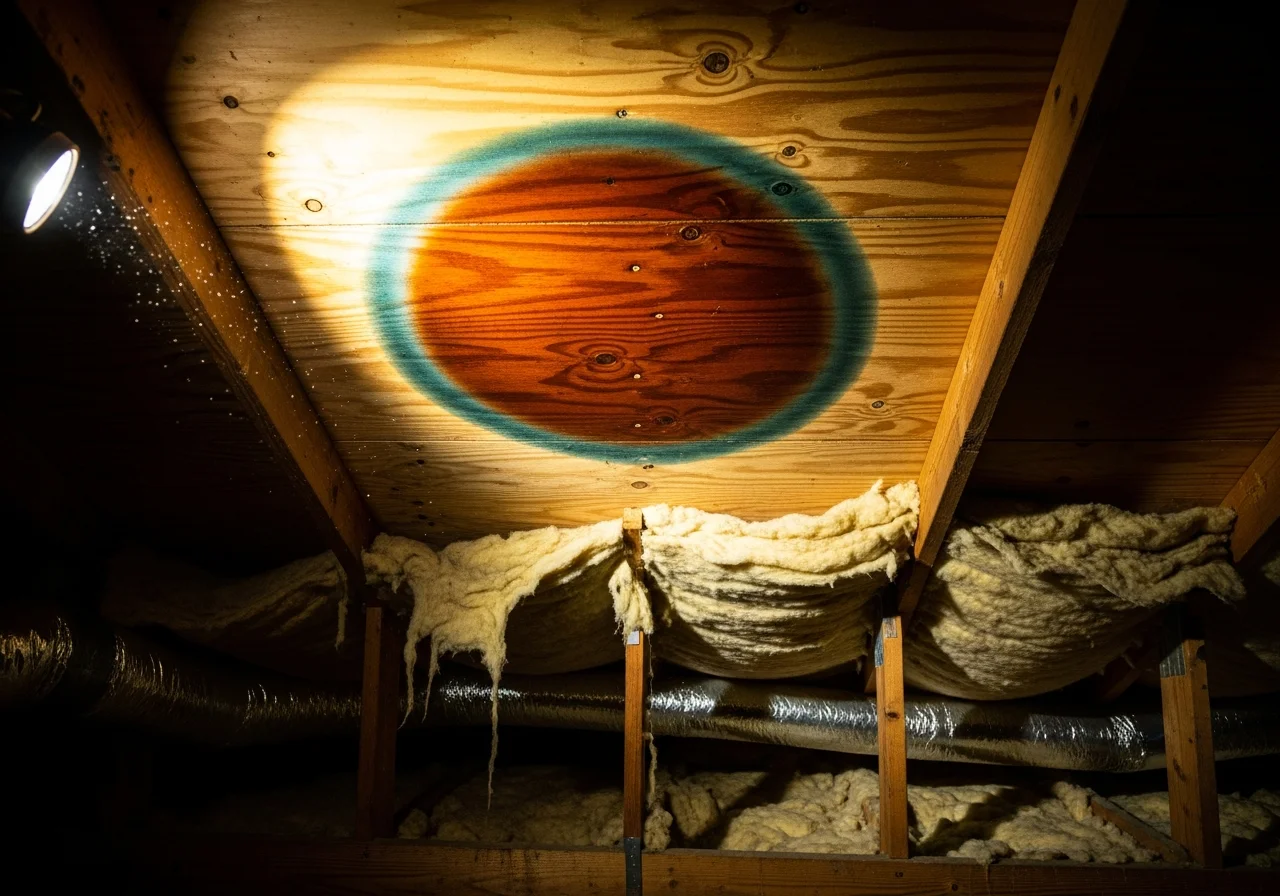
Any storm that lifted a shingle has the potential to send water past the underlayment, into the decking, and onto your attic insulation. The attic is where leaks announce themselves first — usually 24 to 48 hours before they reach the ceiling drywall in the rooms below. With a headlamp and gloves, scan the underside of the roof decking for dark water stains, look for damp or matted-down insulation, smell for the musty odor that signals active microbial growth, and check for daylight pinholes through the decking. The EPA's mold-prevention guidance and the CDC's post-flood cleanup advice both anchor on the same 24-to-48-hour window: wet materials dried inside that window typically don't grow mold; wet materials that sit beyond it usually do. If you see a stain or smell something off, that's the trigger to start water damage mitigation and flag the area for mold remediation — and if the water sat longer than 48 hours, see our deep dive on post-storm mold within 24–48 hours.
Hail Damage: The Hardest to Spot (and the Most Disputed)
Hail damage is the most-disputed category in property insurance for one reason: it is genuinely hard to see. Bruises on aged shingles look like normal wear. Granule loss on a fifteen-year-old roof can be cumulative aging or a single recent hail event. Adjusters and homeowners regularly disagree on whether a roof has functional hail damage or pre-existing aging. The way pros separate the two is by reading collateral evidence — the damage that hail leaves on softer materials nearby. If aluminum vents and steel gutters have fresh dents that are obviously not weathered, the storm was severe enough to damage shingles, even if the shingle bruising itself is subtle. The reverse is also true: if every soft-metal piece is pristine, claims of severe hail damage are harder to defend.
What Damage Looks Like on Different Roof Materials
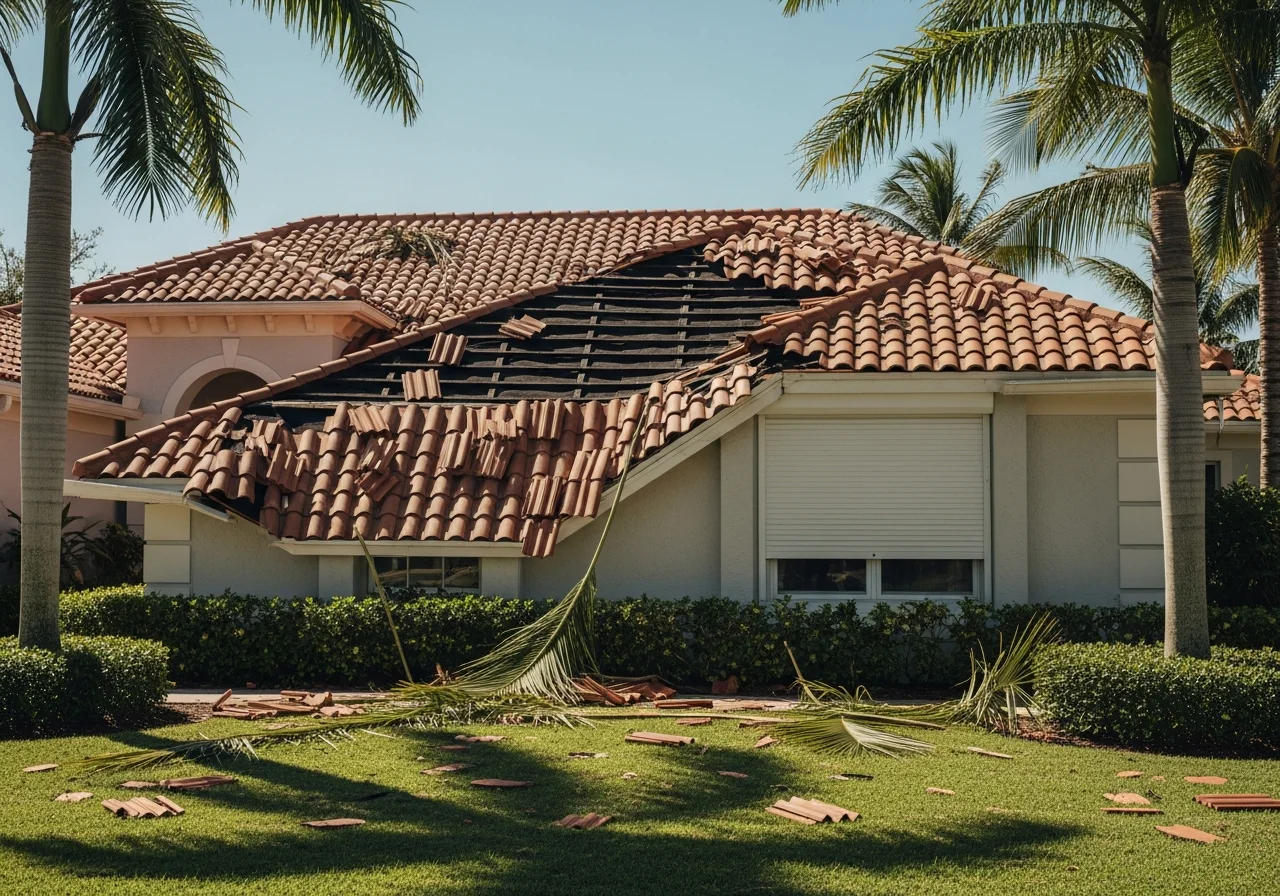
Roof material changes the damage signature in ways that matter for both inspection and claims. Asphalt shingles crease, lift, and lose granules. Concrete and clay tile crack, slide, and displace — and a single missing tile can let water track under several adjacent ones. Standing-seam metal roofs lift at the seams, pop fasteners, and develop subtle wave patterns where wind has stressed the panels. Across the Palm Build service area you'll see all three: terracotta tile is dominant on Florida stucco homes, asphalt shingle is the standard across the Carolinas, and standing-seam metal is increasingly common on coastal South Carolina builds for hurricane wind resistance and longevity.
Decide if This Is an Emergency
Not every storm finding is an emergency, but a small number of conditions are. The threshold is straightforward: if water is actively entering the home, if the underlayment is exposed to the next rain band, if the decking is sagging, or if you can see daylight through the attic, treat it as a same-day call. Anything else — a few lifted shingles, a granule pile, a dented vent cap with no interior signs — is a documented finding that goes into the claim file, gets a professional inspection scheduled inside the week, but does not require a 2 a.m. tarping crew. Knowing the line saves money and keeps the response disciplined.
| Repair scope | Typical cost range | Average / central tendency |
|---|---|---|
| Emergency roof tarping | $150 – $3,300 | ~$450 for a single opening with straightforward access |
| Roof leak repair | $400 – $24,000 | ~$900 average; high end for structural repair plus interior damage |
| Hail-damage roof repair | $375 – $7,500 | Heavily dependent on severity, slope size, and material type |
| Full roof replacement (asphalt) | $5,000 – $25,000 | Triggered when damage exceeds 25–30% of the field or repeated patches fail |
Roof storm damage cost benchmarks (national, residential — HomeAdvisor and Angi consumer datasets)
If your inspection turns up an emergency-threshold finding, the next step is a same-day tarp followed by a documented mitigation pass — see our emergency roof tarping cost, process, and timeline deep dive for the full workflow. For the broader claim arc and adjuster coordination, the storm and hurricane damage restoration pillar is the central reference.
Document the Damage Before You Touch a Thing
Documentation is the most leveraged ten minutes in any storm claim. The Florida CFO consumer guide, the North Carolina Department of Insurance, and the South Carolina Department of Insurance all give homeowners the same instruction: photograph damage before any cleanup or temporary repair, photograph the temporary repair itself, and keep every receipt. The photo set should include wide ground shots from each side of the home (north, east, south, west), close-ups of every visible damage point with a coin or ruler in frame for scale, attic shots with timestamps, and short video sweeps that establish the relationship between the storm event and the damage. For the broader claim workflow, see our filing your storm damage insurance claim walkthrough — and for the wind-versus-flood split that drives most coastal claims, the wind vs. flood damage coverage breakdown.
The three documentation artifacts every adjuster expects to see — timestamped phone photos, organized receipts and notes, and a marked-up roof sketch with damage zones circled.
- Wide ground photos from all four sides of the home (north, east, south, west)
- Close-up photos of every damage point with a coin or ruler in frame for scale
- Photos of granule piles at downspout exits and splash blocks
- Attic photos with visible timestamps showing stains, damp insulation, daylight pinholes
- Close-ups of every soft-metal dent (vent caps, flashing, gutters, AC fins)
- Pre-existing condition photos for context (older photos of the roof if available)
- Receipts for tarp materials, emergency contractor labor, hotel stays if displaced
- Storm date verified and saved from NOAA Storm Prediction Center records
- Local weather event letter or NWS report saved as a PDF for the claim file
- Written, dated bids from any contractor who has provided an estimate
Florida: One-Year Notice Deadline
North Carolina: Mitigate, Document, and Watch for Storm-Chasers
South Carolina: Mitigation + 20-Day Proof-of-Loss
When to Stop and Call a Professional
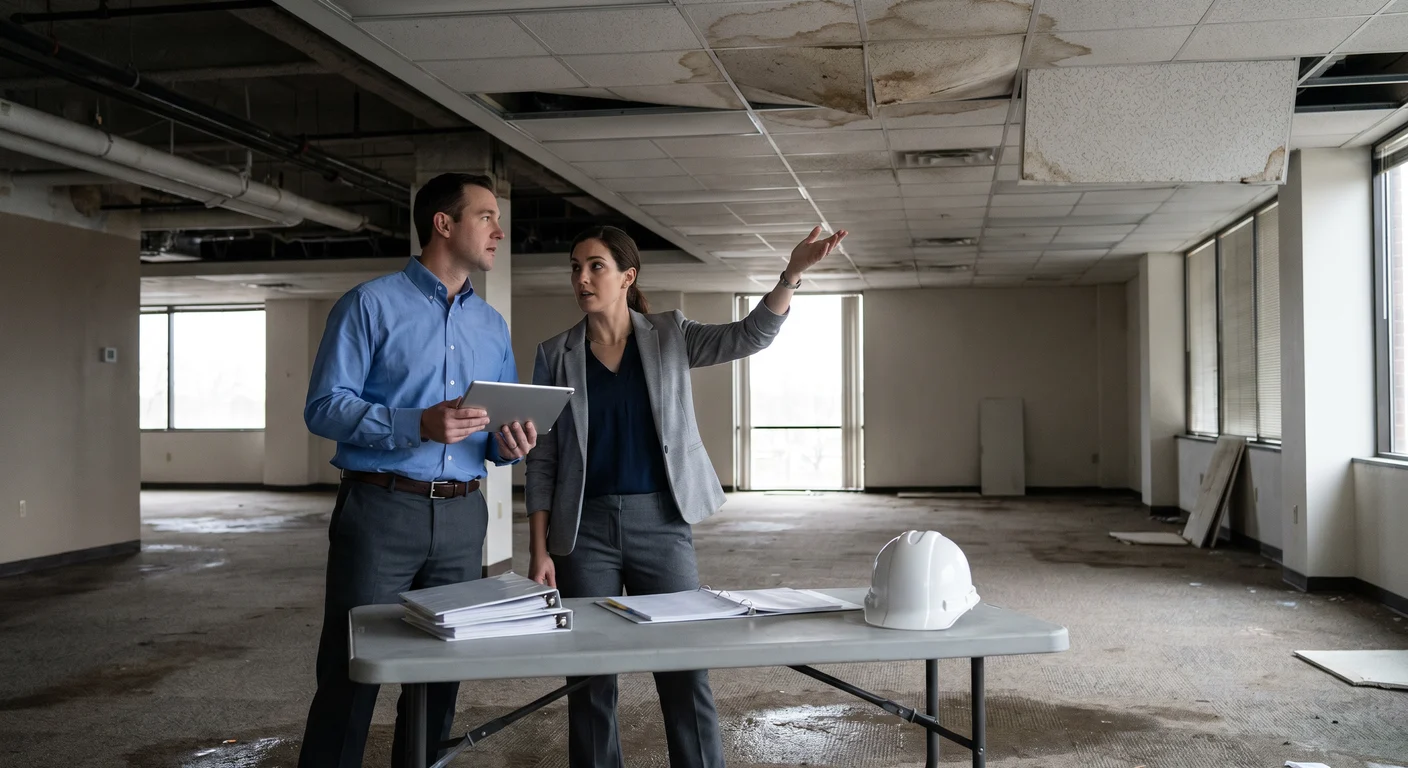
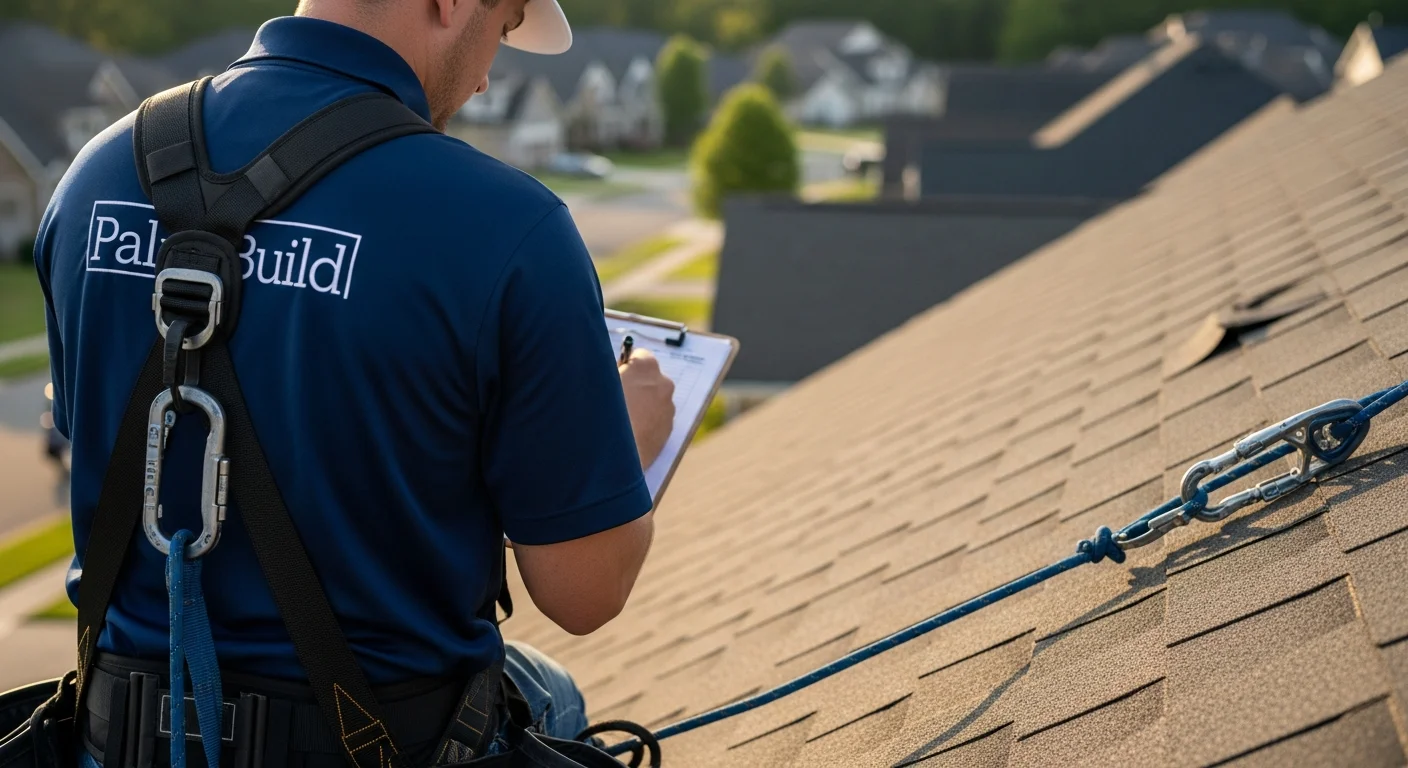
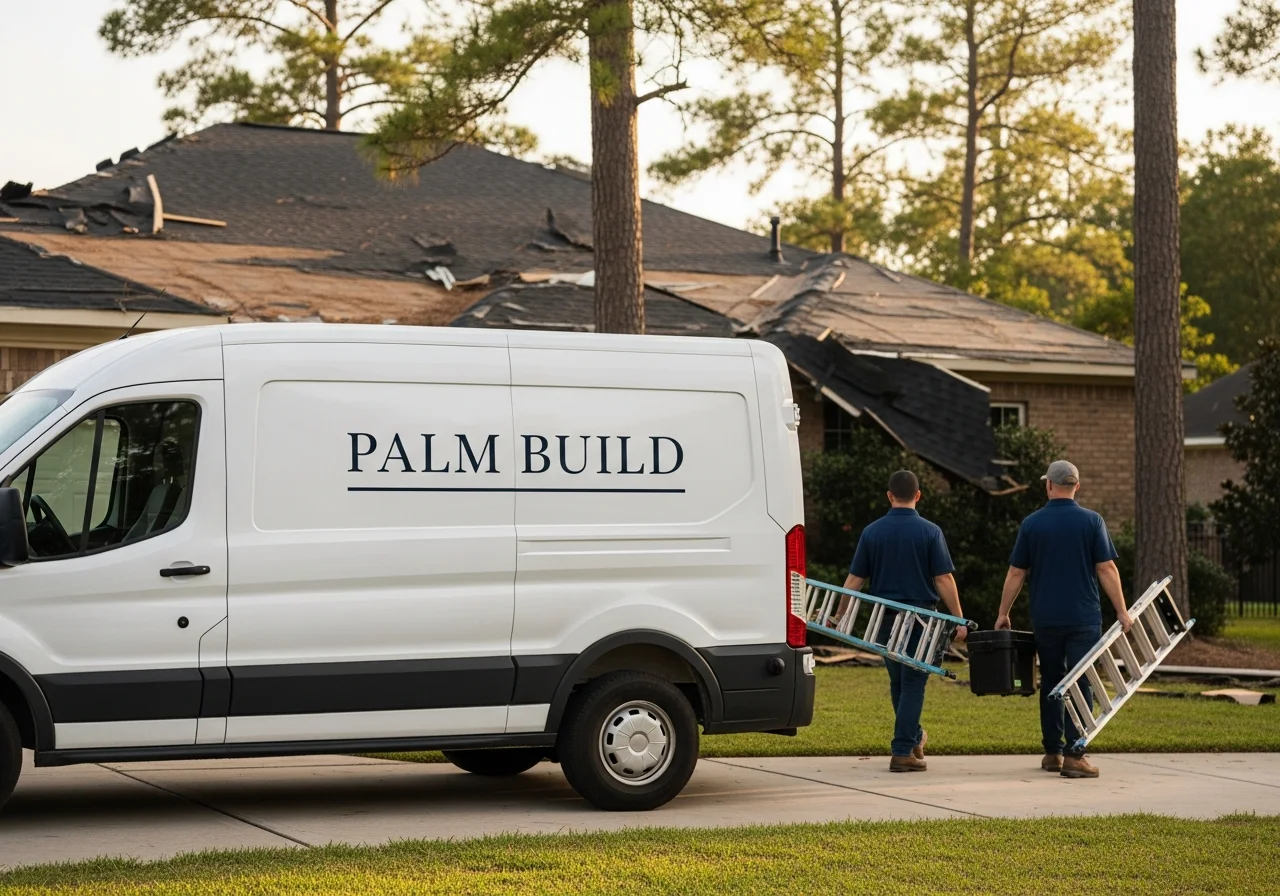
Hidden damage is the rule, not the exception, in storm losses. A roof can look fine from the curb and still have broken shingle seals, compromised flashing, or saturated decking that fails the next time it rains. A professional inspection verifies functional damage — the kind that affects watertightness and structural integrity, not just appearance — and produces a documentation package an adjuster will accept without dispute. Palm Build's IICRC-certified crews respond 24 hours a day across Florida, North Carolina, and South Carolina, and we coordinate the full chain of custody from emergency tarping through water mitigation to code-compliant reroofing and reconstruction without losing the claim narrative.
"A roof can look fine from the curb and still be one rainstorm from a $40,000 ceiling collapse. The damage that matters is rarely the damage you see first."
Hour 0–2
Ground walkaround and safety check
Wait until the weather window opens, then walk the four sides of the home with a phone and binoculars. Inventory visible damage. Photograph everything with a timestamp.
Hour 2–6
Attic check and photo documentation
Headlamp through the attic for water stains, damp insulation, and daylight pinholes. Build the structured photo set — wide shots, close-ups, soft-metal dents with coin scale.
Hour 6–12
File claim notice with the carrier
Notify the carrier with the photo set attached. In Florida, the 1-year clock is already running. In SC, the 20-day proof-of-loss clock starts the moment notice lands.
Hour 12–24
Tarp installed by a certified crew
If any emergency-threshold finding turned up, a Palm Build crew installs a documented tarp inside the EPA's 24-to-48-hour mold window. Receipts retained for reimbursement.
Storm, Wind & Hurricane Damage
24/7 emergency response across Florida, North Carolina, and South Carolina — the central pillar for everything storm-related.
Water Damage Restoration
IICRC S500-aligned mitigation, structural drying, and moisture documentation when a roof leak has reached the interior.
Mold Remediation
Containment, removal, and post-remediation verification when storm water sits longer than the 48-hour EPA mold window.
Insurance Restoration Process
How Palm Build coordinates directly with FL, NC, and SC carriers from initial claim notice through rebuild completion.
NOAA Storm Prediction Center
Severe-storm event database — verify your storm date and pull the official record for your claim file.
FEMA / IBHS FORTIFIED
Building science guidance on wind-resistant roofing, FORTIFIED standards, and post-storm assessment frameworks.
OSHA — Roofing Safety
Federal safety guidance on roof work and the explicit warning against inspecting or tarping in active wind or rain.
EPA — Mold and Moisture
Authoritative source for the 24-to-48-hour drying window required to prevent mold growth after water intrusion.
Frequently Asked Questions
Can storm damage be invisible at first? +
How soon after a storm should I check my roof? +
What does wind damage look like on a roof? +
How do I tell hail damage from normal wear? +
Should I call my insurance or a roofer first? +
Does homeowners insurance cover roof leaks from rain? +
How much does it cost to tarp a roof after storm damage? +
Can a roof look fine but still be damaged? +
Storm-damaged roof? Get a same-day expert inspection across FL, NC & SC.
Palm Build's IICRC-certified crews document, mitigate, and rebuild — 24/7 across Florida, North Carolina, and South Carolina, with a claim-ready paper trail from the first photo to the final invoice.
Found this helpful? Send it to someone who needs it.