Step 1
Photograph everything before touching anything
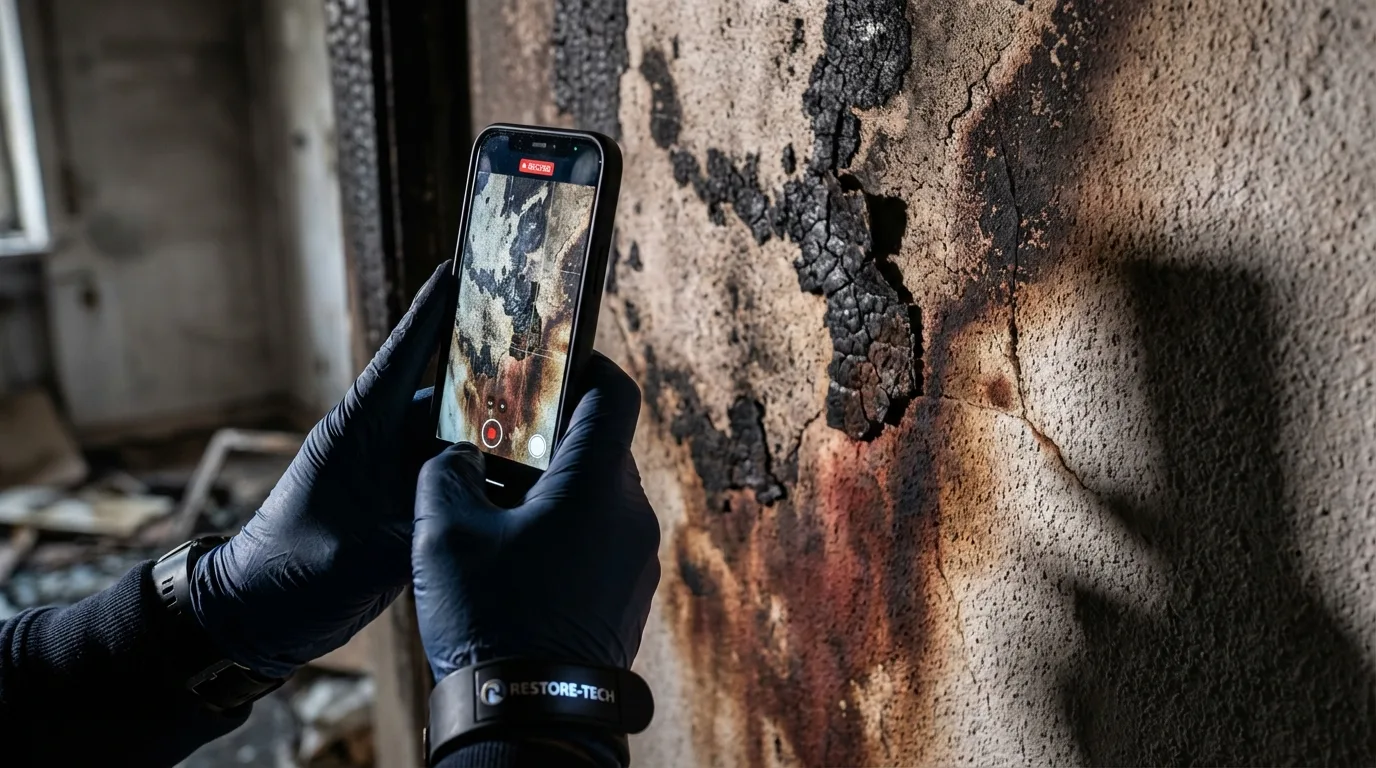
Wide shots of each room, close-ups of specific damage, the source of damage, water lines on walls, serial numbers on electronics.
Insurance Documentation Guide
Thorough documentation is the single most powerful tool in your claims arsenal. This guide shows you exactly what to photograph, how to build a personal property inventory, and what records to keep so your adjuster has everything they need.
Key Steps
Step 1
Wide shots of each room, close-ups of specific damage, the source of damage, water lines on walls, serial numbers on electronics.
Step 2
Walk through every affected room describing what you see. Date-stamped video is powerful evidence. Include rooms that appear undamaged but may have hidden water.
Step 3
List every damaged item: description, brand, model, age, approximate purchase price. Be specific — "Sony 55-inch LED TV, model X123, purchased 2019, $799."
Step 4
Tarps, hotel stays, meals, temporary clothing, emergency plumbing. Insurance reimburses reasonable emergency costs but needs documentation.
Take 200+ photos minimum — wide shots and close-ups of every affected area
Never throw away damaged items before documentation is complete
Video walkthroughs with narration create the most compelling evidence
Moisture readings from a restoration company prove hidden damage
Organize everything digitally with backups — adjusters appreciate thoroughness
In-Depth Guide
Documentation is the single most powerful tool in your insurance claims arsenal — and the quality of documentation created in the first hours after a loss directly determines the outcome of your claim. Adjusters write estimates based on evidence. When that evidence is thorough — hundreds of photos, narrated video, moisture maps, and organized inventories — the estimate reflects the true scope of damage. When documentation is thin, gaps in evidence become gaps in coverage.
Professional restoration documentation adds a layer of technical evidence that homeowner photographs cannot provide. Moisture meters quantify hidden water damage behind walls and under floors. Thermal imaging cameras reveal temperature differentials that indicate wet building materials. Xactimate estimates translate damage into the industry-standard pricing format that adjusters use. These tools convert subjective observations ("the wall feels damp") into objective, measurable data ("moisture content at 42% — requires demolition and drying") that insurance companies cannot easily dispute.
The organizational system you use for documentation matters almost as much as the documentation itself. Create a digital folder structure organized by room, with subfolders for photos, receipts, and correspondence. Maintain a master spreadsheet for your personal property inventory. Keep a chronological claim diary logging every call, email, and decision. When the adjuster asks for specific evidence — and they will — you need to locate it instantly. Adjusters appreciate organized claimants and process their claims faster.
Visual Reference
Real-world examples of the documentation, coordination, and processes involved in insurance claims.
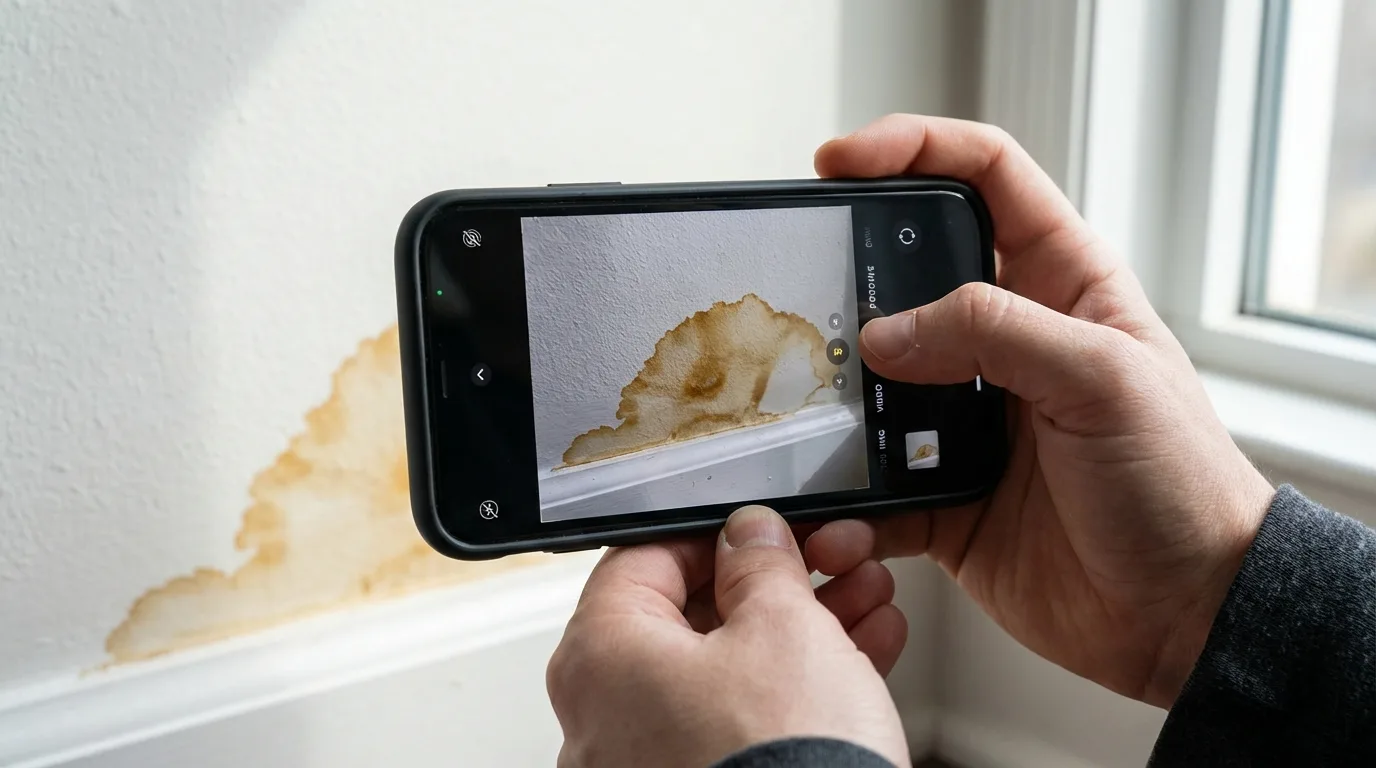
Photograph from multiple angles. Wide shots show extent; close-ups show severity.
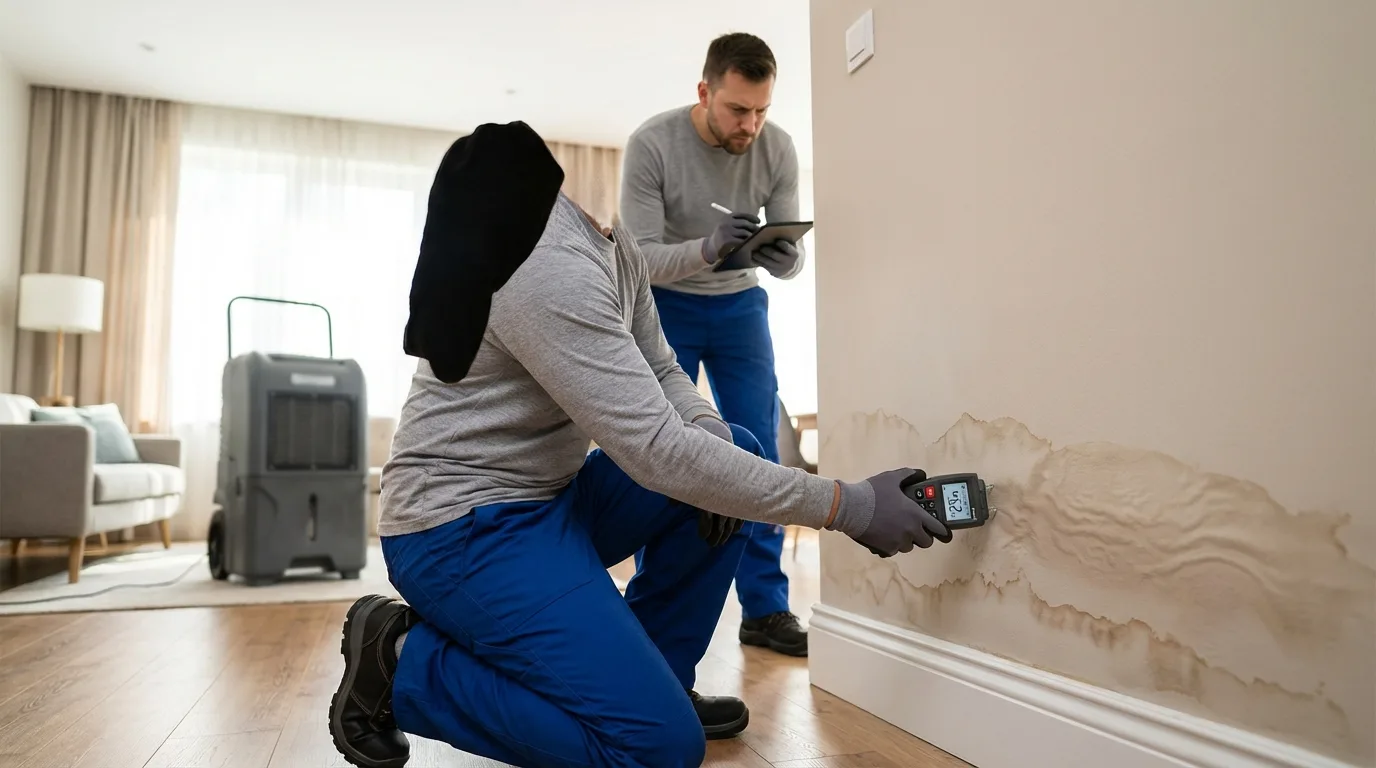
Professional moisture readings prove hidden damage that photos alone cannot show.
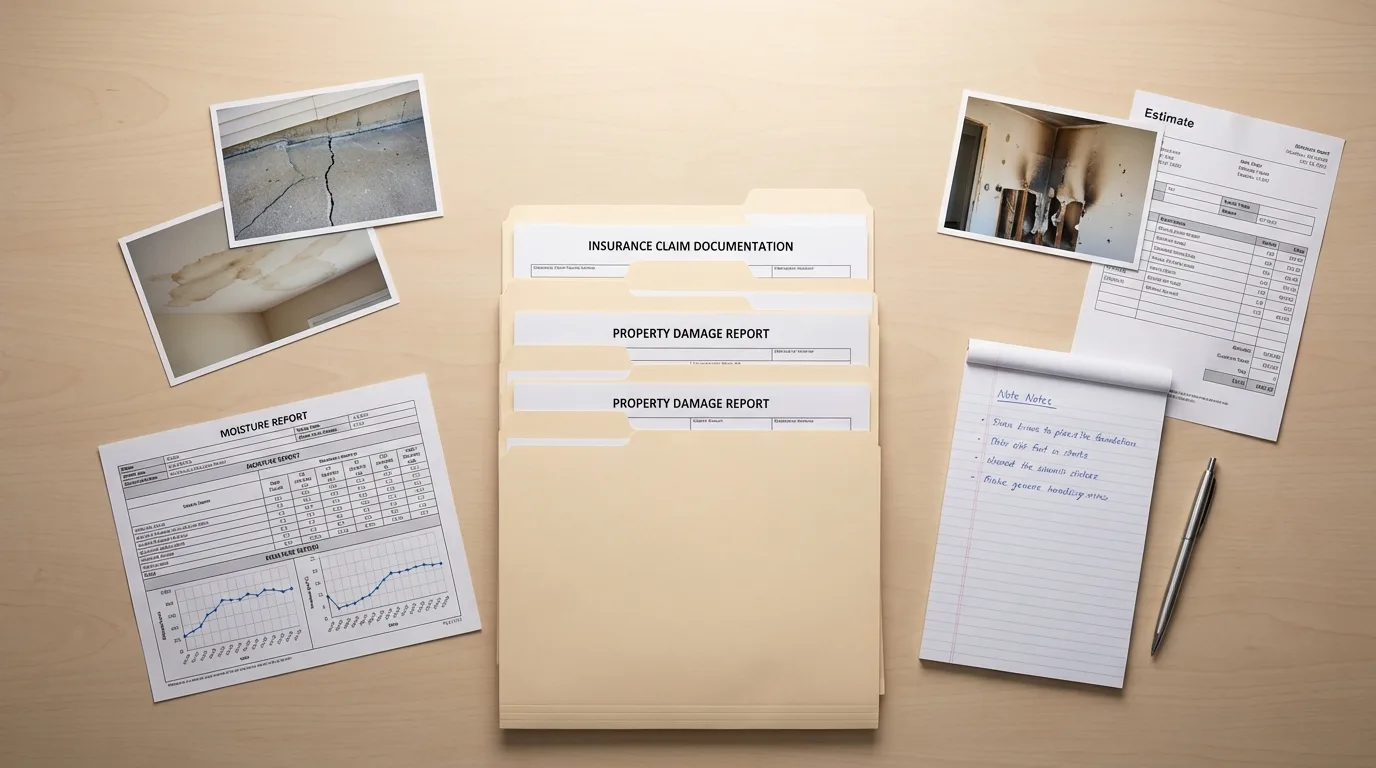
Keep photos, receipts, inventory lists, and communication logs in one organized system.

Thorough documentation from the first hour through project completion creates the evidence trail that supports full claim recovery and fair settlement.
Step-by-Step
Understanding each step gives you leverage and helps prevent common problems.
Before anyone touches anything, capture the full scope with photos and video from every angle.
List every damaged item with details. Use a spreadsheet or your insurer's inventory form.
Your restoration company adds moisture maps, Xactimate estimates, and technical reports.
Compile everything into a clear package: photos by room, inventory list, moisture data, receipts.
South Florida
Hurricane damage documentation requires photos of the roof, exterior, and interior separately. Insurers will have separate adjusters for wind vs. flood damage.
Charlotte / NC
For pipe burst or ice dam claims, document the failed component and the resulting damage separately to establish cause.
Coastal SC
After storm damage, photograph debris and exterior damage before cleanup crews arrive. This evidence establishes the timeline.
Common Questions
Take at least 200 photos — more is always better. Capture wide shots of each affected room, close-ups of specific damage, the source or cause of damage, serial numbers on electronics, brand labels on furniture, and water lines on walls. Photograph rooms that appear undamaged but may have hidden moisture. You cannot take too many photos.
Both. Photos provide detailed evidence of specific damage, while a narrated video walkthrough adds context about the sequence, extent, and severity of damage. Walk through every room describing what you see, including the source, the path of water or fire, and every area affected. Date-stamped video is powerful evidence that adjusters find compelling.
List every damaged item with: description, brand name, model number, approximate age, purchase price, and where it was purchased. Be specific — "Sony 55-inch LED TV, model X900H, purchased Best Buy 2021, $999" is far more effective than "large TV." Include receipts, credit card statements, or Amazon order history to substantiate values.
Never throw away damaged items before they are documented by the insurance adjuster or a professional restoration company. Photograph each item from multiple angles, note the brand and model, and keep items accessible for the adjuster inspection. If items pose a health hazard (contaminated materials), photograph them thoroughly before disposal and note the reason for removal.
Moisture meter readings and thermal imaging reveal hidden damage that photographs cannot show — water inside walls, under flooring, or in ceiling cavities. This data proves the extent of damage beyond visible surfaces and justifies the scope of demolition and drying work. Adjusters rely heavily on moisture maps when approving restoration estimates.
Continue Reading
Our team documents hundreds of claims annually. We provide moisture mapping, Xactimate estimates, and organized documentation that supports full claim recovery.