Step 1
Ensure safety and evacuate if necessary
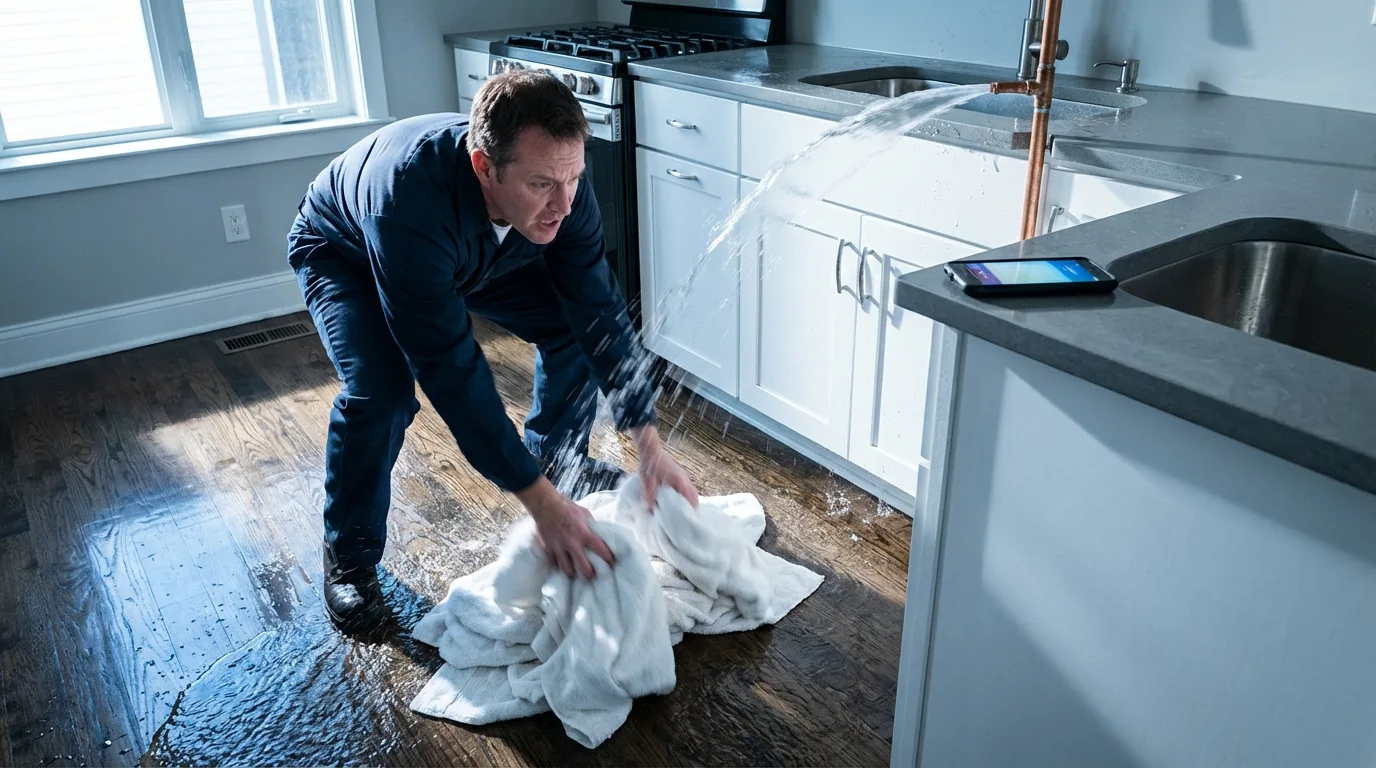
Shut off water, turn off electricity to affected areas. If structural or fire danger exists, get everyone out and call 911.
Insurance Claims Guide
What you do in the first hour after discovering property damage determines how your entire claim plays out. Safety first, then document, mitigate, and report — in that order. This guide gives you the step-by-step plan.
Key Steps
Step 1
Shut off water, turn off electricity to affected areas. If structural or fire danger exists, get everyone out and call 911.
Step 2
Once safe, grab your phone. Take hundreds of photos and a narrated video walkthrough. Photograph the source of damage, every affected room, and all damaged items.
Step 3
Start water extraction, tarp the roof, board up windows. Don't wait for the adjuster. Your policy REQUIRES you to prevent further damage. Save all receipts.
Step 4
Report within the first hour if possible. Get your claim number. Write down the representative's name and direct contact.
Step 5
Note the time damage was discovered, every action taken, every call made, and every person spoken to. This record is invaluable for disputes.
Safety always comes first — shut off utilities before entering damaged areas
Your policy requires you to mitigate further damage — never wait for the adjuster
Document everything with photos and video before anyone touches anything
Report to your insurer within the first hour if possible, always within 24 hours
Emergency mitigation costs are reimbursable — save every receipt
A claim diary tracking every call and decision is your most underrated tool
In-Depth Guide
The first 60 minutes after discovering property damage establish the trajectory of your entire insurance claim. Actions taken — or not taken — during this window directly affect documentation quality, mitigation compliance, and ultimately claim settlement. The sequence matters: safety first, then documentation, then mitigation, then reporting. Deviating from this order can compromise both your physical safety and your financial recovery.
Documentation created in the first hour is the most valuable evidence in any property claim because it captures conditions before any cleanup, repair, or deterioration changes the scene. Insurance adjusters arrive days or weeks later — by then, water has been extracted, damaged materials removed, and the original conditions are gone. Your photographs, video, and written observations become the primary evidence for establishing the scope and cause of damage. The difference between a well-documented and poorly-documented claim can be tens of thousands of dollars in settlement.
The duty to mitigate is perhaps the most misunderstood aspect of property insurance. Your policy obligates you to take reasonable steps to prevent further damage after a covered loss. This means extracting water, tarping damaged roofs, boarding broken windows, and shutting off water supply to broken pipes — immediately, before the adjuster arrives. Failure to mitigate can result in denial of claims for secondary damage (mold from standing water, additional water intrusion from an untarped roof). Every mitigation expense is reimbursable when properly documented with receipts and photographs.
Visual Reference
Real-world examples of the documentation, coordination, and processes involved in insurance claims.
The first hour is critical. Safety, documentation, mitigation, and reporting — in that order.
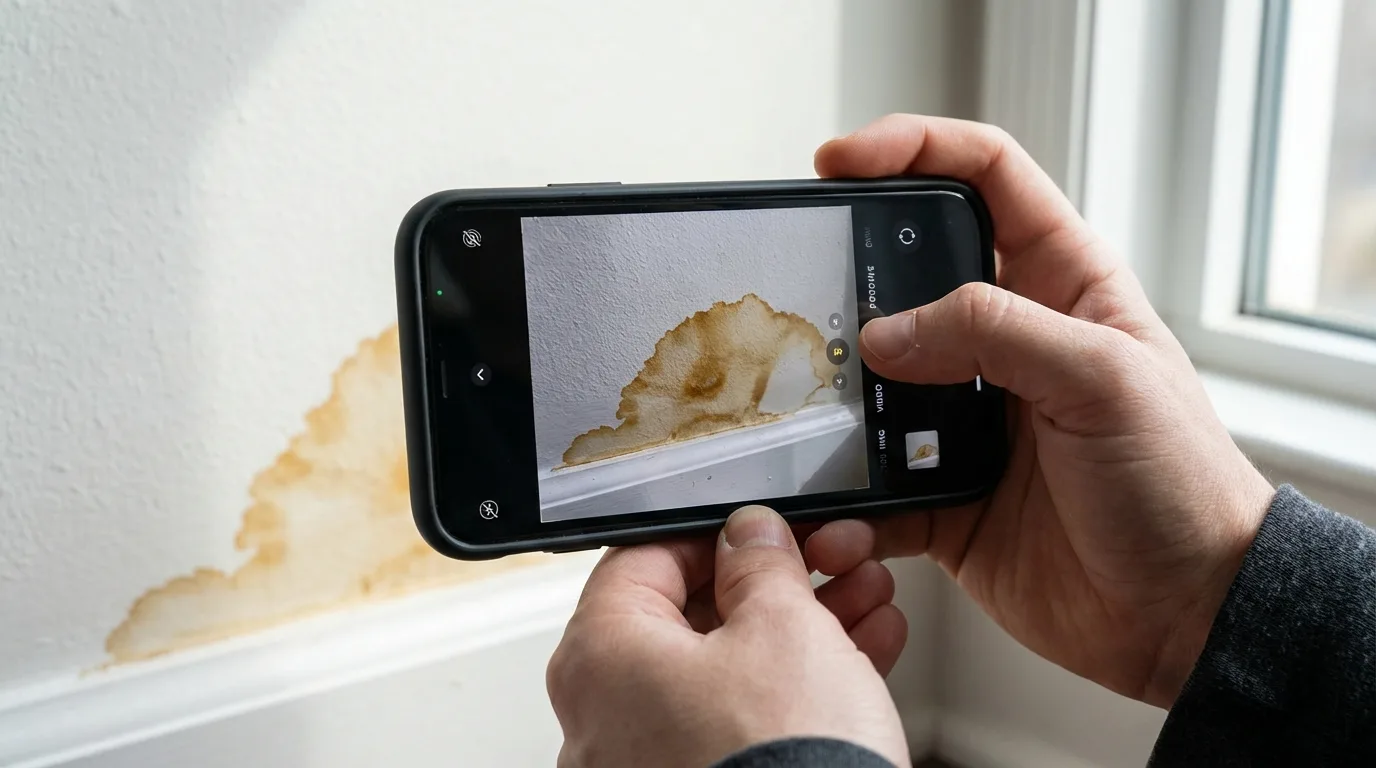
Before anyone touches anything, photograph every angle of every affected area.

Professional restoration teams extract water and deploy drying equipment immediately upon arrival.
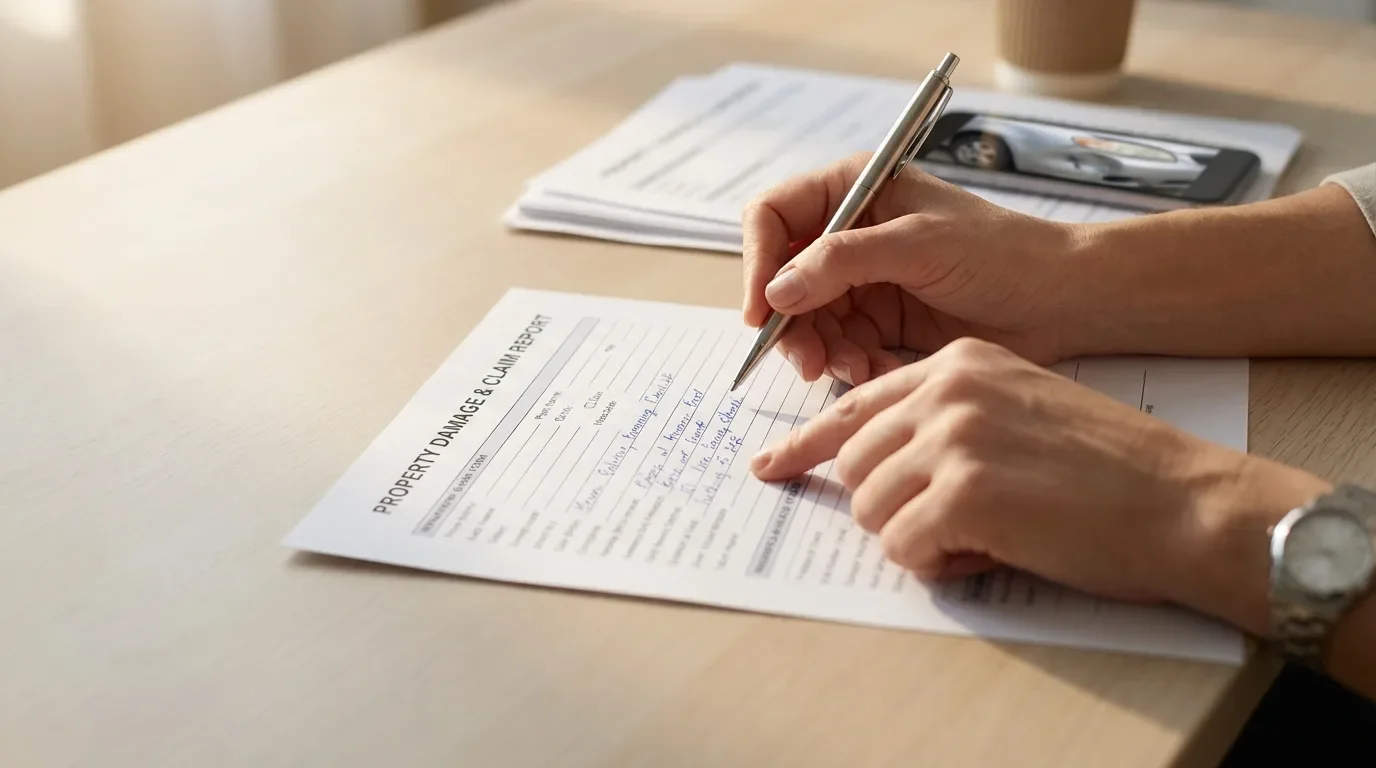
Reporting to your insurer within the first hour gets your claim number established and starts the adjuster dispatch process. Always get the representative's name and direct contact information.
Step-by-Step
Understanding each step gives you leverage and helps prevent common problems.
Evacuate if needed. Shut off water supply or electricity. Address immediate hazards.
Photographs, video walkthrough, inventory of visible damage. Capture the cause and the result.
Water extraction, tarping, board-up. Call a professional restoration company for immediate response.
Call your insurer, get a claim number, start your diary, and secure any important documents or valuables that can be moved safely.
South Florida
During hurricane season, expect delays in adjuster response. Begin mitigation immediately and document everything. Palm Build responds 24/7.
Charlotte / NC
Pipe bursts from freezing are common in winter. Shut off the main water valve immediately and begin extraction before calling insurance.
Coastal SC
Storm surge and wind damage may involve both homeowners and flood policies. Document both exterior and interior damage separately.
Common Questions
Safety first — always. Shut off utilities to affected areas, evacuate if there is structural or fire danger, and call 911 if needed. Once safe, documentation is the most critical step. Photograph and video everything before anyone touches anything. This evidence is irreplaceable and directly determines your claim outcome.
No. Your insurance policy requires you to mitigate further damage — waiting for the adjuster while water sits or a roof stays exposed can result in claim denial for the secondary damage. Begin emergency mitigation immediately, but document everything thoroughly before and during the process. Save all receipts for emergency spending.
Take at least 200 photos. Wide shots of each room show the extent of damage. Close-ups show specific damage, serial numbers, and brand names on damaged items. Photograph the source of damage, every affected room, and rooms that appear unaffected but may have hidden damage. A narrated video walkthrough adds context that photos alone cannot convey.
A claim diary is a chronological record of every action taken, every call made, and every person spoken to throughout your claim. Note times, dates, names, and what was discussed. This record becomes invaluable during disputes — it proves you acted promptly, fulfilled your mitigation duty, and documents any promises or commitments made by the insurance company.
Yes — and you should. Emergency mitigation (water extraction, tarping, board-up) is required by your policy. However, do not make permanent repairs until the adjuster documents the damage. The distinction is critical: temporary measures that prevent further damage are expected and reimbursable. Permanent repairs that change the evidence should wait.
Continue Reading
Our team navigates insurance claims daily. Call for guidance on documentation, adjuster coordination, or claim disputes.