Key takeaways
- Mold can begin growing within 24 to 48 hours on wet materials, so every hour of delay increases damage scope and cost.
- Never touch electrical panels or use power tools while standing in water. Call an electrician if the panel is not safely accessible.
- Document everything with photos and video before moving any items. This evidence is critical for insurance approval.
- Keep indoor humidity below 50% using dehumidifiers and ventilation to prevent secondary mold growth during drying.
- Florida homeowners have only 1 year to file notice of a property insurance claim. NC and SC have separate proof-of-loss rules.
If you have water damage, your goal in the first 24 hours is simple: stay safe, stop the water, document the loss, remove standing water, and start aggressive drying before mold becomes likely. Mold can begin growing within 24 to 48 hours on wet materials, so every hour you wait increases the scope of demolition and the odds your insurance claim becomes more complicated. Start by avoiding electrocution hazards, shutting off power only if you can reach the panel from a dry location, and calling an electrician if you cannot. Then stop the leak, take photos for insurance, and begin emergency water damage restoration with extraction and dehumidification.
- 1
Ensure personal safety
Turn off electricity from a dry location. Evacuate if you see structural sagging, gas odors, or sewage contamination.
- 2
Stop the water source
Shut off the main water valve for pipe failures, or contain storm intrusion with tarps and barriers where safe.
- 3
Document everything for insurance
Photograph and video all damage before moving anything. Capture wide shots, close-ups, serial numbers, and receipts.
- 4
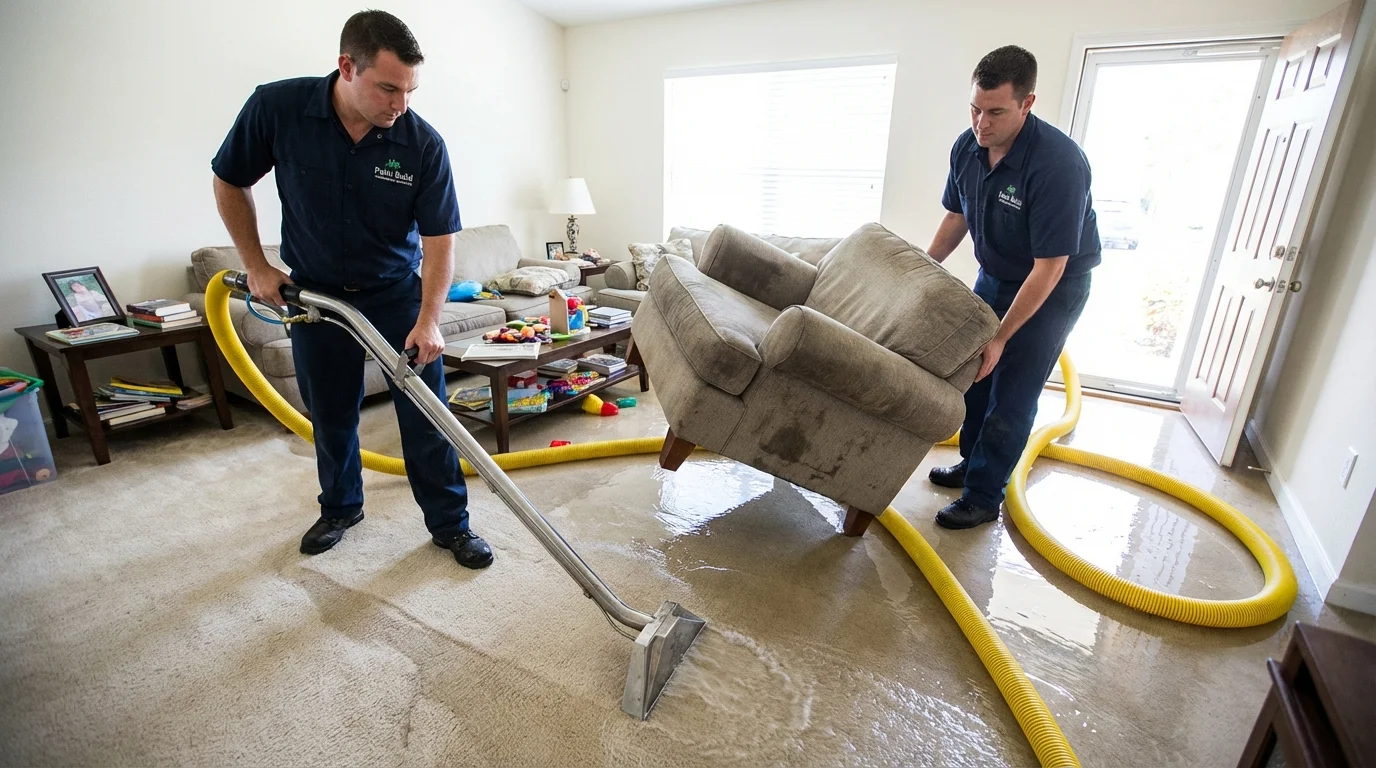
Remove standing water
Use mops, towels, or a wet-dry vacuum (only when power is confirmed safe). Never use a household vacuum.
- 5
Start drying and dehumidifying
Open windows if humidity is low outside. Run dehumidifiers and fans to bring indoor humidity below 50%.
- 6
Triage materials and contents
Separate salvageable items from items that must be discarded. Freeze wet documents and photos in sealed bags.
- 7
Call a certified restoration team
Professional extraction, moisture mapping, and daily drying documentation protect your property and your insurance claim.
Mold growth window
24-48 hrs
EPA and CDC recommend drying within this window
Homes with water claims
1 in 50
Annual rate among insured U.S. homes
Target indoor humidity
Under 50%
CDC guideline to prevent mold during drying
Step 1: Immediate Safety and Shutoffs
Electrical safety and when to call an electrician
Electricity and water are a lethal combination. The CDC warns never to turn power on or off or use electric tools while standing in water. If you can reach your breaker panel from a dry, elevated position, turn off power to all affected areas. If the panel is in a flooded area or you would have to step through standing water to reach it, leave the home and call an electrician or your utility company.
OSHA flood response guidance reinforces this: turn off power at the main breaker if water has been near circuits, and never enter flooded areas or touch electrical equipment if the ground is wet. This is not optional. Even a small amount of standing water near wiring can create a fatal shock hazard.
Do
- Turn off power from a dry location only
- Wear rubber-soled shoes and dry gloves
- Call an electrician if the panel is not safely reachable
- Wait for a professional assessment before restoring power
Do not
- Step into standing water to reach the panel
- Use any electrical appliances in wet areas
- Use extension cords in or near water
- Assume power is off without verifying at the breaker
Gas leaks, ceiling collapse, and evacuation triggers
If you smell gas at any point, evacuate immediately and call your gas company from outside the home. Do not flip switches or use phones inside, as even a small spark can ignite a leak. Sagging ceilings are another evacuation trigger. Waterlogged drywall and insulation can weigh hundreds of pounds, and a ceiling collapse can cause serious injury. If you see bulging, discoloration, or dripping from above, leave the room and stay out until a professional can assess the structure.

Step 2: Stop the Water Source and Prevent More Damage
Shutoff valve basics for burst pipes and appliance leaks
For burst pipes, water heater failures, and appliance leaks, your first move is the shutoff valve. Every home has a main water shutoff, typically near the water meter or where the main line enters the house. Turn it clockwise to close. If the leak is isolated to one fixture (a toilet, washing machine, or dishwasher), use the local shutoff valve behind or beneath the appliance instead. Knowing where your shutoff valves are before an emergency saves critical minutes.

Storm intrusion: quick containment when safe
When water is entering from storm damage, a damaged roof, or wind-driven rain, you cannot simply turn off a valve. If it is safe to do so, place tarps over exposed areas, use buckets or bins under active drips, and push towels or barriers along door thresholds. Do not climb onto a damaged roof during a storm. For significant storm damage, contact a storm and hurricane damage restoration team to safely tarp and contain the intrusion. If you experienced a fire and the water damage is from fire suppression, our fire and smoke cleanup team handles the combined damage.
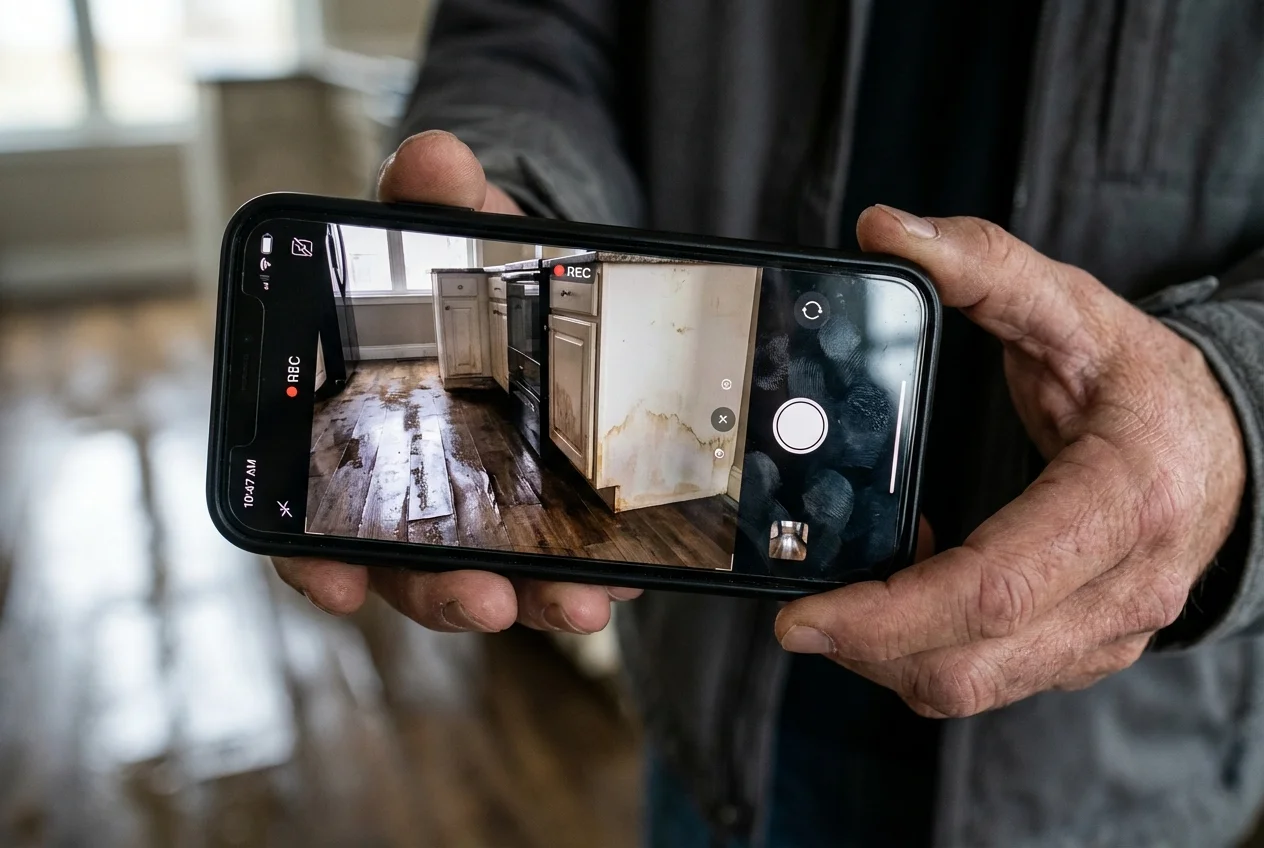
Step 3: Document Everything for Insurance Before You Move Items
This step is one that homeowners most often skip or rush. Before you move furniture, pull up carpet, or start cleaning, you need thorough documentation. Your insurance adjuster was not there when the water hit. Photos, video, and written notes are the evidence that supports your claim. Doing this right on day one directly affects whether your claim gets approved and how much you receive. For a complete walkthrough of the claim process, see our guide on how to file a water damage insurance claim.
Photo and video checklist
- Wide shots of every affected room from multiple angles
- Close-ups of water lines on walls, baseboards, and cabinets
- Damaged flooring, including under rugs and mats
- Serial numbers and model numbers of damaged appliances and electronics
- The water source or point of entry (burst pipe, roof breach, appliance connection)
- Video walkthrough narrating what you see, when it happened, and what rooms are affected
- Damage to personal belongings: furniture, clothing, documents, electronics
- Any pre-existing conditions you want to distinguish from the new damage
What receipts and notes to keep in the first day
Start a written log with the date and time the damage was discovered, what caused it (if known), and every action you take. Save receipts for any emergency supplies: fans, dehumidifiers, cleaning materials, hotel stays, and meals if you are displaced. Your insurer may reimburse these under additional living expenses coverage. Keep a running list of damaged items with approximate replacement values. The more organized your documentation, the smoother your insurance restoration process will be.
State insurance deadlines: Florida, North Carolina, and South Carolina
Step 4: Remove Standing Water Safely
What you can do yourself vs. when to call a professional
For small, contained leaks with clean water (a broken supply line or appliance overflow), you can start removing water yourself using mops, towels, and buckets. A wet-dry shop vacuum is effective for larger volumes, but only when you have confirmed the power is safe in the area. For anything involving contaminated water, water in wall cavities, or standing water deeper than a few inches, professional extraction is safer and far more effective. Professional truck-mounted extractors remove water at rates that consumer equipment cannot match, and the faster the water is out, the less damage spreads. For context on what professional restoration typically costs, see our water damage restoration cost guide.
Why household vacuums are dangerous and what to use instead
Safe water removal methods
- Mops and towels for small spills
- Wet-dry shop vacuum (power safety confirmed)
- Squeegees to push water toward drains
- Professional truck-mounted extraction for large losses
Unsafe methods to avoid
- Standard household vacuum (shock and fire hazard)
- Pushing water into unaffected rooms
- Using electrical equipment while standing in water
- Ignoring water in wall cavities or under flooring
Multiple emergency response agencies explicitly warn against using household vacuums for water removal. Standard vacuums are not designed for liquids, and using one in wet conditions creates a shock hazard and can destroy the motor. A wet-dry vacuum (shop vac) is designed for this purpose, but only use it when you can confirm the outlet and area are dry and safe.
Step 5: Start Drying and Dehumidifying
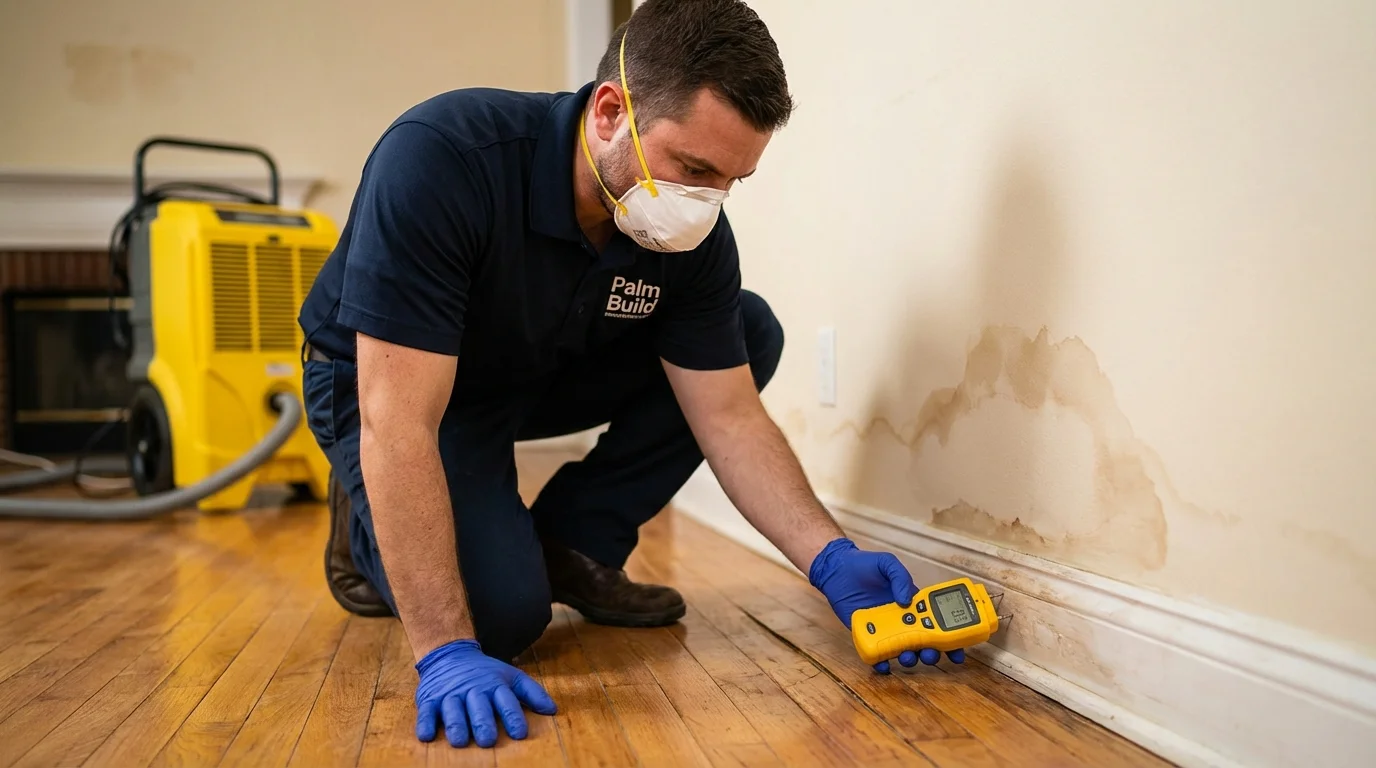
Once standing water is removed, the real race against mold begins. The EPA states that if wet or damp materials are dried within 24 to 48 hours after a leak or spill, in most cases mold will not grow. The CDC recommends keeping indoor humidity no higher than 50% throughout the drying process. Your goal is to move as much moisture out of the building materials and air as possible, as quickly as possible.
Humidity targets and how to measure them
Pick up an inexpensive digital hygrometer (available at any hardware store for under $15) to monitor humidity levels in affected rooms. Your target is below 50% relative humidity consistently. The EPA recommends maintaining indoor humidity between 30% and 50% for mold prevention. If humidity stays above 60% despite your efforts, you need more dehumidification capacity. Commercial-grade dehumidifiers can remove 30 to 50 pints of water per day, compared to 10 to 15 for consumer models.
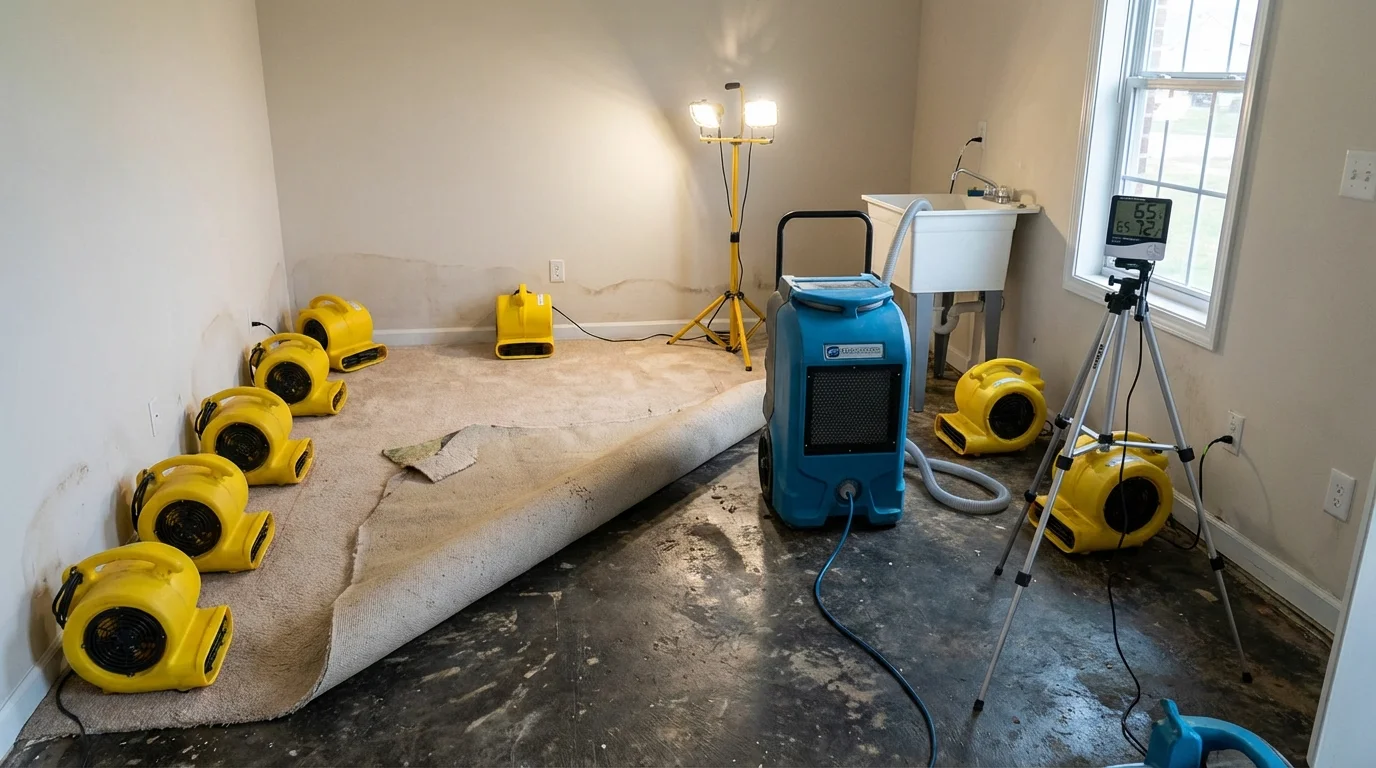
Fan and ventilation rules (including when NOT to use fans)
For confirmed clean water losses (a broken supply line, ice maker, or water heater), fans and open windows accelerate drying. Position air movers to blow across wet surfaces rather than directly at walls, which can push moisture deeper into materials. If outdoor humidity is lower than indoor humidity, open windows on opposite sides of the home to create cross-ventilation. Close windows if it is raining or if outdoor humidity is above 60%. For potential mold remediation concerns, drying speed and documentation are what matter most.
Expected drying timelines
Hours 0-4
Emergency extraction
Remove all standing water. Begin running dehumidifiers and air movers in affected areas.
Hours 4-12
Active drying begins
Pull back carpet and pad. Open cabinet doors. Remove baseboards if water reached behind walls. Monitor humidity readings.
Hours 12-24
First moisture checkpoint
Take moisture meter readings on walls, floors, and subfloor. Adjust equipment placement based on readings. Humidity should be trending downward.
Days 2-3
Sustained drying
Continue running equipment 24/7. Daily moisture readings confirm progress. Materials should be measurably drier each day.
Days 3-5+
Drying verification
Professional moisture mapping confirms all materials have reached acceptable dryness levels. Equipment is removed. Rebuilding can begin.
Step 6: Triage Materials and Contents
What to throw away vs. what to salvage
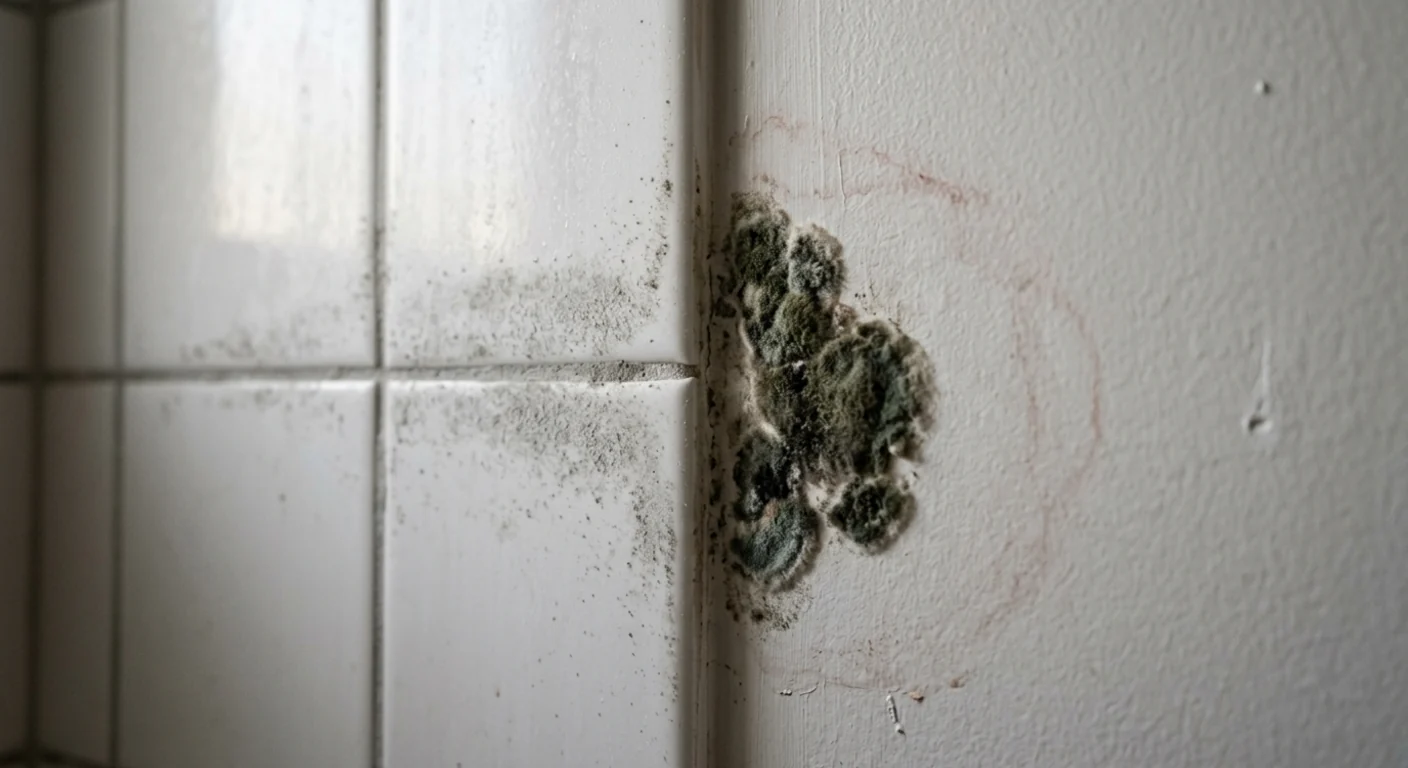
Not everything can be saved, and trying to salvage the wrong materials wastes time and creates health risks. The EPA and CDC recommend discarding porous items that cannot be cleaned and dried within 24 to 48 hours, especially after exposure to contaminated water. The table below, adapted from EPA guidance, helps you make fast decisions about what stays and what goes.
| Material | Salvageable? | Action within 24-48 hours |
|---|---|---|
| Hardwood flooring | Often yes | Extract water, dry slowly to reduce cupping and warping. Professional monitoring recommended. |
| Carpet and pad | Maybe carpet, rarely pad | Extract water immediately. Carpet can often be cleaned and re-laid. Pad absorbs contaminants and usually must be replaced. |
| Drywall (clean water) | Sometimes | If wet less than 48 hours and no contamination, can be dried in place. Cut and remove if mold appears or water was contaminated. |
| Drywall (contaminated water) | No | Remove and replace all drywall exposed to Category 2 or 3 water. |
| Insulation (fiberglass batts) | No | Absorbs water and contaminants. Remove and replace. |
| Books and documents | Yes, with care | Freeze in sealed plastic bags within 48 hours. Freeze-drying preserves them. Do not try to open or separate wet pages. |
| Electronics | Depends | Do not power on wet electronics. Air-dry or bring to a data recovery specialist. Some items can be cleaned by a contents restoration team. |
| Upholstered furniture | Sometimes | Small items can be cleaned and dried. Large pieces saturated with contaminated water are usually not worth saving. |
| Clothing and textiles | Usually yes | Launder in hot water if clean water loss. Dry clean or discard if exposed to sewage or floodwater. |
| Mattresses | Rarely | Absorb water deep into core. If exposed to anything other than a small clean-water spill, replace. |
Material-by-material triage guide (adapted from EPA water damage cleanup guidance)

Special items: documents, photos, and electronics
- Wet documents and photos: Place in sealed plastic bags and freeze as soon as possible. Freeze-drying preserves paper without further damage. Do not attempt to peel apart wet pages or photos.
- Electronics: Do not power on any device that has gotten wet. Remove batteries where possible. Let items air-dry for at least 72 hours or take them to a professional recovery service.
- Photographs and artwork: Rinse gently in clean water if contaminated, then air-dry face-up on a clean surface. Do not stack wet photos.
- Important records: If originals are damaged, contact issuers for replacements (insurance policies, birth certificates, deeds).
Once drying and triage are complete, the next phase is reconstruction services: replacing drywall, flooring, insulation, and other materials that could not be saved.
Understanding Water Contamination Categories
The category of water that caused your damage determines how aggressive the cleanup needs to be, whether you can safely handle some of it yourself, and what your insurance will cover. IICRC standards define three categories that every restoration professional uses.
| Category | Source examples | Health risk | DIY possible? | Professional needed? |
|---|---|---|---|---|
| Category 1: Clean water | Broken supply line, faucet, ice maker, rainwater (direct) | Low | Yes, for small areas | Recommended for large areas or wall cavities |
| Category 2: Gray water | Washing machine, dishwasher, toilet overflow (urine only), sump pump | Moderate | Limited, with PPE | Yes, especially if affecting porous materials |
| Category 3: Black water | Sewage backup, floodwater, toilet overflow with feces, standing water over 48 hours | High | No | Required. Full PPE, containment, and disposal protocols |
Water contamination categories and what they mean for your cleanup
An important rule that many homeowners miss: any Category 1 water that sits for more than 48 hours automatically escalates to Category 2 or 3 as bacteria multiply. That is another reason the 24-hour response window matters so much. What starts as a simple clean-water pipe break becomes a contamination event if left standing.

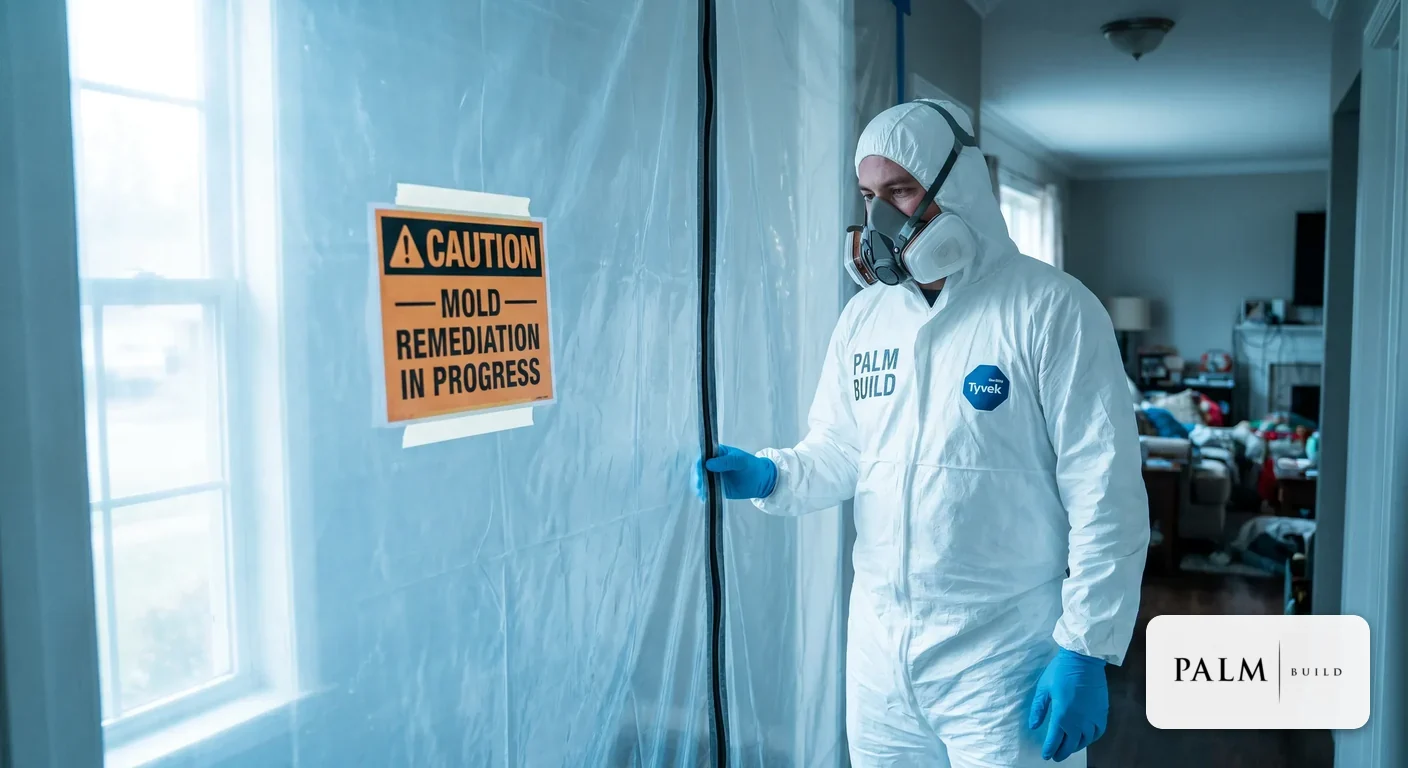
Step 7: Call a Certified Restoration Team and Set Expectations
What a professional team does in the first 24 hours
A certified restoration team brings capabilities that go far beyond what any homeowner can do with a shop vac and box fans. When Palm Build responds to a water loss, the first-day protocol follows IICRC S500 standards and produces the documentation your insurer expects.
- 1
Site assessment and safety
The team secures the site, verifies electrical safety, and identifies the water source and contamination category.
- 2
Moisture mapping
Using thermal imaging cameras and penetrating moisture meters, the team maps exactly where water has traveled, including behind walls and under flooring that looks dry on the surface.
- 3
Extraction
Truck-mounted extractors remove standing water at industrial rates. Carpet is pulled, pad removed, and subfloor access created.
- 4
Drying plan
Based on the moisture map, the team places dehumidifiers and air movers in calculated positions for maximum drying efficiency.
- 5
Daily documentation
Every day, the team records moisture readings, photos, and a drying log. This documentation is what your insurance company uses to validate the scope and approve the claim.

Commercial properties and HOA considerations
If you manage a commercial property, apartment building, or HOA community, the stakes multiply. Tenant safety, business downtime, liability documentation, and multi-unit containment all require coordination that goes beyond a single-family response. Commercial restoration projects need a dedicated project manager, daily progress reports for stakeholders, and containment protocols that protect unaffected units. For condo and HOA buildings, figuring out who pays for water damage adds another layer of urgency.
In the Carolinas especially, crawl spaces are a common hidden source of ongoing moisture problems after water events. If your property has a crawl space, request an inspection as part of the water damage assessment. Standing water and humidity in crawl spaces feed mold growth that can affect the entire structure. Palm Build's crawl space cleanup service addresses this as part of the full restoration scope.
What to Know in Florida, North Carolina, and South Carolina

The core steps of water damage response are the same everywhere, but climate, building practices, and insurance rules create real differences across these three states. For a complete Florida-specific walkthrough, see our water damage restoration guide for Florida homeowners.
In Florida, the combination of heat, humidity, and storm frequency makes rapid dehumidification and moisture documentation especially important. Florida Department of Health guidance emphasizes controlling moisture aggressively and discarding items that cannot be dried within 24 to 48 hours after floodwater exposure. Florida homeowners also face the strictest claim-filing window: only 1 year from the date of loss under Florida Statutes section 627.70132.
In North Carolina and South Carolina, hurricane flooding and wind-driven rain are major drivers, but interior water losses also frequently involve crawl spaces and seasonal humidity. North Carolina's Historic Preservation Office provides a state-hosted drying guide that emphasizes staged drying actions. South Carolina's environmental guidance warns against turning HVAC systems on before inspection and cleaning after flooding, as contaminated air can spread through ductwork and into every room.
Frequently Asked Questions
How fast do I need to act after water damage? +
Should I turn off electricity if there is standing water? +
Can I use a household vacuum to remove water? +
How long does drying usually take after water damage? +
Will insurance pay for water damage cleanup? +
What if the water is from sewage or floodwater? +
When should I call a professional restoration company? +
24/7 Water Damage Restoration
Palm Build's emergency water extraction and drying services across Florida and the Carolinas.
Water Damage Restoration Cost Guide (2026)
What water damage restoration typically costs and what drives the price up or down.
How to File a Water Damage Insurance Claim
Step-by-step guide to documenting, filing, and protecting your water damage insurance payout.
Mold Remediation Cost Guide (2026)
What mold remediation costs and when water damage leads to mold problems.
Insurance Restoration Process
How Palm Build works with your insurance company from first call to final walkthrough.
Restoration Company vs General Contractor: Who to Call First
When to call a restoration company vs. a general contractor, the difference between mitigation and reconstruction, and state licensing rules for FL, NC, and SC.
Water damage right now? Call Palm Build 24/7.
Our IICRC-certified crews respond across Florida, North Carolina, and South Carolina with the equipment and documentation your insurance company expects.
Found this helpful? Send it to someone who needs it.