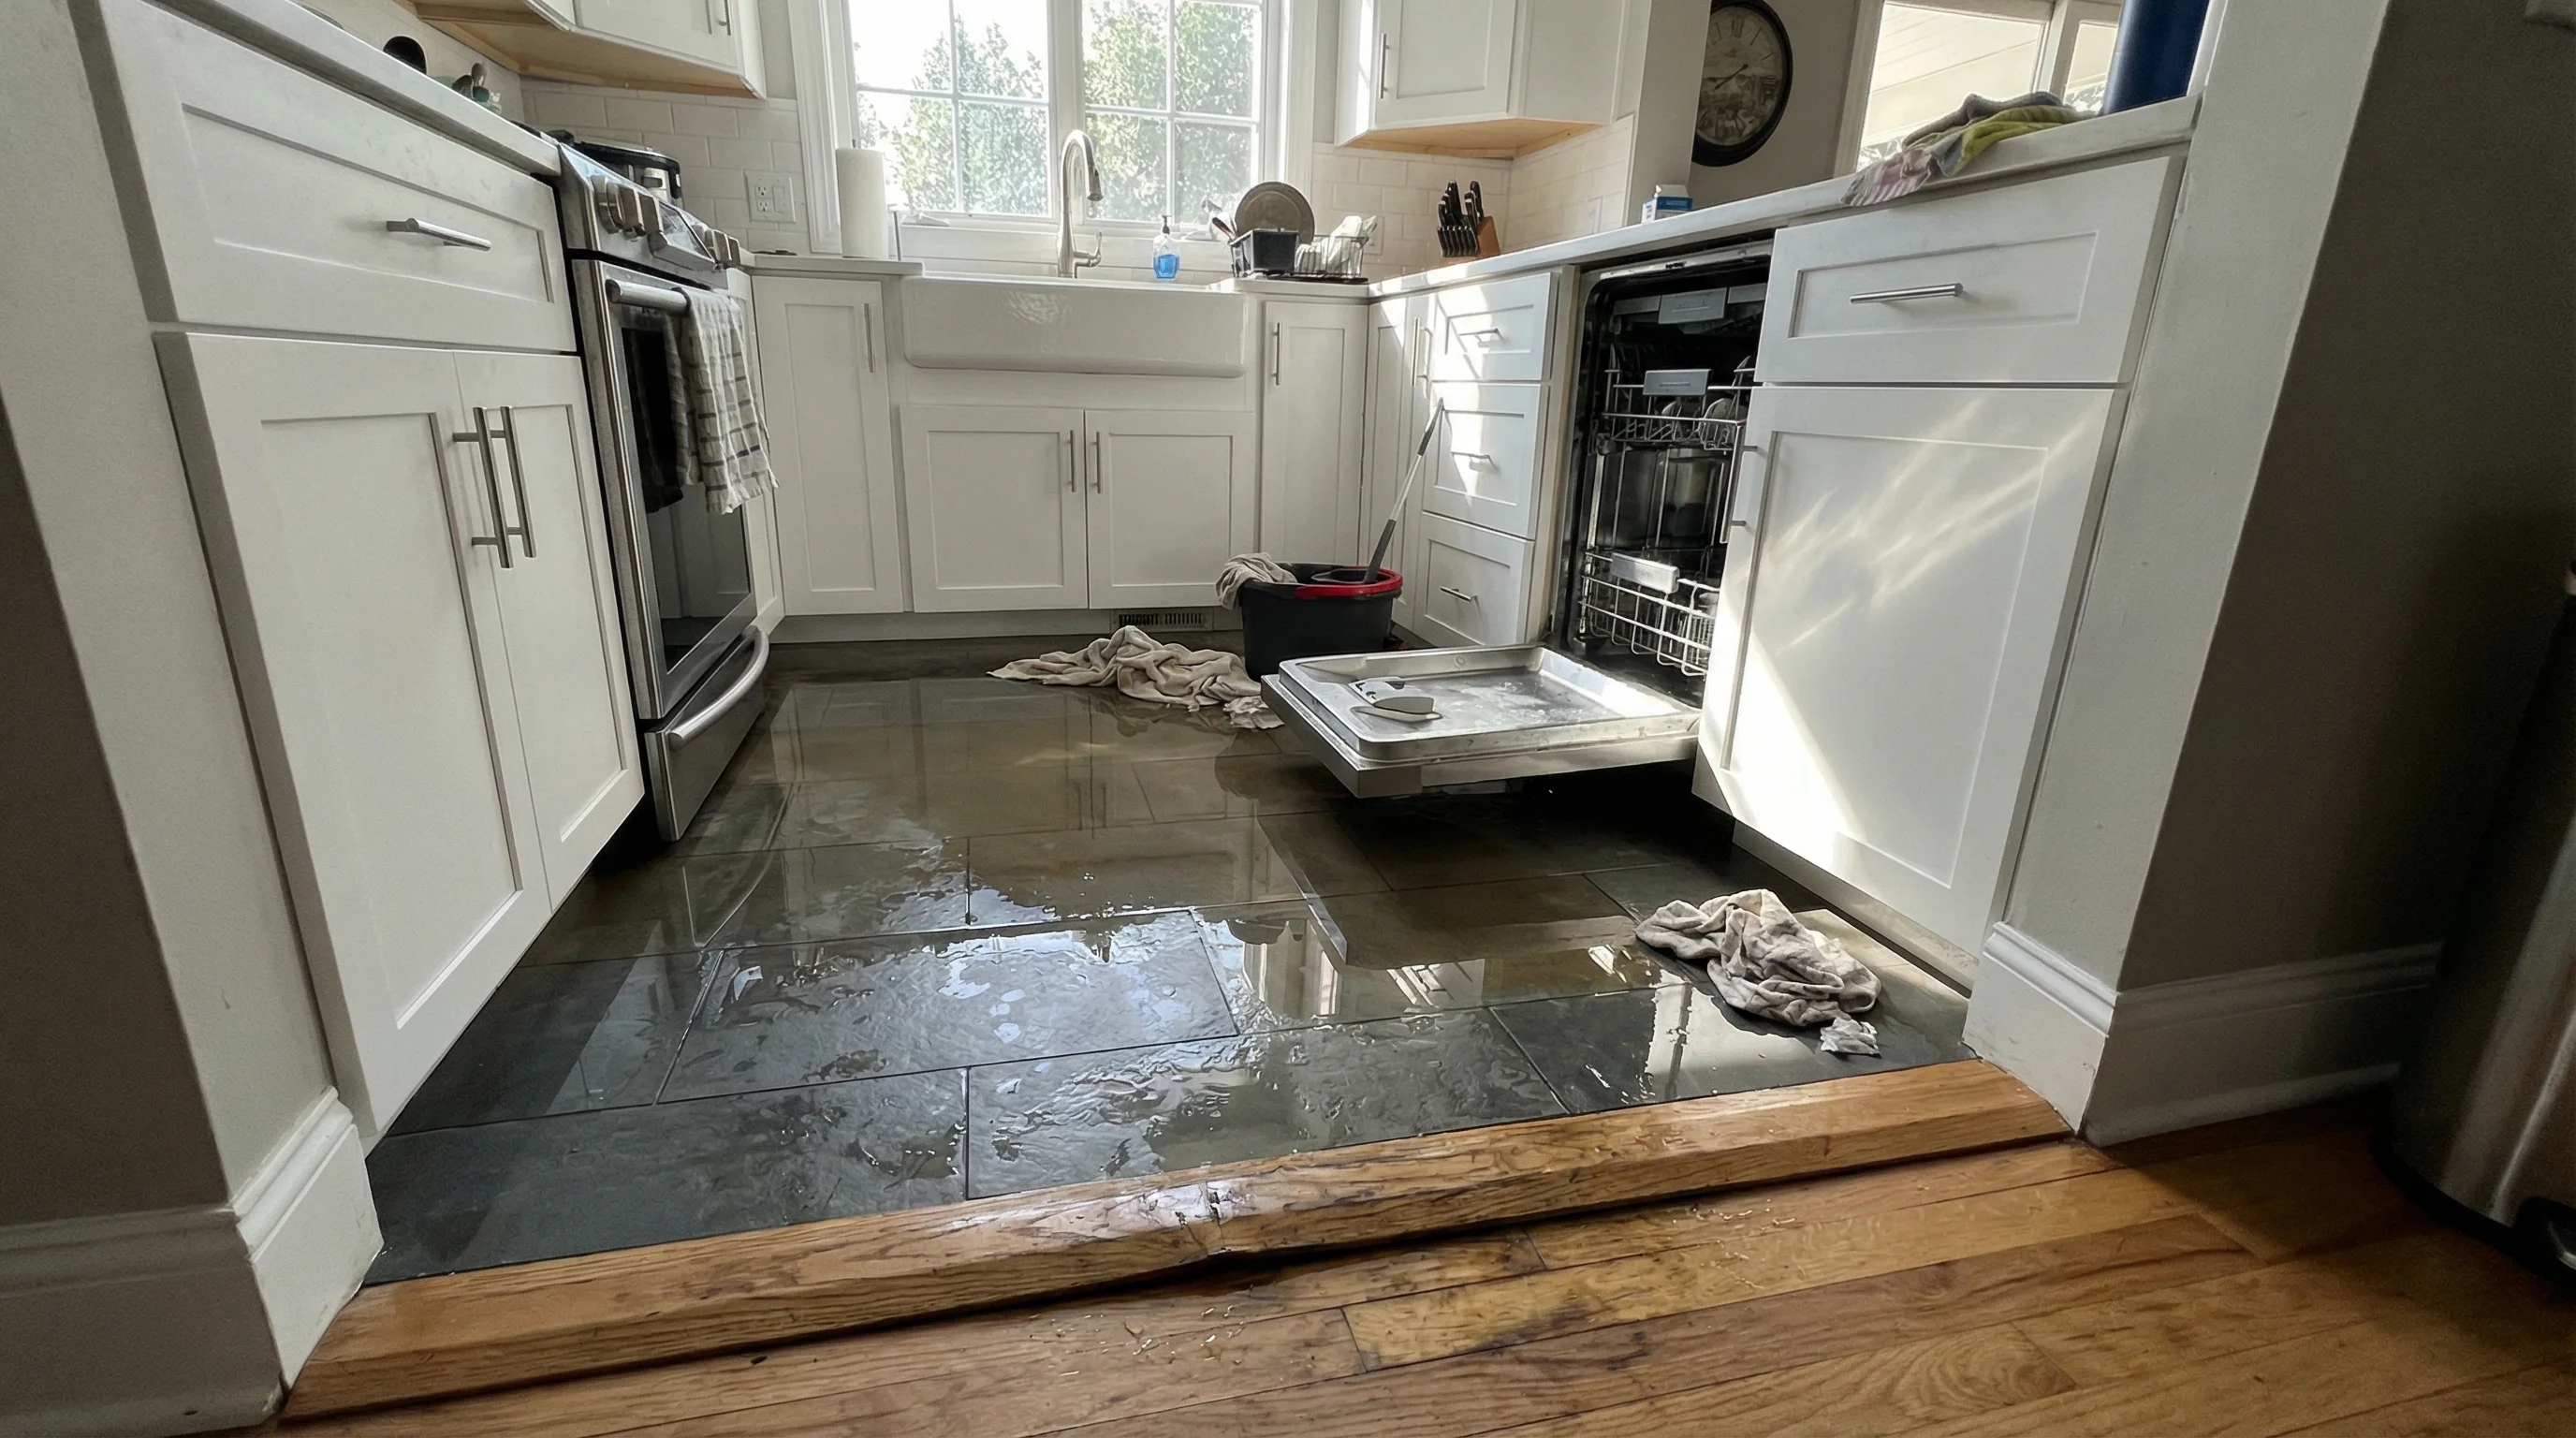
Kitchen appliance leak causing standing water near cabinets

Water Restoration Sub-Guide

Appliance Leak Water Damage Response

Appliance leaks often spread under finishes before they are visible. This guide covers immediate shutdown, hidden-moisture detection, and mitigation sequencing that prevents small leaks from becoming major rebuilds.

  • Hidden Moisture Pathways
  • Cabinet and Subfloor Risk
  • Fast Extraction
  • Claim-Ready Documentation

First-Hour Priorities

What to do immediately

Step 1

Shut supply valve and power safely

Isolate the leaking appliance by closing the dedicated shut-off valve, and do not operate electrical switches or outlets in any area where standing water is present. If the shut-off valve is inaccessible or corroded, turn off the main water supply at the meter or building entry. Avoid walking through pooled water near electrical panels or appliance circuits until a qualified person confirms the area is safe.

Step 2

Check adjacent and lower rooms for migration

Leaks from kitchens and laundry rooms can travel under flooring, along baseplate channels, and into lower-level ceilings well before any visible staining appears. Inspect rooms that share a wall with the affected space, and check ceilings directly below for soft spots, discoloration, or dripping. Early detection of secondary spread areas is critical because concealed moisture drives mold colonization and structural softening within 48 to 72 hours.

Step 3

Document cabinetry, flooring, and content exposure

Photograph toe-kick zones, baseboards, swollen materials, and any discoloration on cabinet panels or flooring transitions before anything is moved or discarded. Include wide-angle shots that show the appliance in context as well as close-ups of damage indicators such as warping, delamination, or waterline staining. This documentation forms the baseline for insurance claims and helps adjusters understand the scope before mitigation work alters the scene.

Step 4

Start extraction and meter-guided drying

Rapid water extraction using weighted tools and sub-surface attachments reduces swelling, delamination, and microbial risk in enclosed finish systems such as cabinetry and laminate flooring. Moisture meters and thermal imaging should guide equipment placement to ensure drying energy reaches concealed cavities, not just exposed surfaces. Early extraction combined with targeted airflow can often preserve materials that would otherwise require full replacement if left saturated for more than 24 hours.

In-Depth Guide

Understanding the process

Appliance leaks are among the most common sources of residential water damage, and four appliances account for the vast majority of claims: water heaters, dishwashers, washing machines, and AC condensate systems. Water heater failures are often the most severe because a ruptured tank or failed relief valve can release the full reservoir, typically 40 to 80 gallons, across the floor in minutes. Dishwashers and washing machines produce smaller volumes per event, but their leaks frequently go undetected for hours or days because water travels under cabinetry, behind walls, and beneath flooring before any surface evidence appears. AC drip pan overflows and clogged condensate lines are particularly prevalent in humid climates, where continuous cooling cycles generate substantial condensation that overwhelms neglected drain paths. The hidden damage patterns from appliance leaks are what make them disproportionately costly relative to the visible water present. In a kitchen, water from a dishwasher supply-line failure migrates into toe-kick voids, wicks up into particleboard cabinet bases, and saturates subfloor sheathing, all while the homeowner may only see a thin film of water on the tile in front of the unit. Laundry rooms present similar risks: washing machine overflows often travel along the subfloor seam between the laundry area and adjacent hallways or closets, reaching rooms that have no visible connection to the source. By the time flooring begins to buckle or a ceiling below shows staining, the damage perimeter can be two to three times larger than the initial wet area suggested. This discrepancy between visible evidence and actual damage is also why small appliance leaks can lead to surprisingly large insurance claims. A slow dishwasher drain leak that persists unnoticed for a week may affect cabinetry, subflooring, drywall, and adjacent room finishes, resulting in a mitigation and reconstruction scope that far exceeds what the homeowner expected from what appeared to be a minor drip. Prompt professional assessment with moisture-detection equipment is the most reliable way to define the true scope early, contain the loss, and prevent secondary damage such as mold growth from turning a manageable repair into a major rebuild.

Field Visuals

Scenarios, equipment, and mitigation examples

These examples show the conditions and response patterns teams evaluate during active water losses.

Kitchen dishwasher leak spreading under cabinetry and flooring

Cabinet Toe-Kick Saturation

Appliance losses frequently hide in toe-kick voids and panel seams, even when surface pooling appears minor.

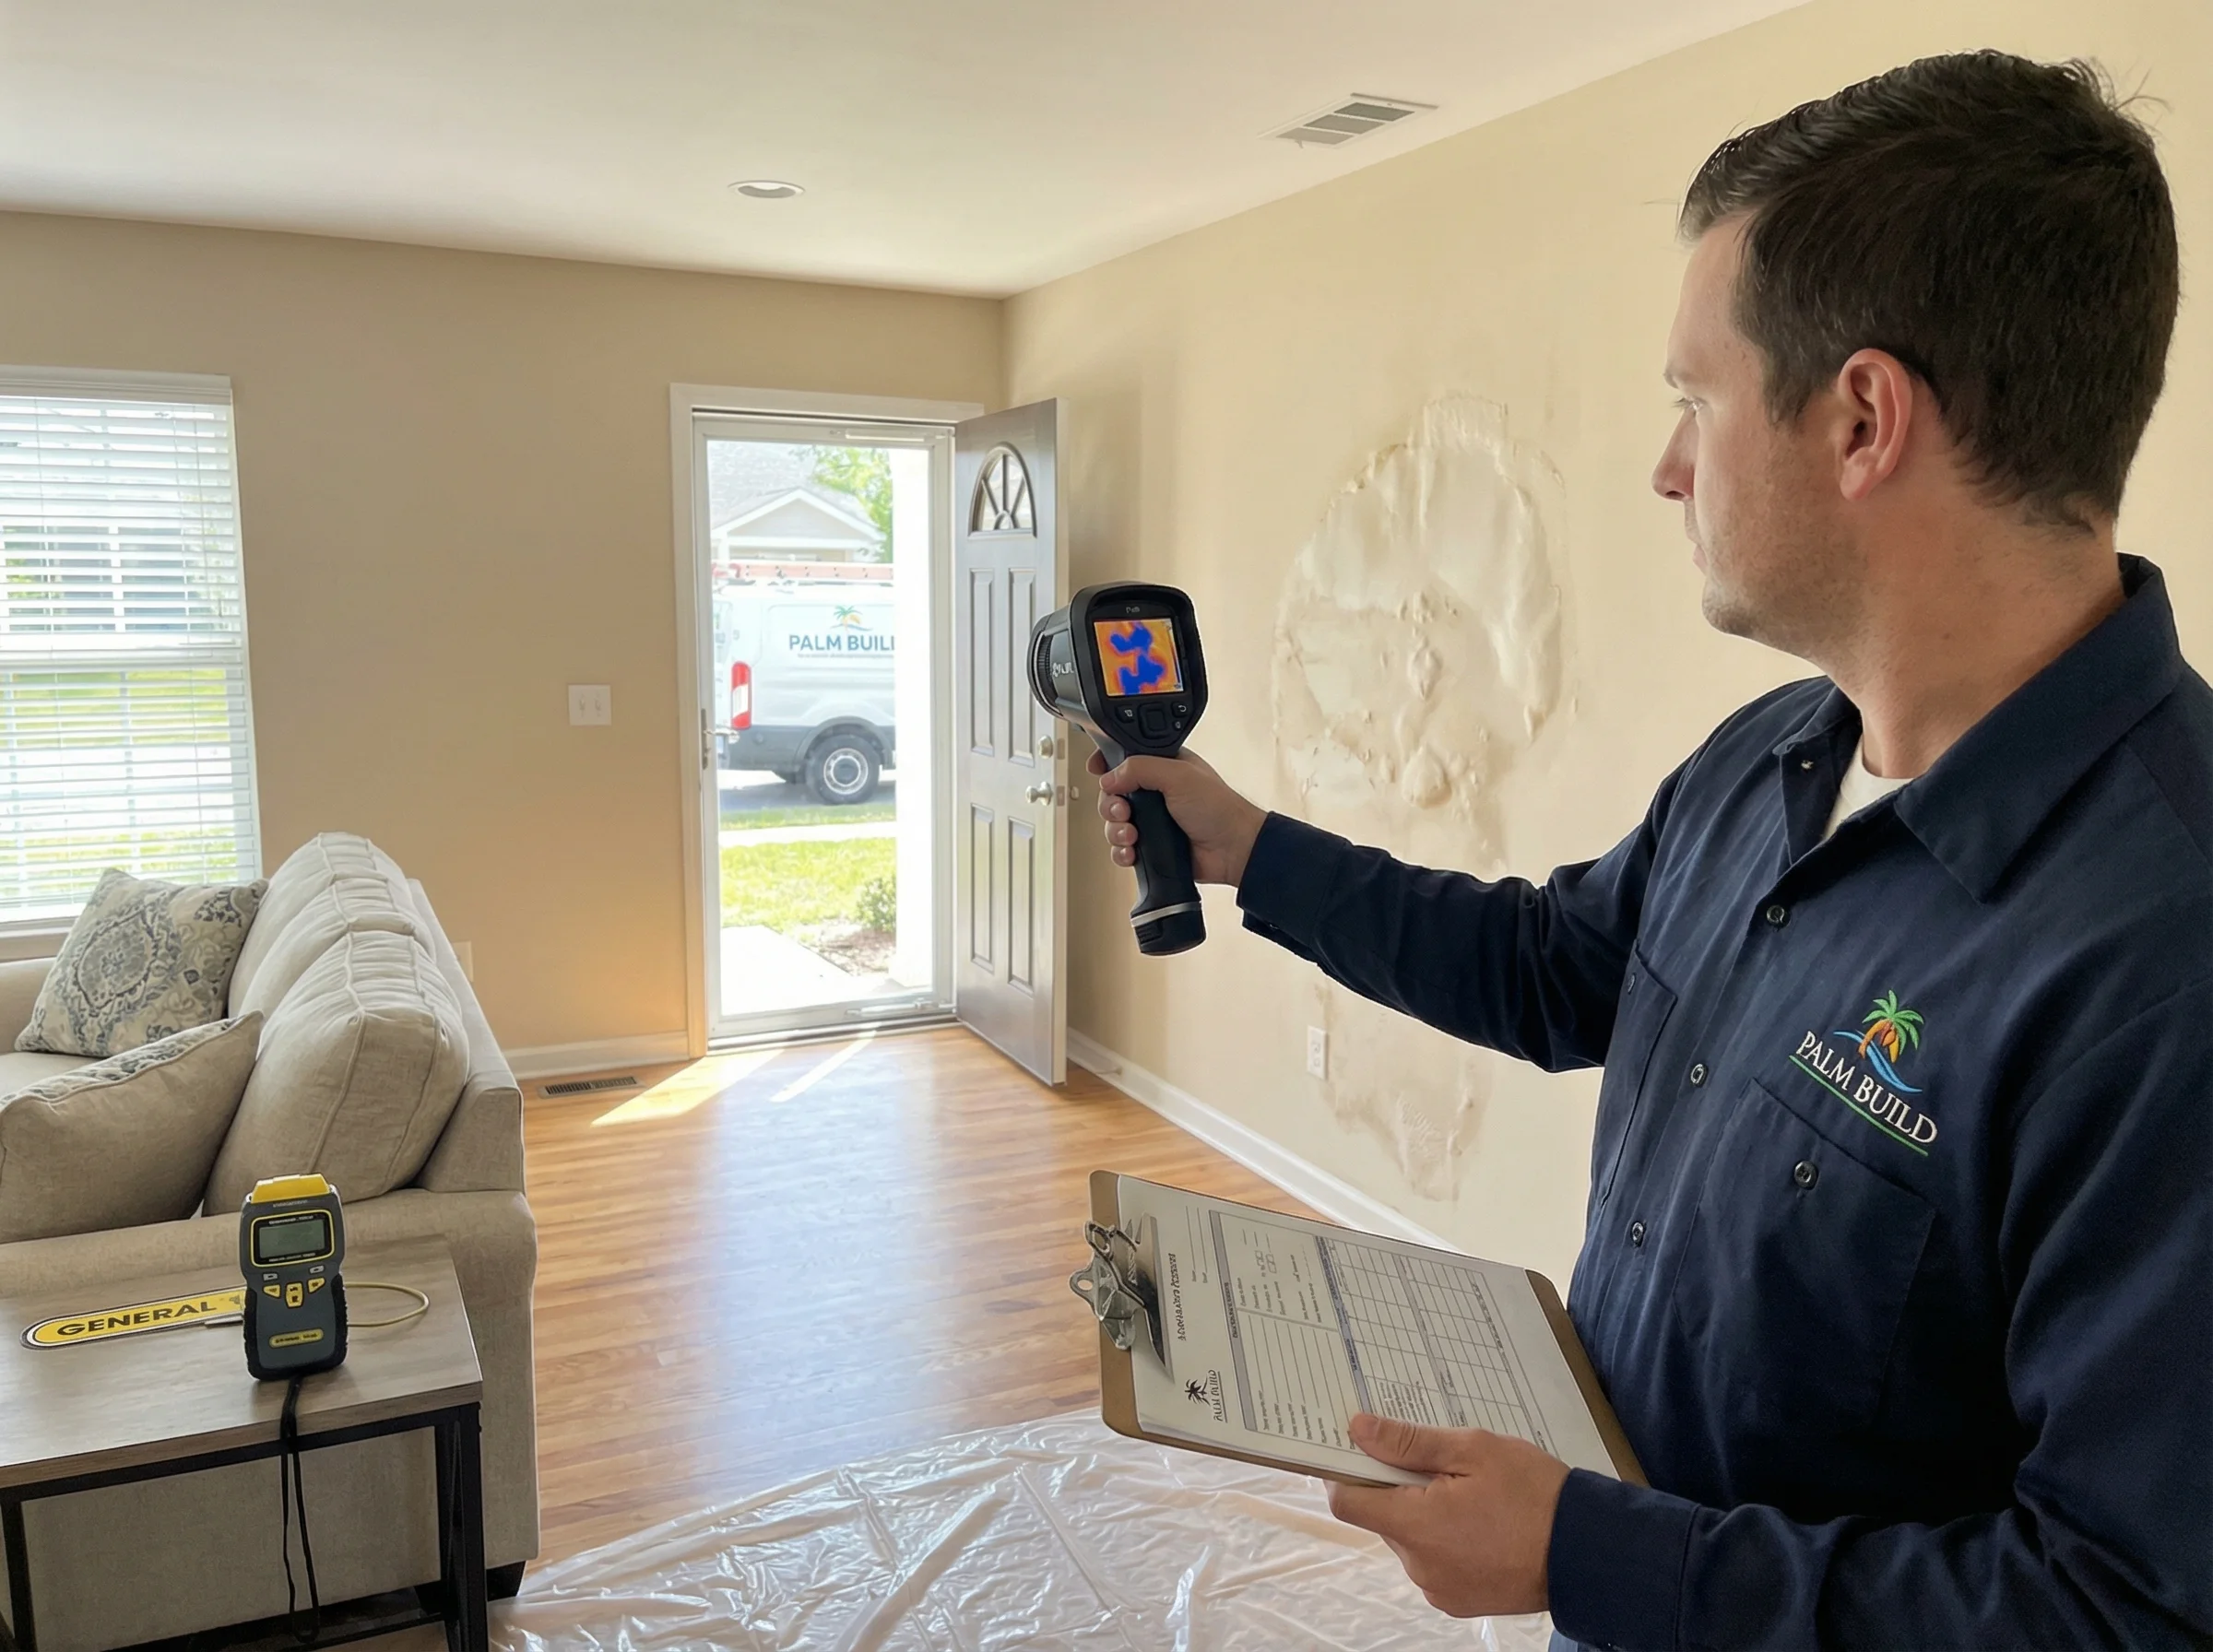
Thermal and meter-based inspection near appliance leak zone

Hidden Spread Mapping

Detection tools identify migration into adjoining walls and adjacent rooms that visual checks miss.

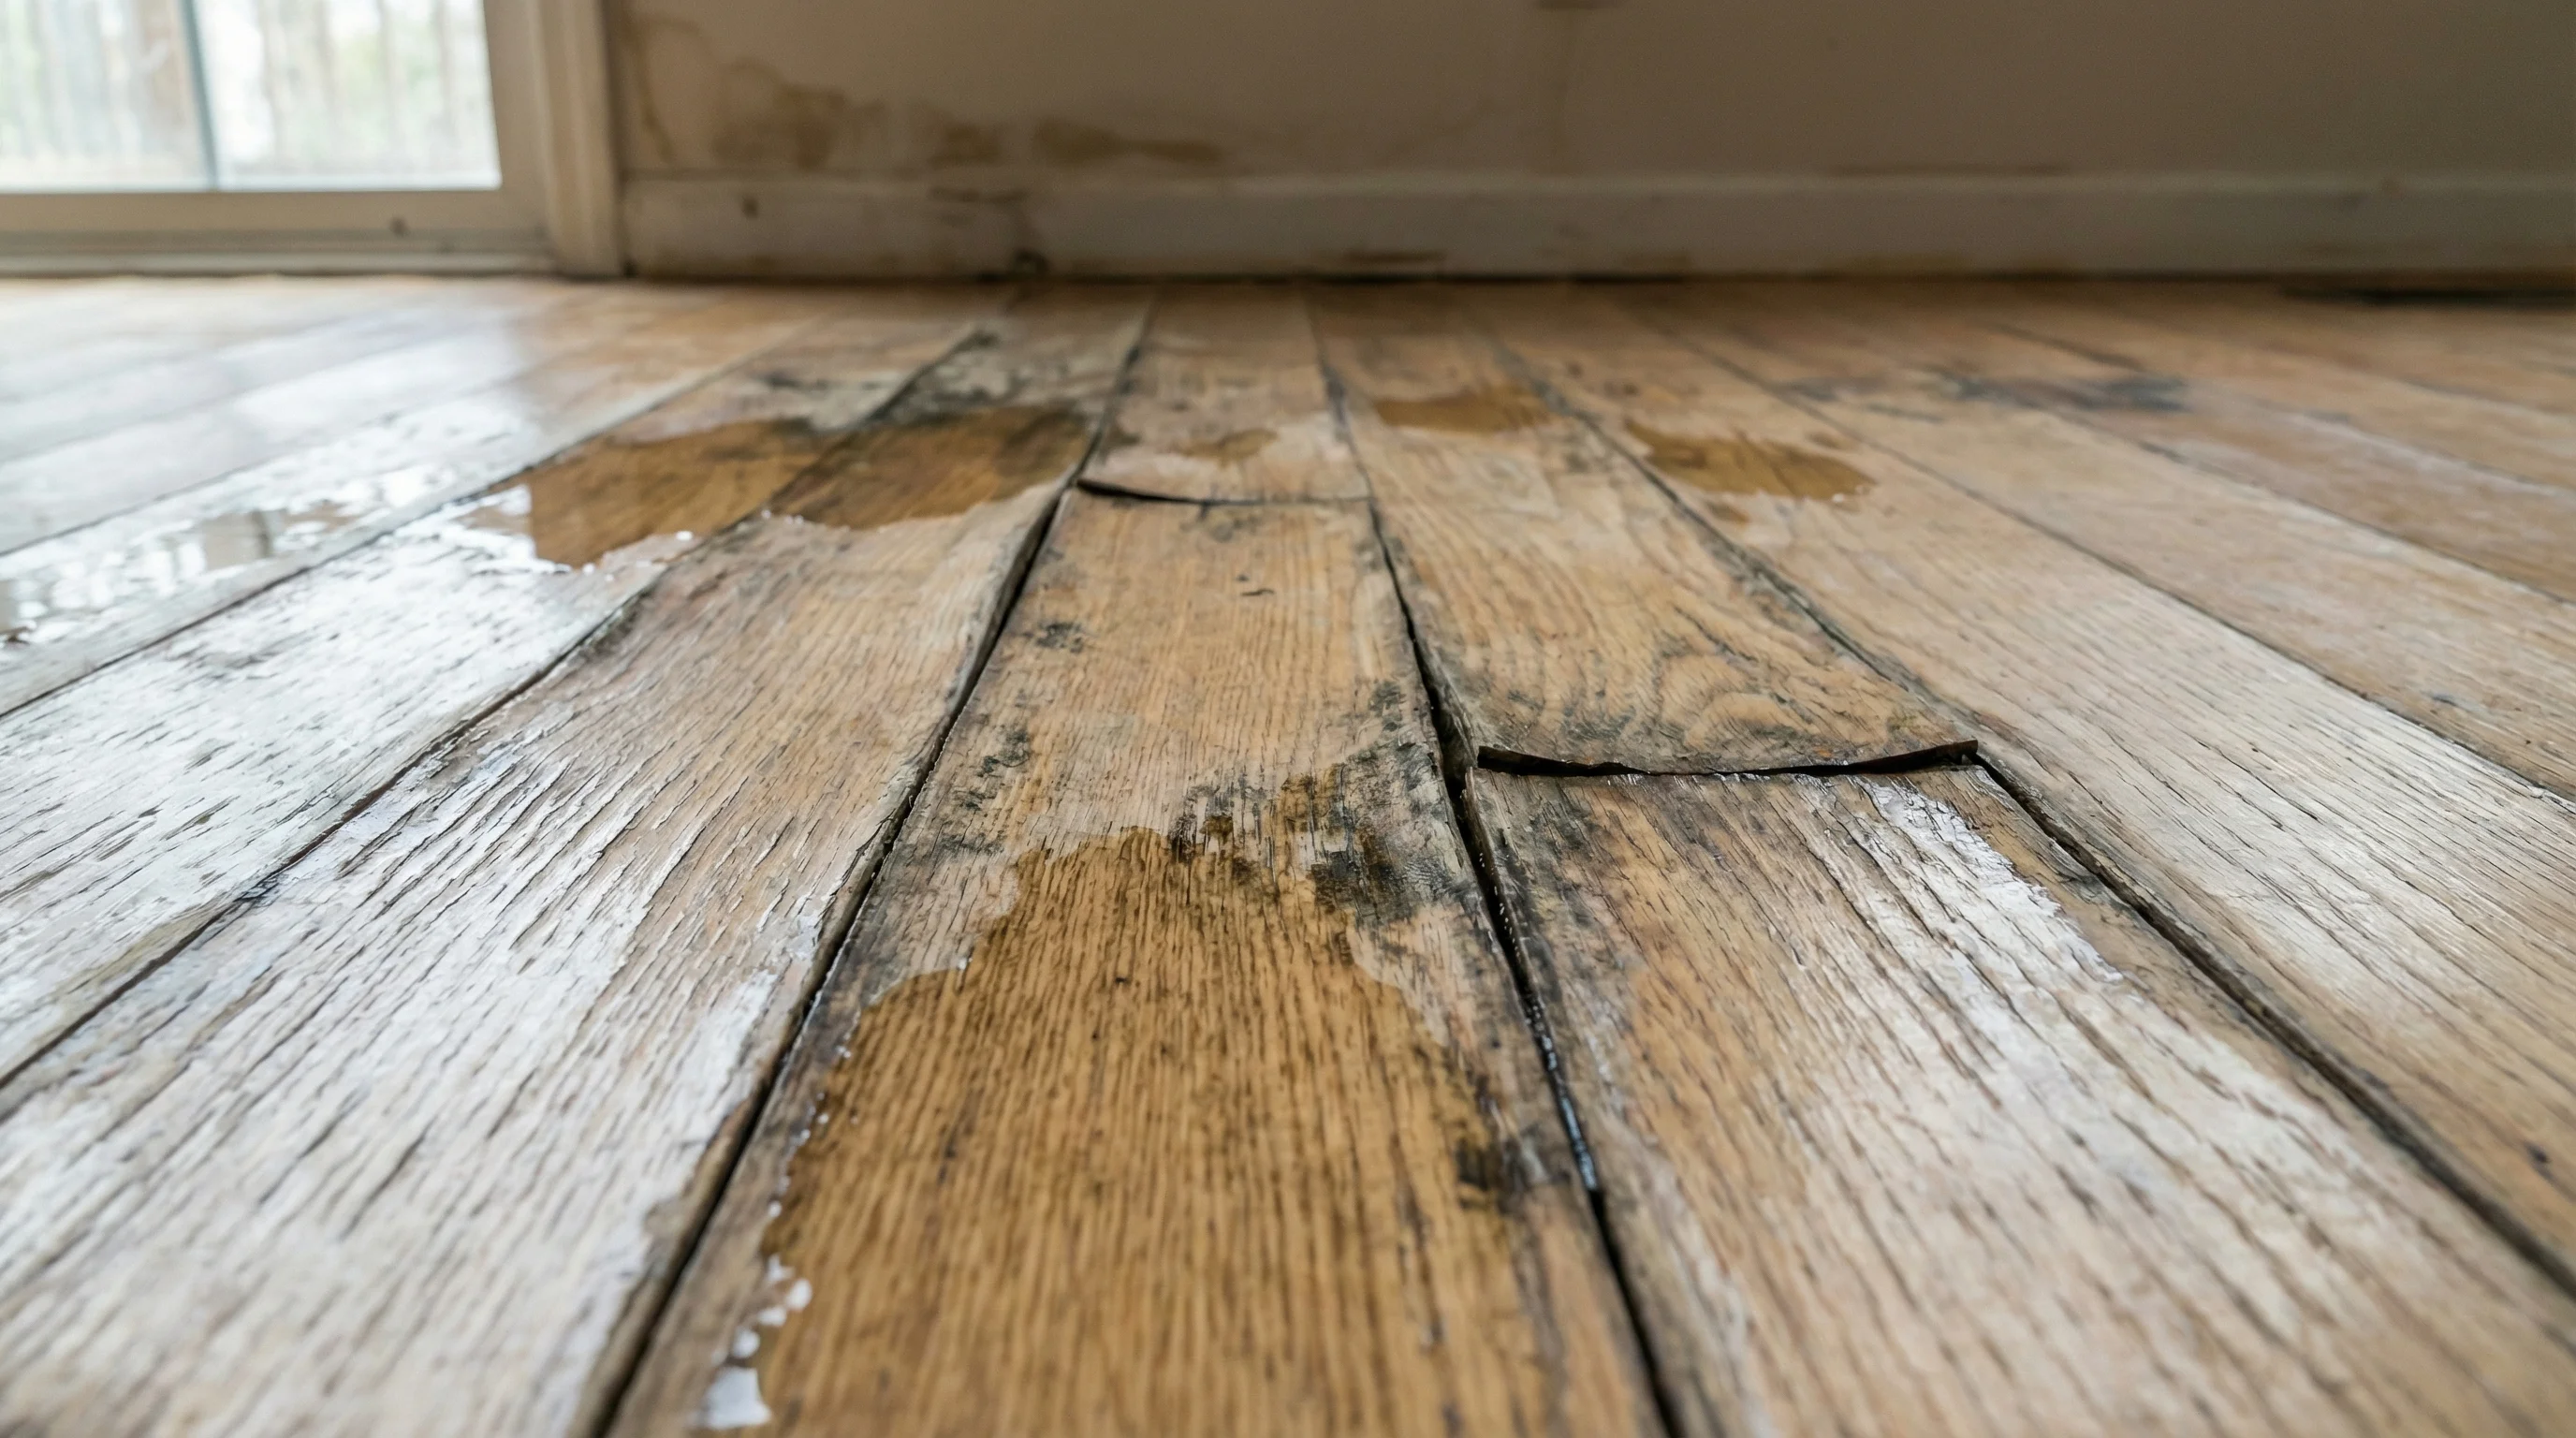
Warped hardwood from delayed mitigation after kitchen leak

Finish Damage Escalation

Fast extraction and drying can preserve flooring and cabinetry before swelling and delamination become irreversible.

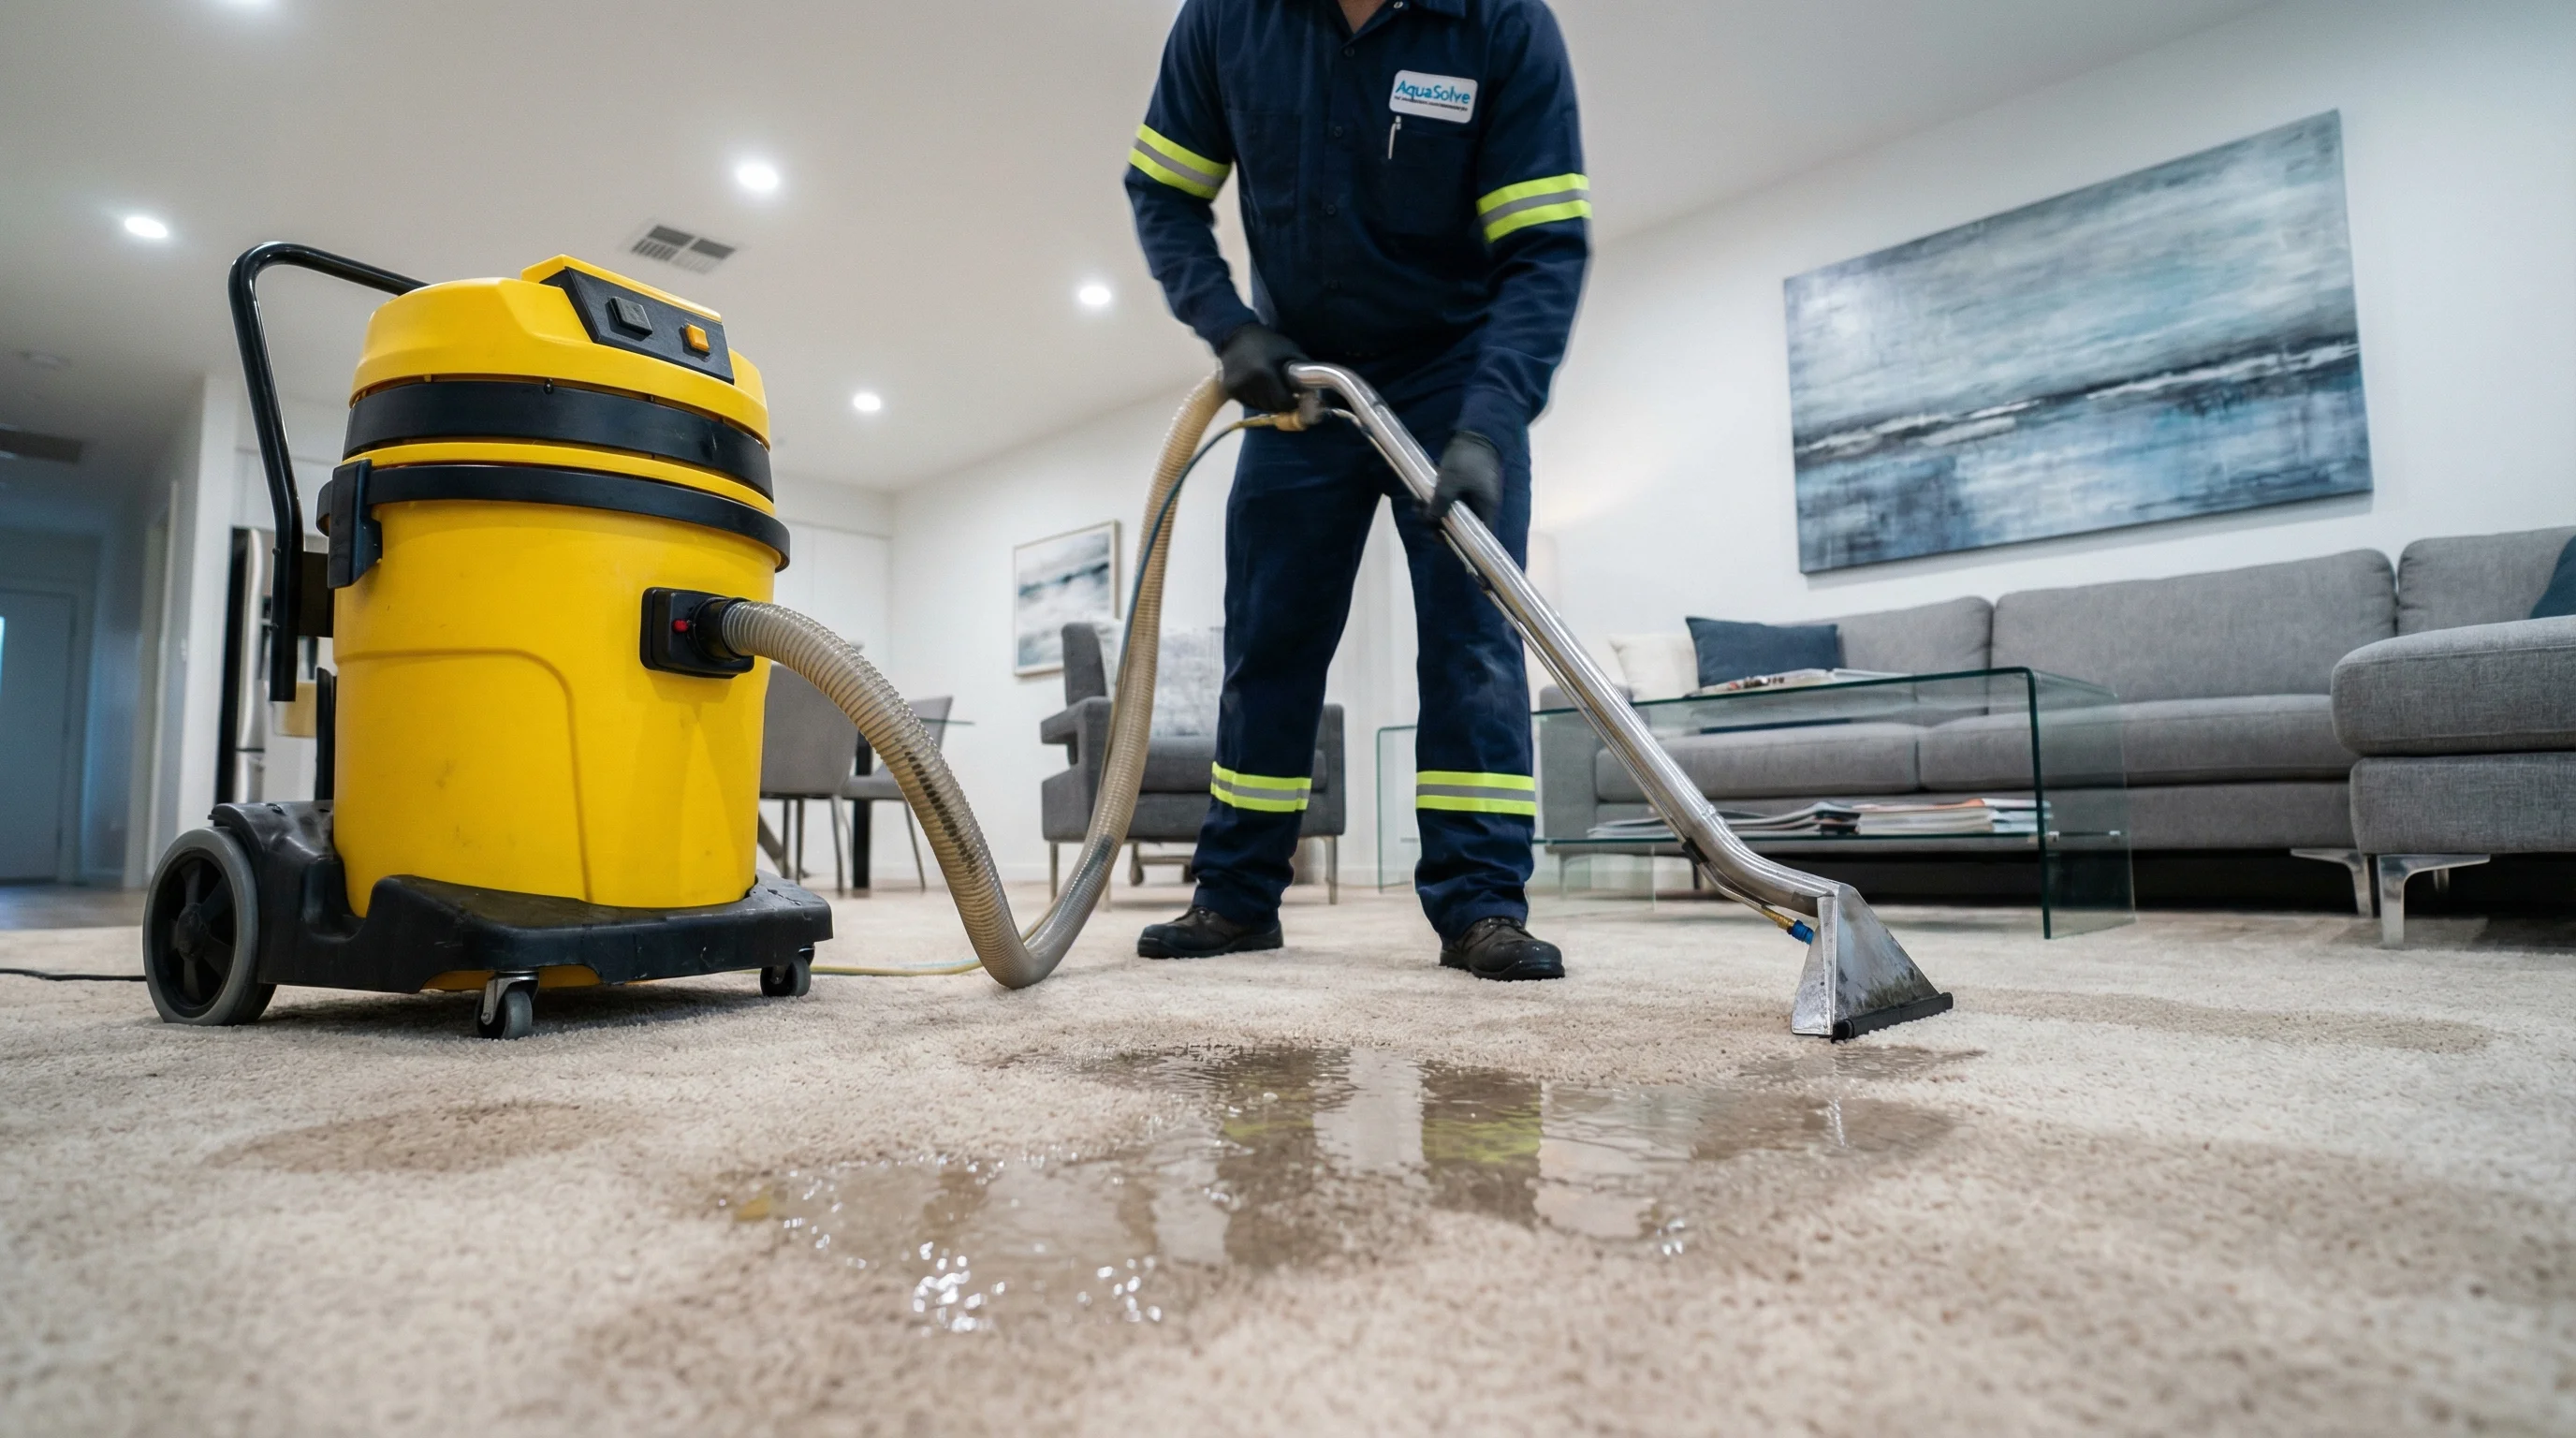
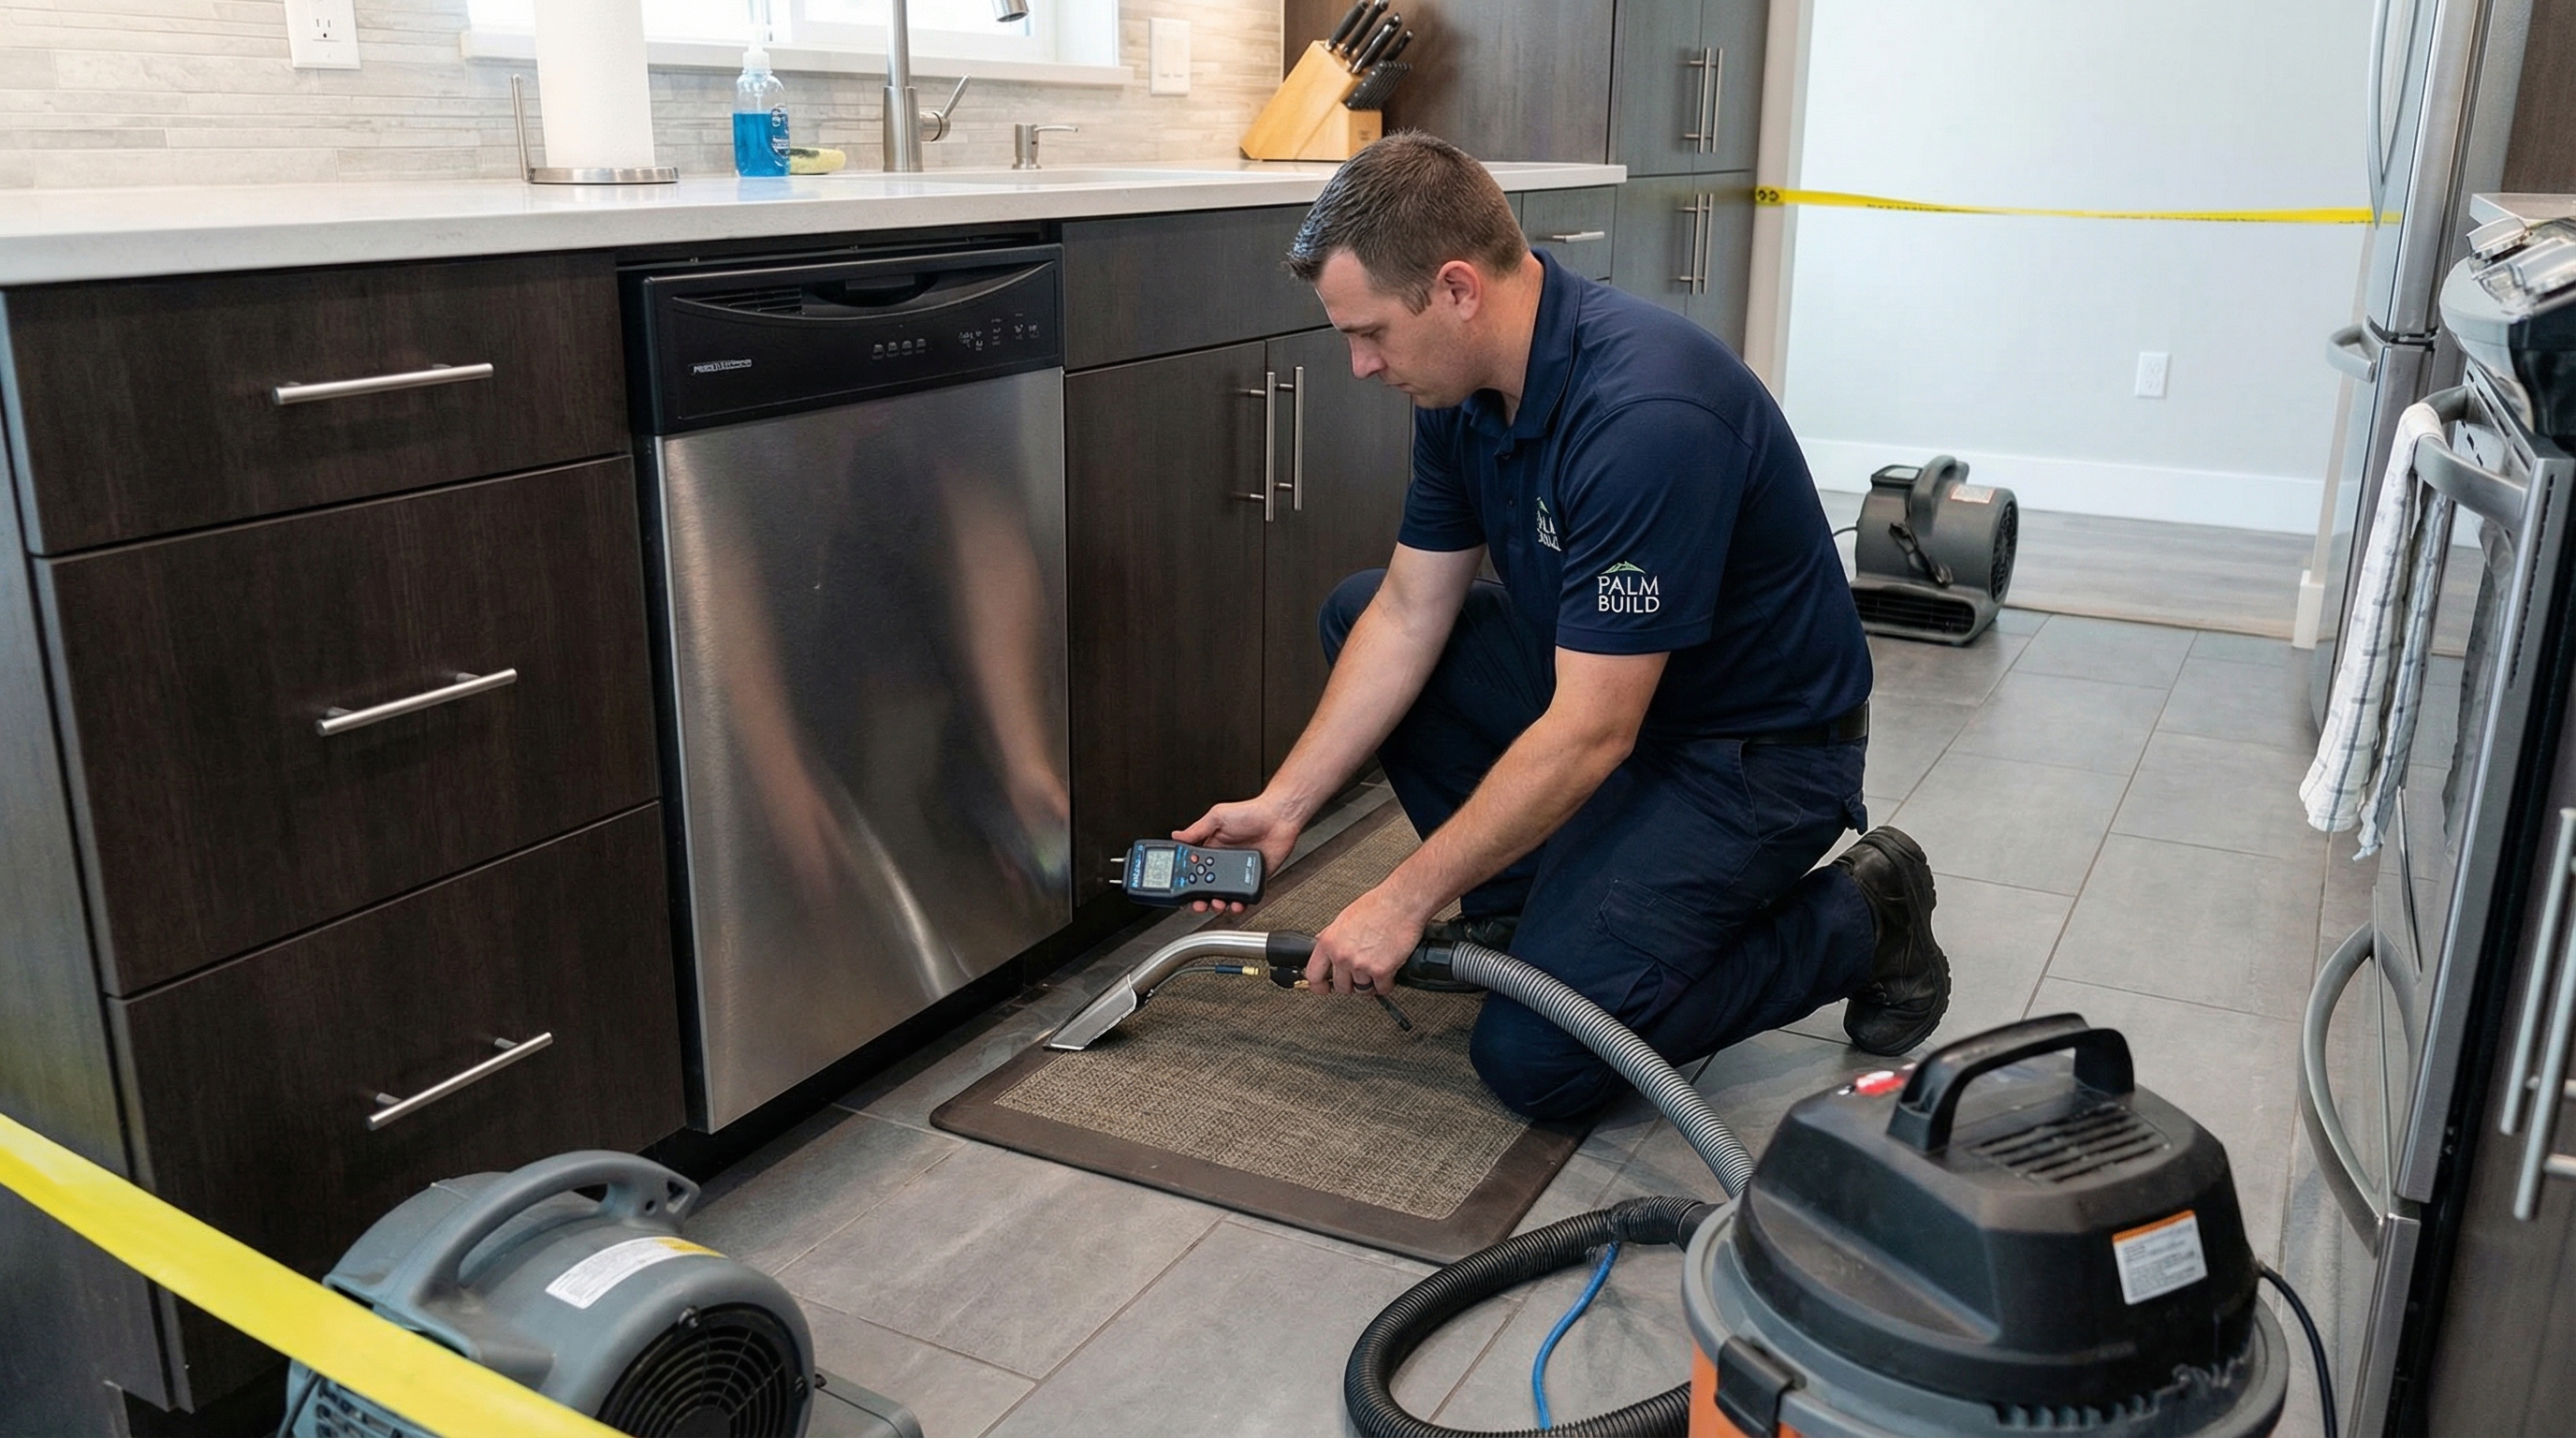
Technician extracting water and removing saturated carpet near appliance area

Extraction and Material Removal

Saturated carpet and pad are removed to expose subfloor for direct drying, preventing trapped moisture from migrating further into the structure.

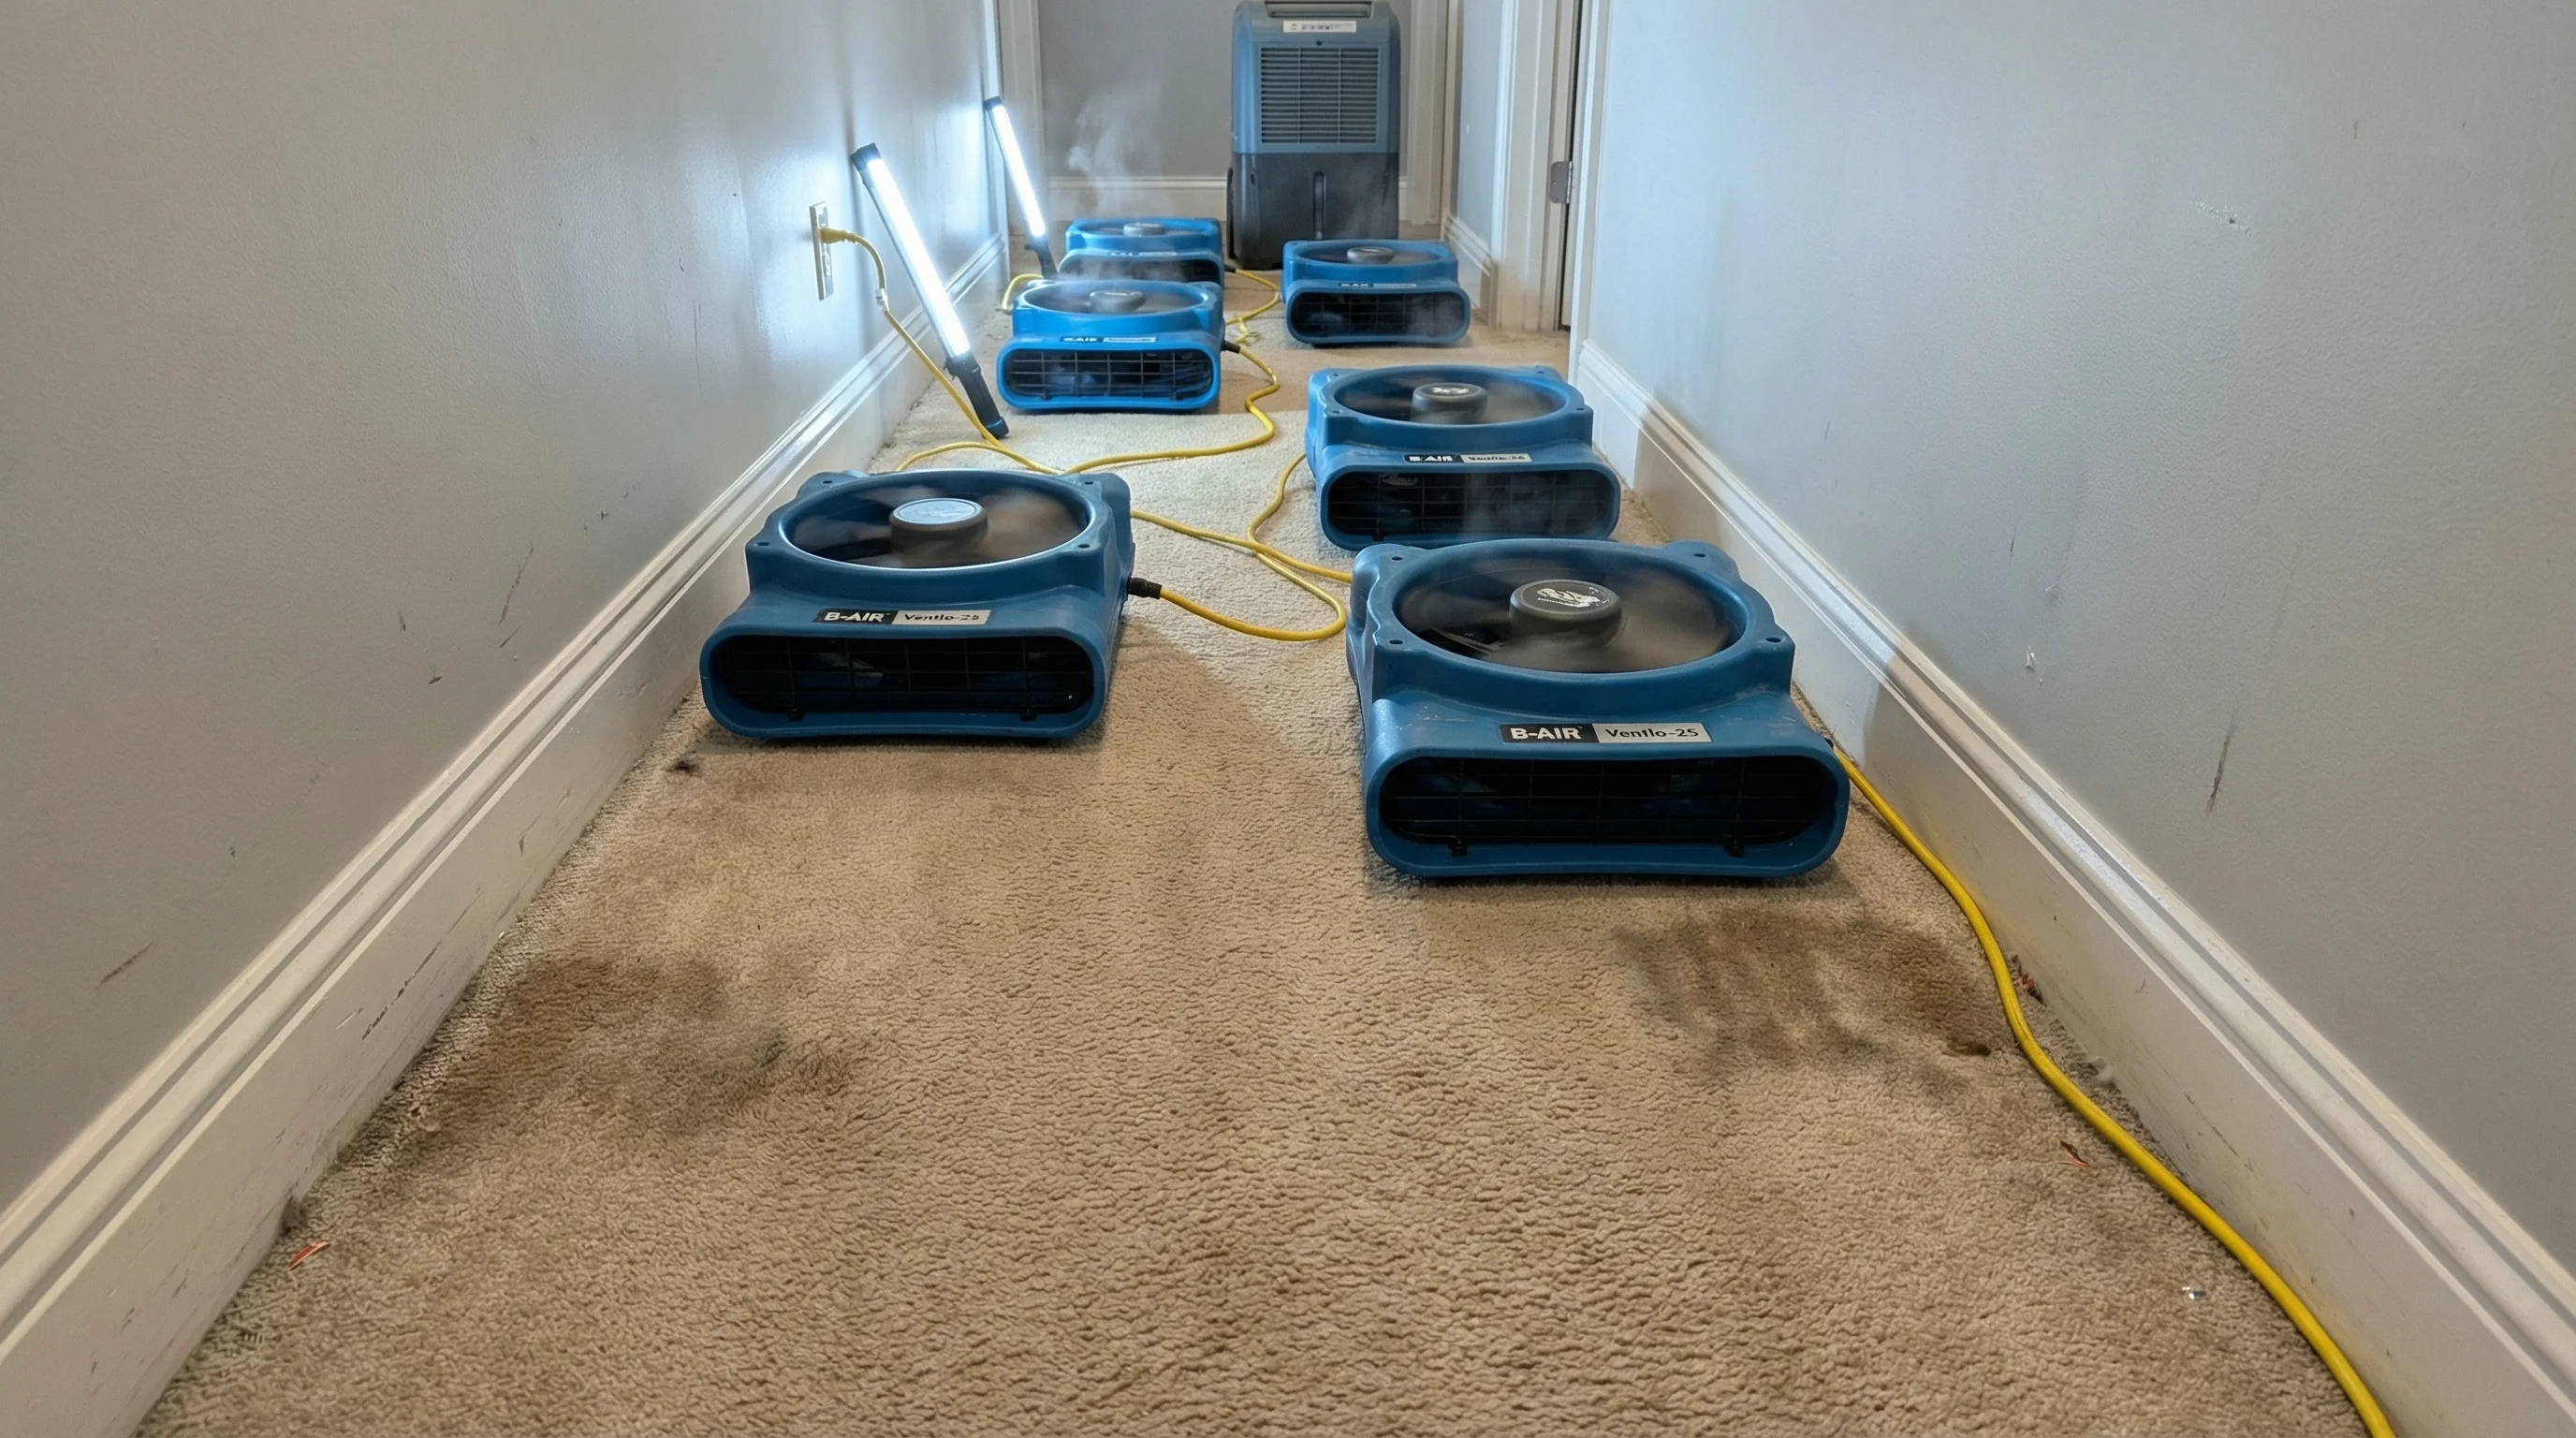
Commercial air movers positioned for targeted drying after appliance leak

Directed Airflow Placement

Air movers are positioned to drive evaporation from cabinet cavities, wall bases, and subfloor surfaces that household fans cannot reach effectively.

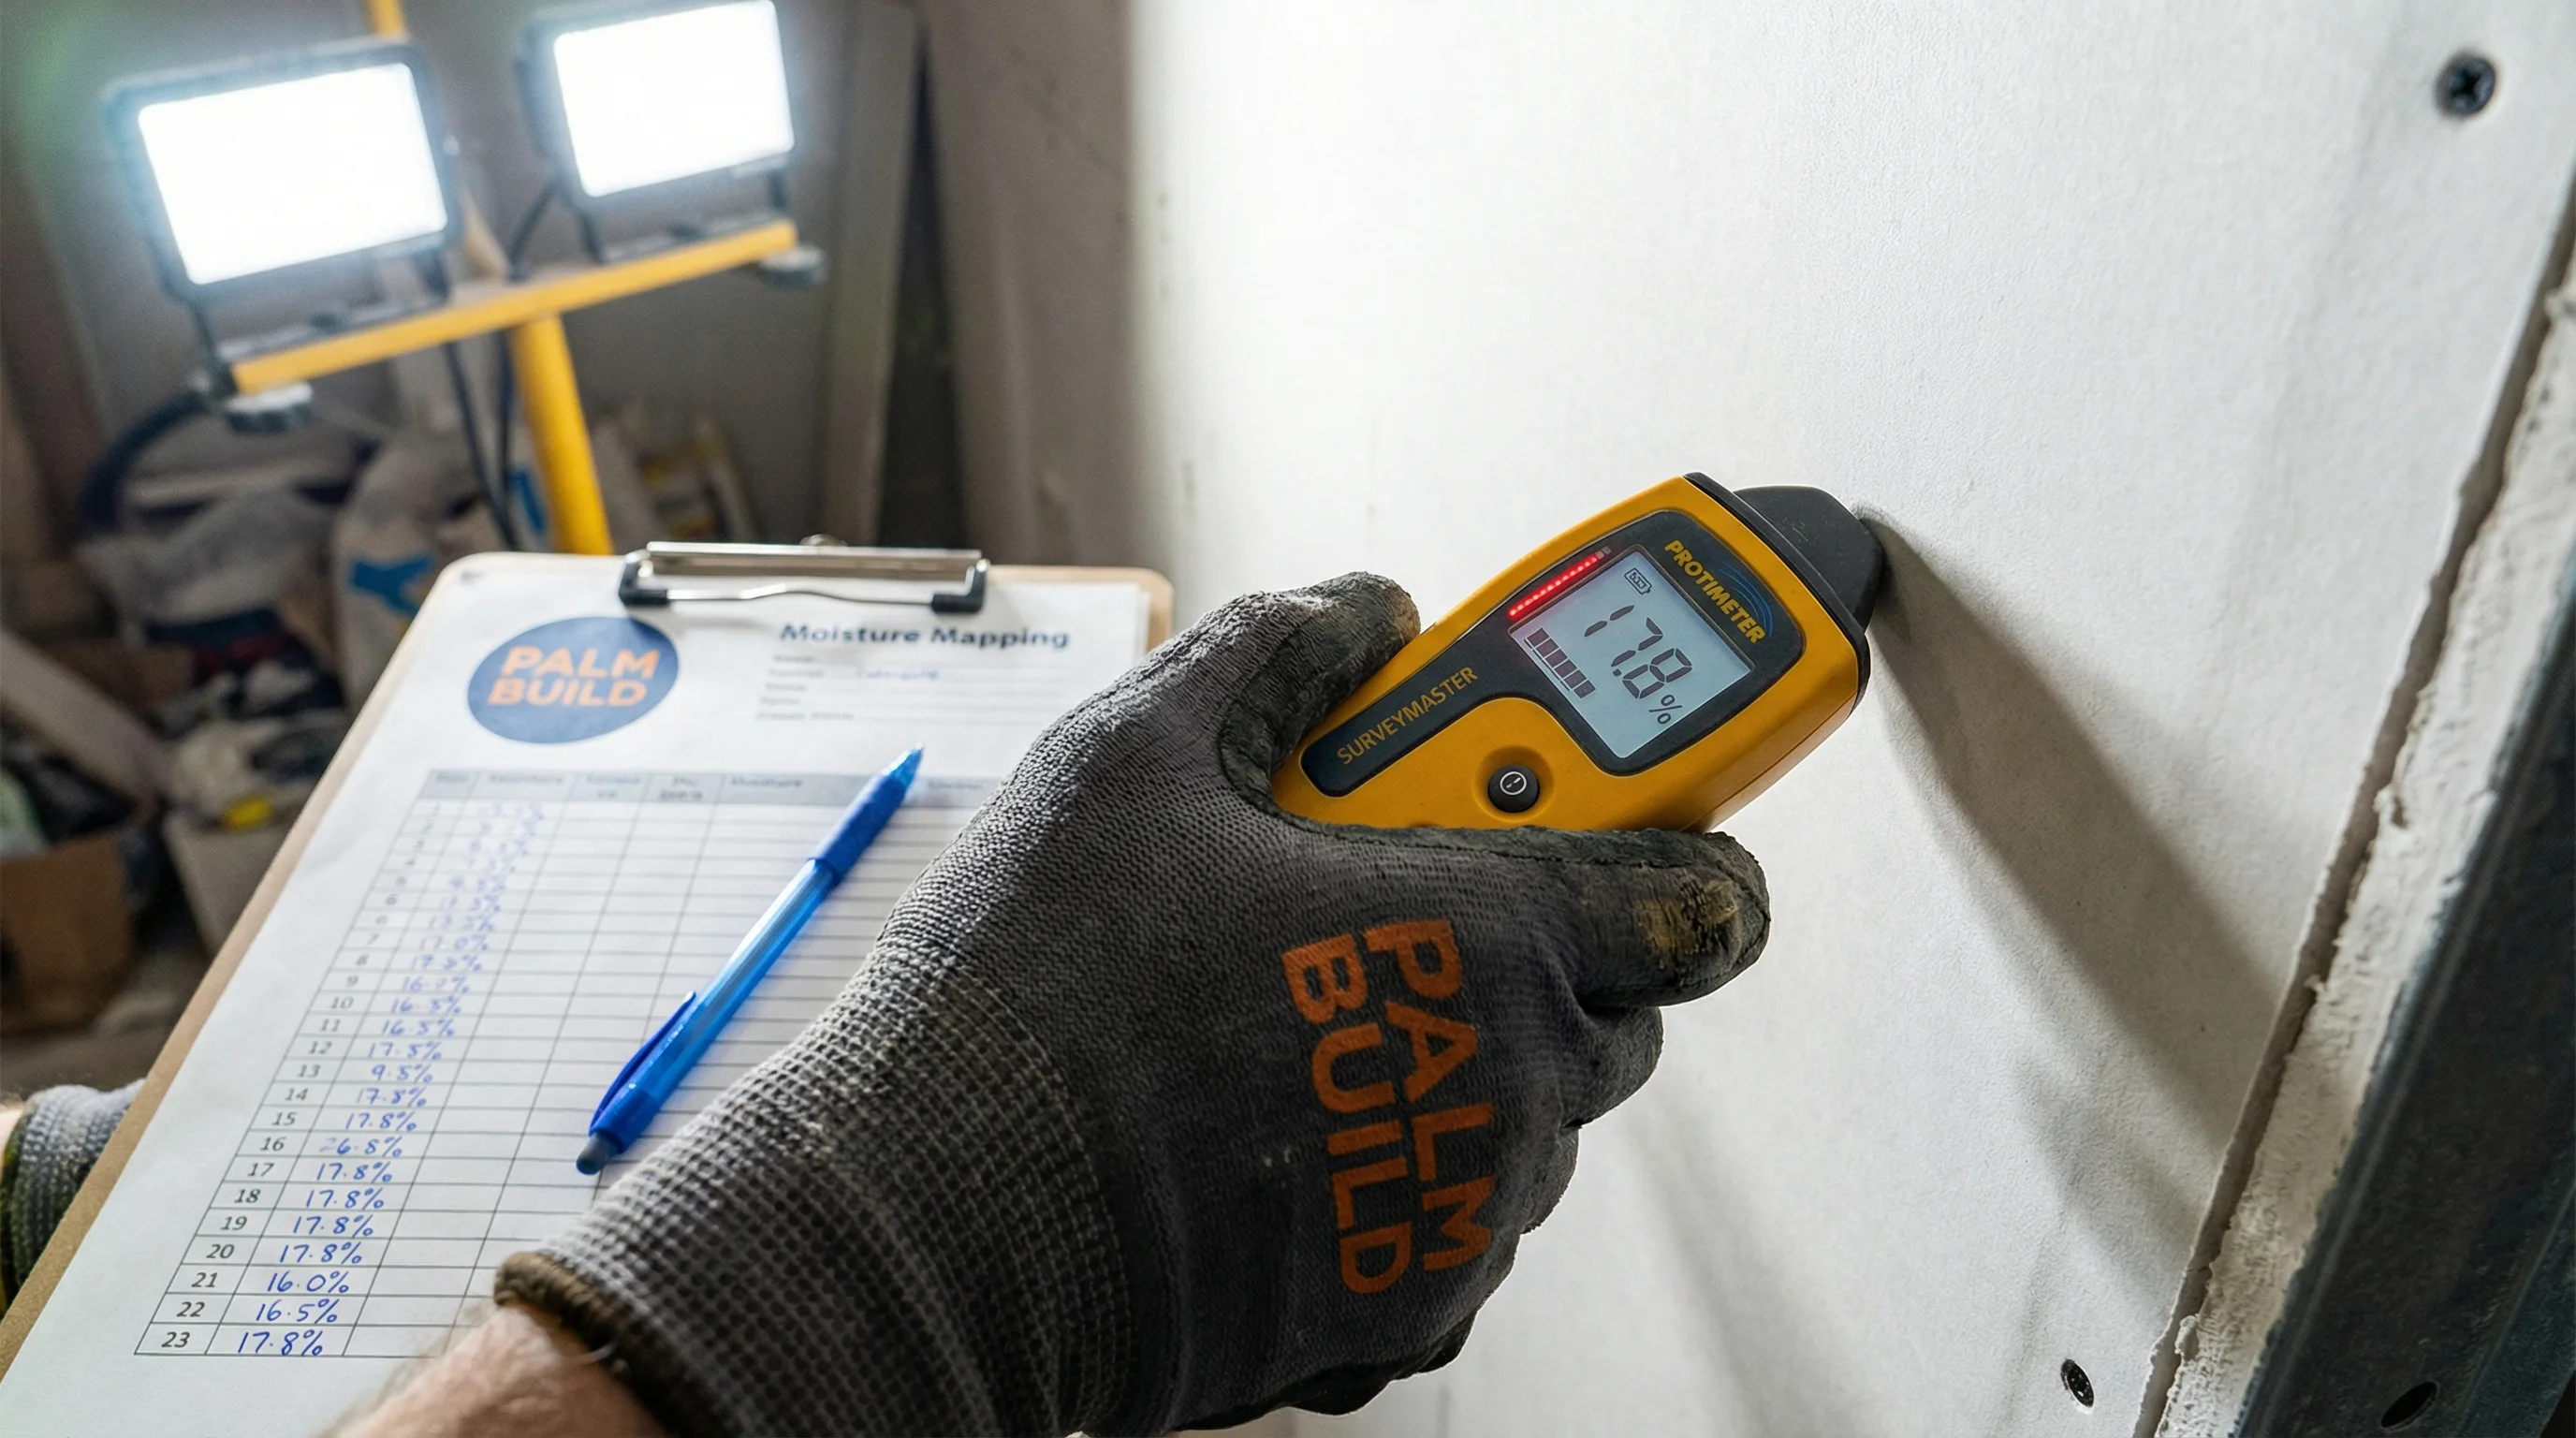
Moisture meter reading taken on subfloor near kitchen appliance

Daily Moisture Monitoring

Meter readings are logged at consistent grid points throughout the drying cycle to verify progress and determine when materials have reached acceptable equilibrium.

Technical Workflow

How professional mitigation progresses

This sequence keeps decisions measurable, documented, and aligned with a safe transition to reconstruction.

Leak-source verification and spread mapping

Teams identify the source fixture or connection, then use non-invasive moisture meters and thermal cameras to map lateral and vertical moisture movement across affected assemblies. Readings are documented at grid intervals to create a moisture map that defines the true perimeter of the loss, which frequently extends well beyond the area of visible water. This data-driven boundary prevents both under-scoping, which leaves hidden moisture behind, and over-scoping, which increases unnecessary costs.

Targeted extraction at finish interfaces

Extraction focuses on under-cabinet voids, flooring seams, wall-to-floor transitions, and other concealed zones where water retention is commonly missed during surface-only cleanup. Technicians may remove toe-kicks, drill weep holes in cabinet bases, or lift transition strips to access trapped water that would otherwise wick deeper into subfloor materials. This targeted approach is essential because trapped moisture beneath sealed surfaces cannot evaporate on its own and will eventually cause odor, warping, or microbial growth.

Selective material preservation strategy

Salvage decisions balance the material type, current moisture content, duration of exposure, and contamination category to determine whether components can be dried in place or must be removed. Solid wood cabinetry and tile often respond well to controlled drying, while particleboard shelving and laminate flooring may require replacement if saturation has exceeded structural thresholds. This measured approach reduces unnecessary tear-out and associated reconstruction costs while ensuring that no compromised materials remain concealed in the finished assembly.

Dry verification and reconstruction planning

Final dry-end confirmation uses the same metering grid from the initial assessment to verify that all materials have returned to acceptable moisture equilibrium relative to unaffected reference points in the structure. This verification determines whether repair can proceed with limited touch-up or requires broader cabinet, flooring, or drywall replacement. A detailed dry log and final moisture report are compiled to support the insurance file and provide the reconstruction team with a clear, verified scope of remaining work.

Cost Guidance

What to expect on pricing

Costs vary by loss size, water category, and region. These ranges reflect typical residential and commercial projects in our service areas.

Appliance leak extraction (typical)

$400 - $1,200

Covers initial water removal, equipment setup, and first-day monitoring for a standard residential appliance leak affecting one to two rooms.

Cabinet and toe-kick drying

$300 - $800

Includes targeted airflow into cabinet cavities, toe-kick voids, and enclosed base assemblies with daily moisture tracking until dry standard is met.

Subfloor moisture assessment

$150 - $350

Non-invasive and pin-based meter readings across affected subfloor zones to determine whether replacement or in-place drying is appropriate.

Flooring replacement (if needed, per sq ft)

$4 - $12

Varies by material type. Laminate and LVP tend toward the lower range, while hardwood and tile replacement with substrate preparation fall higher.

Cabinet restoration or replacement

$500 - $3,000

Depends on cabinet construction, extent of saturation, and whether individual components can be dried and refinished or full replacement is required.
Regional operating notes

South Florida

Year-round humidity above 70 percent accelerates odor development and microbial concerns after appliance leaks, particularly in enclosed cabinetry systems with limited airflow. Dehumidification targets in this region often require longer equipment run times and tighter monitoring intervals to reach dry standard. AC drip pan and condensate line failures are also more frequent due to sustained cooling demand and mineral buildup in drain lines.

Charlotte / Metrolina

Freeze events and pressure fluctuations during winter months can trigger supply-line failures at water heaters, dishwashers, and washing machines, even when main plumbing appears stable. Homes with crawl spaces are particularly vulnerable because leaks from first-floor appliances can saturate subfloor insulation and framing before any pooling is visible indoors. Seasonal temperature swings also complicate drying timelines, as exterior humidity rises sharply in spring while heating systems are still cycling.

South Carolina

Storm-related power interruptions and municipal pressure surges can expose weak appliance supply connections, especially braided steel hoses and plastic fittings that have degraded over time. Coastal and low-country properties face compounded risk because elevated ambient moisture slows natural evaporation and shortens the window before secondary damage develops. Restoration teams in these areas routinely deploy supplemental dehumidification earlier in the process to compensate for regional humidity loads.

Common Questions

Frequently asked questions

Which appliances cause the most water damage?

Water heaters, dishwashers, and washing machines are responsible for the majority of appliance-related water losses. Water heater failures tend to produce the largest volume because the tank releases 40 to 80 gallons at once, while dishwasher and washing machine leaks often go unnoticed for days because they spread under cabinetry or behind the unit. AC condensate line backups are also common in humid climates, particularly in South Florida, where sustained cooling demand increases drain line buildup.

How do I know if water went under my cabinets?

Visible indicators include swelling or discoloration at the cabinet toe-kick, soft spots on adjacent flooring, and a musty odor near the base of the cabinets. However, many cases of under-cabinet moisture show no surface signs at all during the first 24 to 48 hours. A restoration technician uses pin-type and non-invasive moisture meters to read directly through cabinet panels and into subfloor material, which is the only reliable way to confirm whether water has migrated into concealed areas.

Will my flooring need replacement after an appliance leak?

It depends on the flooring material, duration of exposure, and how quickly extraction begins. Tile and sealed concrete are generally salvageable with proper drying. Engineered hardwood and laminate can sometimes be preserved if extraction occurs within the first 12 to 24 hours, but prolonged saturation causes irreversible swelling and delamination. Carpet and pad in direct contact with the leak source are often removed to allow subfloor drying, and replacement decisions are made once moisture targets are verified.

Does renters insurance cover appliance leaks?

Most renters insurance policies cover damage to your personal property caused by sudden and accidental appliance leaks, such as a washing machine hose burst or a dishwasher supply-line failure. However, renters insurance typically does not cover the building structure itself, which is the landlord or property owner's responsibility under their dwelling policy. Gradual leaks that developed over time, such as a slow drip from a corroded connection, are commonly excluded under both renter and homeowner policies. Filing a claim promptly and providing thorough documentation of the damage improves the likelihood of coverage.

How can I prevent future appliance leaks?

Replace rubber and braided supply hoses on washing machines and dishwashers every five to seven years, or sooner if you notice cracking, bulging, or corrosion at the fittings. Install a drip pan under your water heater and washing machine to contain small leaks before they reach flooring. Inspect AC condensate drain lines annually and flush them with a vinegar solution to prevent clogs. Consider installing water leak sensors near high-risk appliances that alert you to moisture before pooling occurs. Routine maintenance does not eliminate all risk, but it substantially reduces the chance of a large, undetected loss.

Need appliance leak cleanup?

Request on-site extraction and moisture assessment before concealed damage escalates.